What's new in Tasaheel — and what's coming
A quick summary of what the latest releases added, and what we are working on now. Every new item is in the program's menu under its own name — if you don't see it, check your plan and your user permissions.
Tasaheel Accounting — TASHDYS
- The official logo: a navy rounded square, with the name «Tasaheel Accounting» and the word TASHDYS in gold.
- TASHDYS stands for: Tax, Accounting & Smart HR — Digital, for Your Success.
- In Arabic: ضرائب ومحاسبة وموارد بشرية ذكية — رقمي، لنجاحك.
- These are the pillars the program is built on: tax and zakat, books and statements, staff and payroll — in one system that runs in the browser.
New in this release
- Subscriptions: a free trial, then a single-module plan, a sector plan or the full program — monthly, yearly or for two years. Current prices are on tasaheelerp.com.
- Time in 12-hour format, and you choose the format in Settings.
- Print templates: more than 20 ready templates per document, with a gallery, an editor and a preview before printing.
- E-invoicing — Phase 2: the ZATCA Phase 2 onboarding screen registers your device step by step (OTP, then the compliance certificate, then the production certificate), and the ZATCA log shows what was sent and its result. The integration passed ZATCA's simulation-environment tests (10 of 10), and the production environment is now open to subscribers — after registering your device, check the result of your first invoice in the ZATCA log.
- Salla and Zid: from the sales-platform integration screen, store orders become posted documents, with separate references for collection and cancellation; anything that needs your review shows in the integration review queue.
- Moving from another program: the migration screen brings your data across, and you can undo the migration as long as nothing has been posted after it.
- Single-account sync: sign in with your website account — no second password — and if the same user is open on another device you get a notice to decide: close it or leave it.
- Start dashboard: a summary that is always visible in nine cards; an empty card explains what will appear there, with a button that takes you to the place.
- A two-mode top bar: «Simple» keeps search, the New button and the bell; «Accountant» shows every button. Press Ctrl+K anywhere to find a screen by name and open it.
- Customer link: on a posted invoice, a customer statement or a posted receipt, click «🔗 Customer link» and send it by WhatsApp or email; your customer opens the document read-only, and you can revoke any link at any time from «Customer links».
- Restaurants: split the bill between guests, and a table QR code that lets the guest open their bill read-only.
- Hotels: add each unit's iCal link from Booking or Airbnb; days booked there appear in «Occupancy calendar» under the channel name, and anything that clashes with your own bookings shows in red, with no automatic deletion. This needs the company to be saved on the server.
- Collection reminders: in «Collection reminder settings» you choose when the customer is reminded — before the due date, on it, and at intervals after it — and you follow the status of each reminder.
- Point of sale: for each device you choose how the receipt and the kitchen ticket print: «Direct», «Ask before printing» or «Don't print».
- Approval workflow: it extends to more documents, including payroll runs, asset disposals and opening balances; for a rejected document, the reason is in the approvals inbox.
- Data quality: «Merge Duplicate Cost Centres» joins a centre that was typed twice into one, and «Months With No Activity» finds a month with no entries inside a year that has activity.
- Contact and support: the program's emails come from [email protected], the website has a WhatsApp button, and support requests (tickets) are recorded from «Ask me» inside the program.
Coming soon
- Mobile app: install it on your phone, a «My day» screen, record an expense from a photo, and an owner dashboard.
- Employee self-service and attendance from the phone.
- The AI assistant: answers with figures and a link to their source — with 1,000 free points a month on every subscription.
- AI reading of purchase and sales invoices from a photo, PDF, Word or Excel file.
- Banks: rules to categorise transactions, and suggested matching.
- «My reports»: build your own report by drag and drop, and schedule it by email.
- Approval workflow for sector documents, and approving several documents at once.
- Sign in with your company number: open your company from any device with the company number, a username and a password.
- Inventory: when a document is recorded with an earlier date, cost is recalculated for the affected items with one difference entry and a «Cost adjustments» report; and you set each item's nature and whether it shows on the cashier screen.
- Recycle bin: restore what was deleted.
- Importing journal entries from Excel with smarter account matching.
- Quick add: add a new customer, item or account from inside the pick list itself, without leaving the screen.
- Automatic archiving of closed years, so the program stays fast as your data grows.
Getting started: your account and company
Tasaheel is a complete accounting system that runs in your browser. Open it from tasaheelerp.com; your data is stored encrypted on the Tasaheel server, and you open it from any device with your account. The first time, you press «Start a free month» and your account and company are created together.
Create the owner account
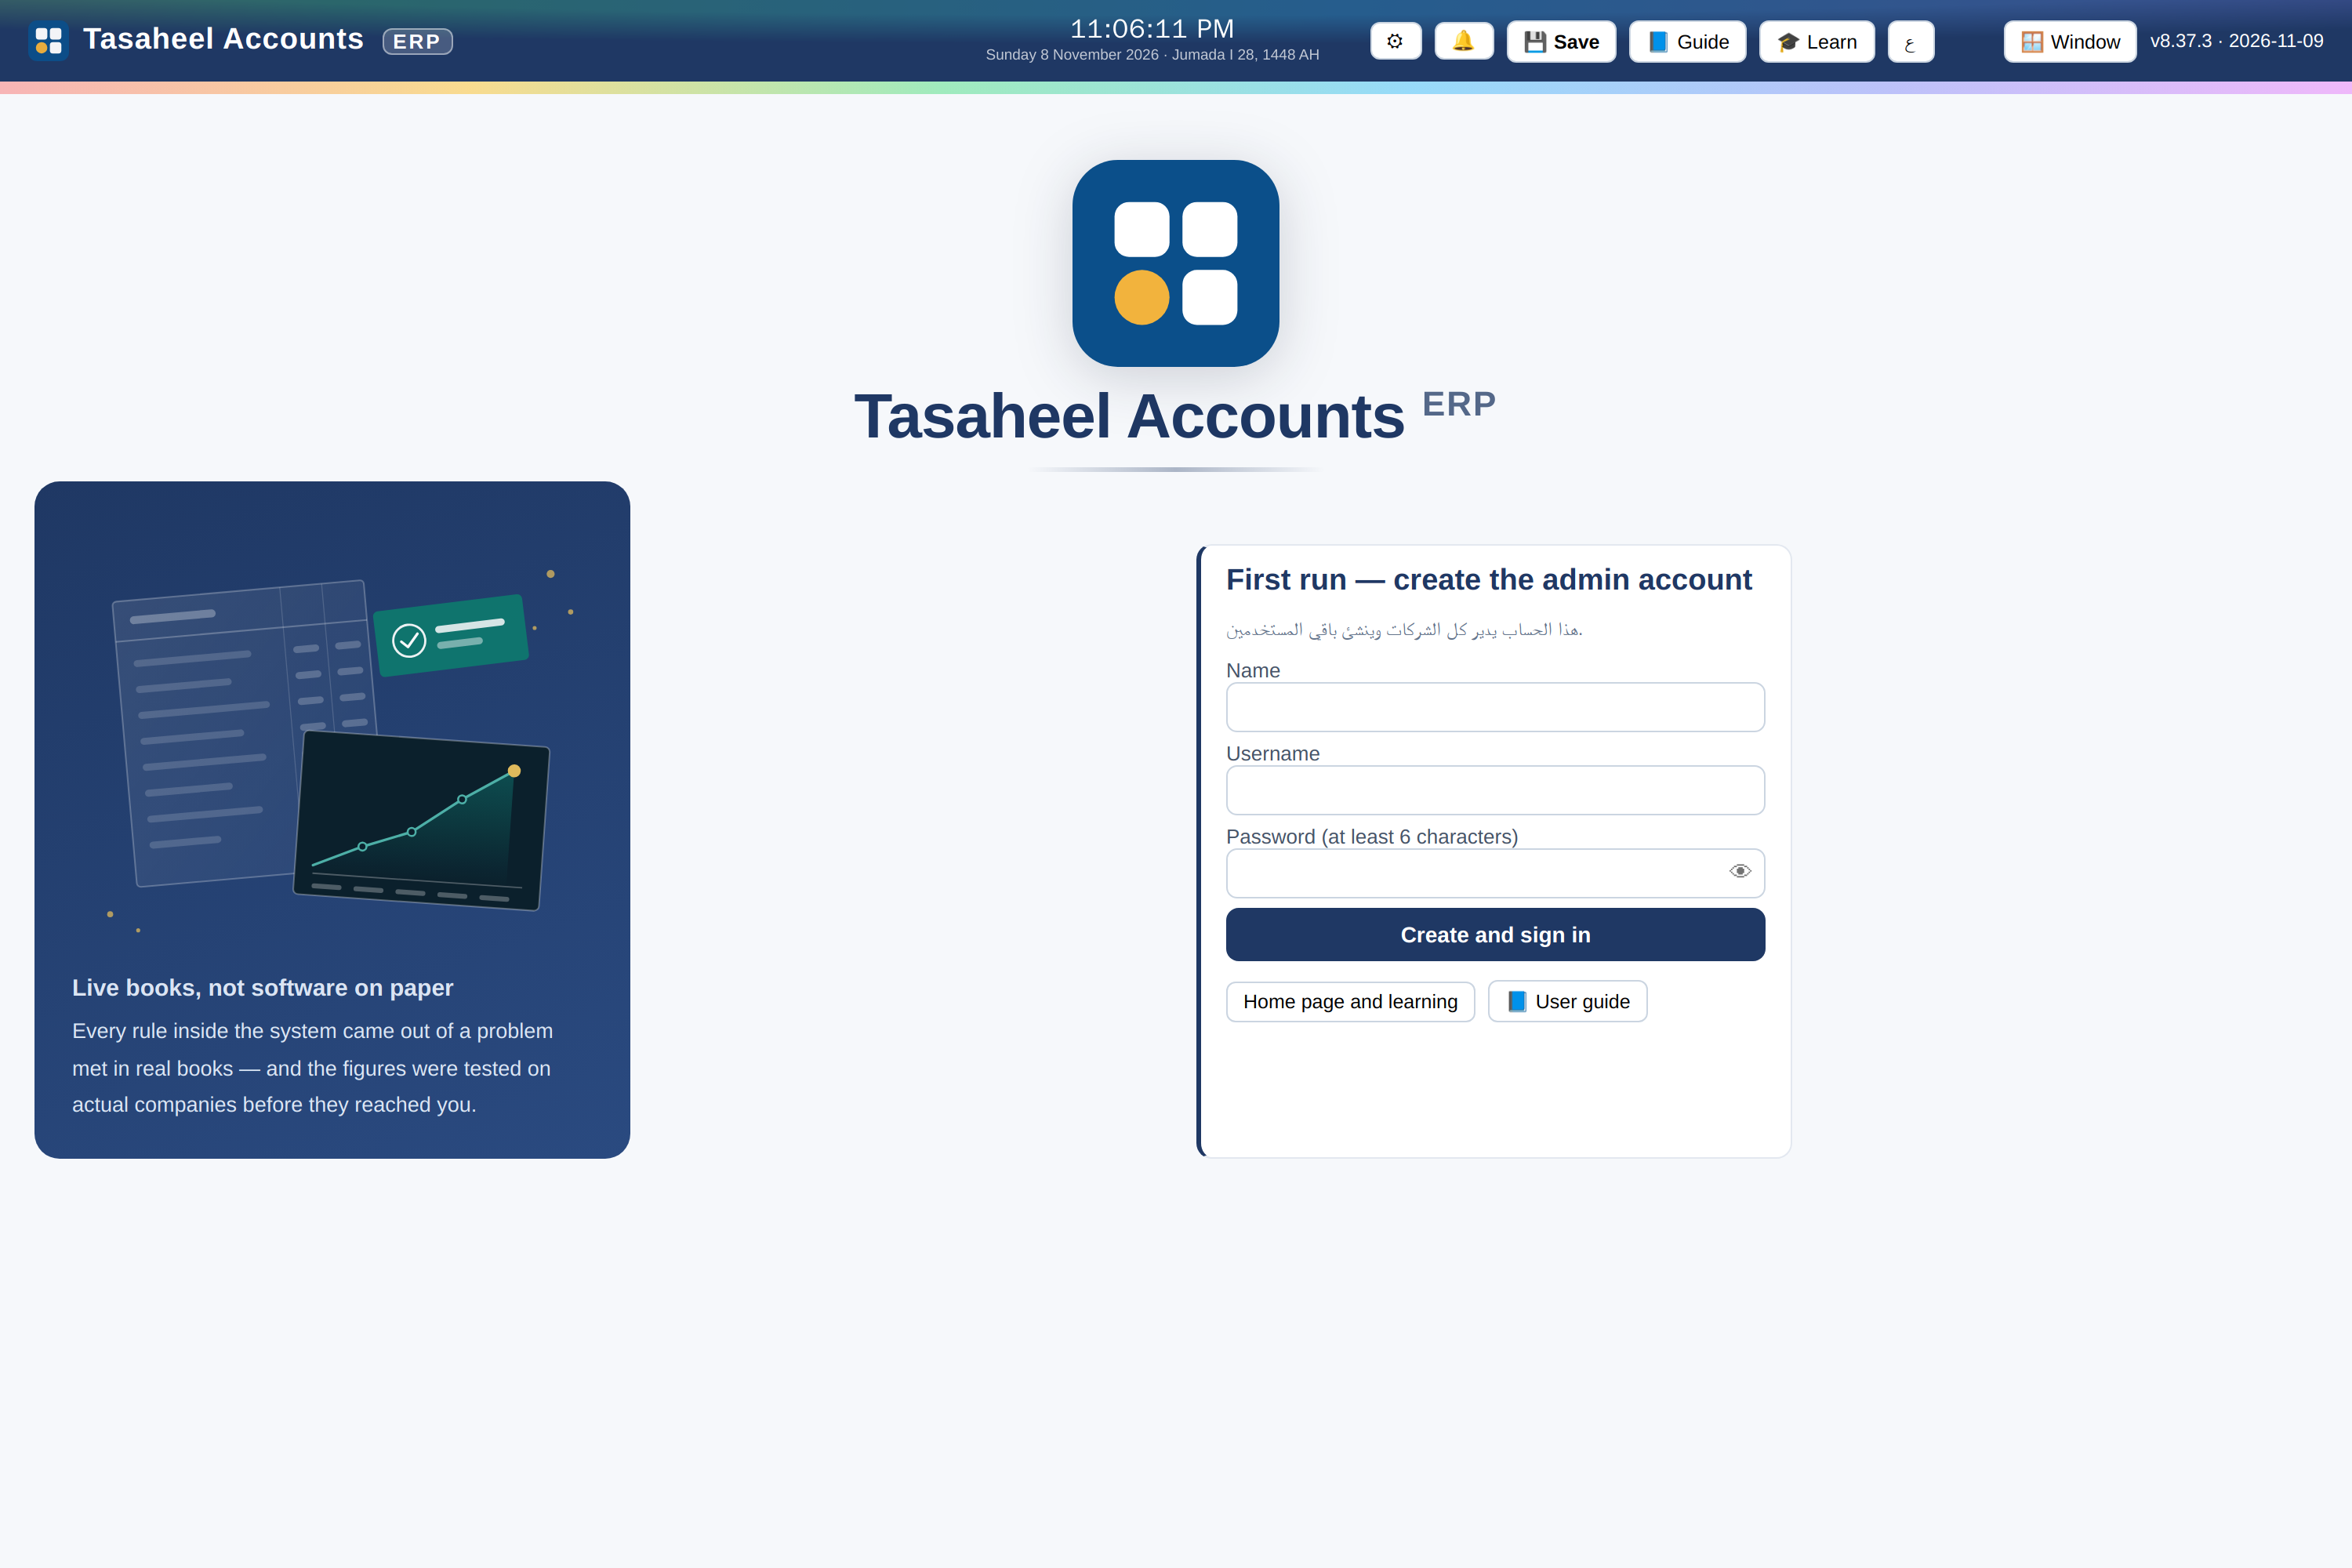
- The first run opens «First run — create the owner account».
- Enter the name, a username and a password (at least 6 characters).
- Click «Create and sign in».
Create your company
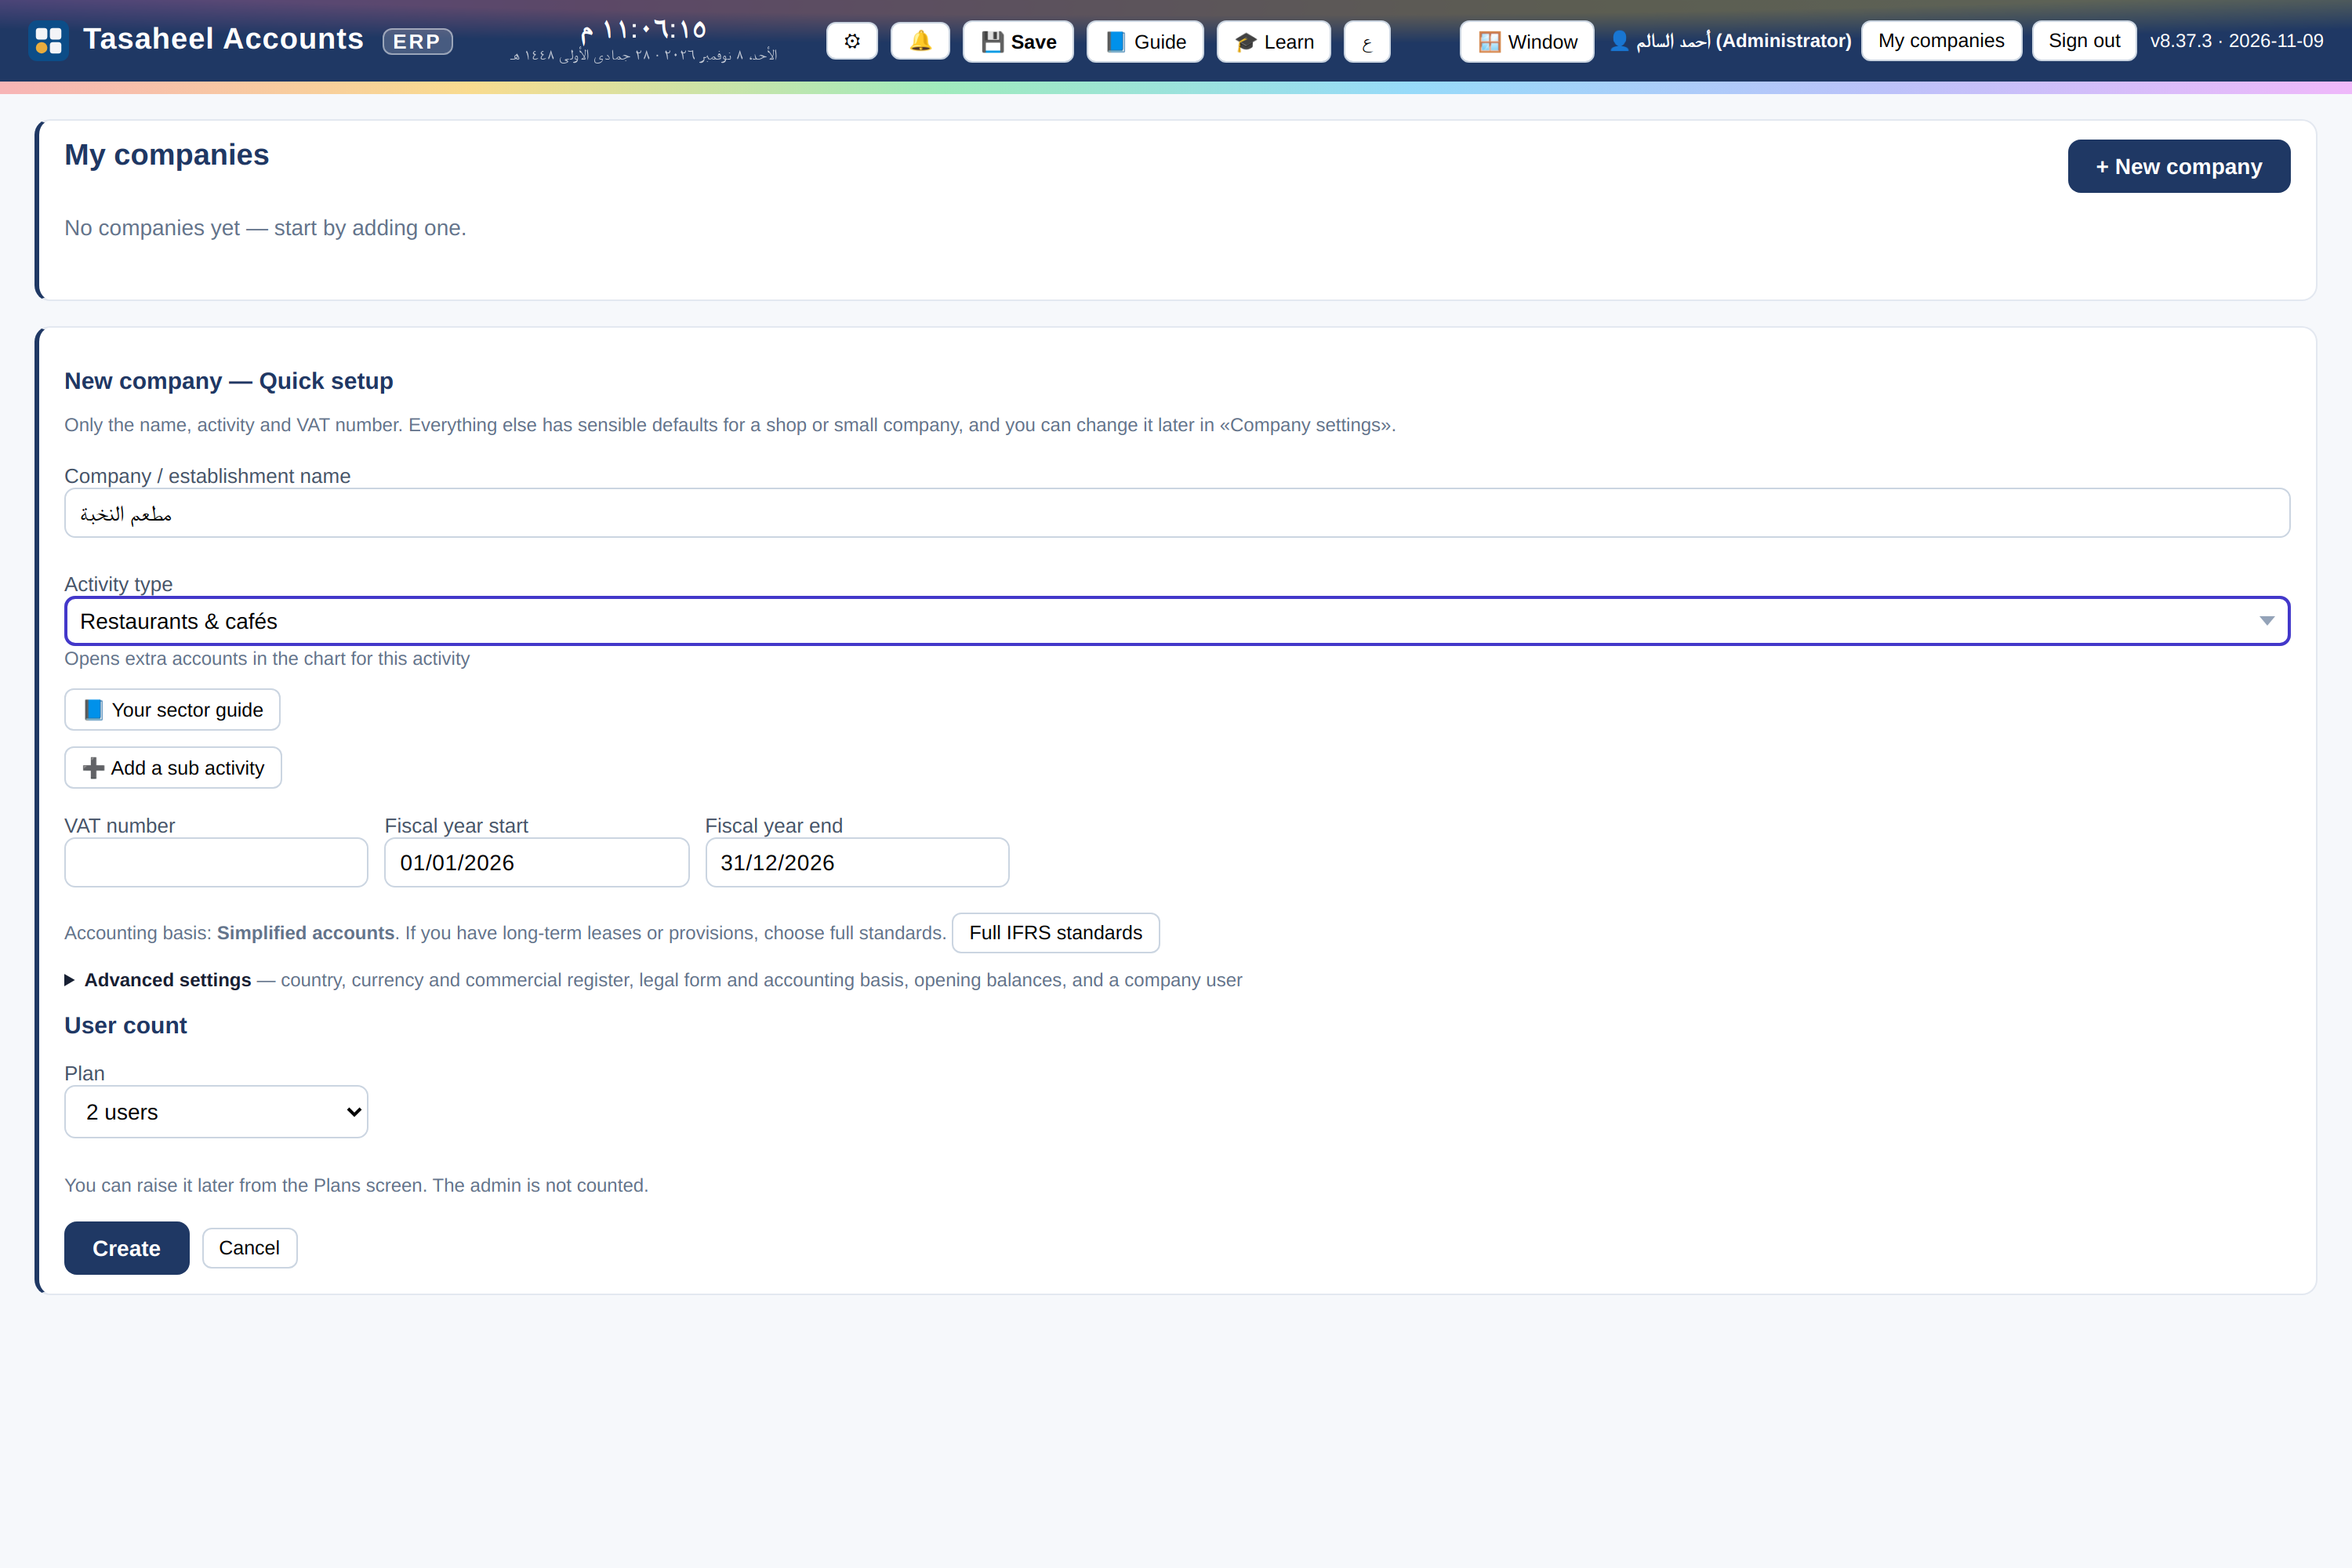
- In «My companies», click «+ New company».
- Enter the company name and choose the country — it sets taxes and currency.
- Set the fiscal year start and end dates, and add the CR and VAT numbers if you have them.
- Choose the business type (restaurants, contracting, retail…) — required, because the chart of accounts is built from it; it opens your sector's accounts and modules ready-made.
- Choose the legal form, the accounting basis and how to enter opening balances, then save.
Choose how you work
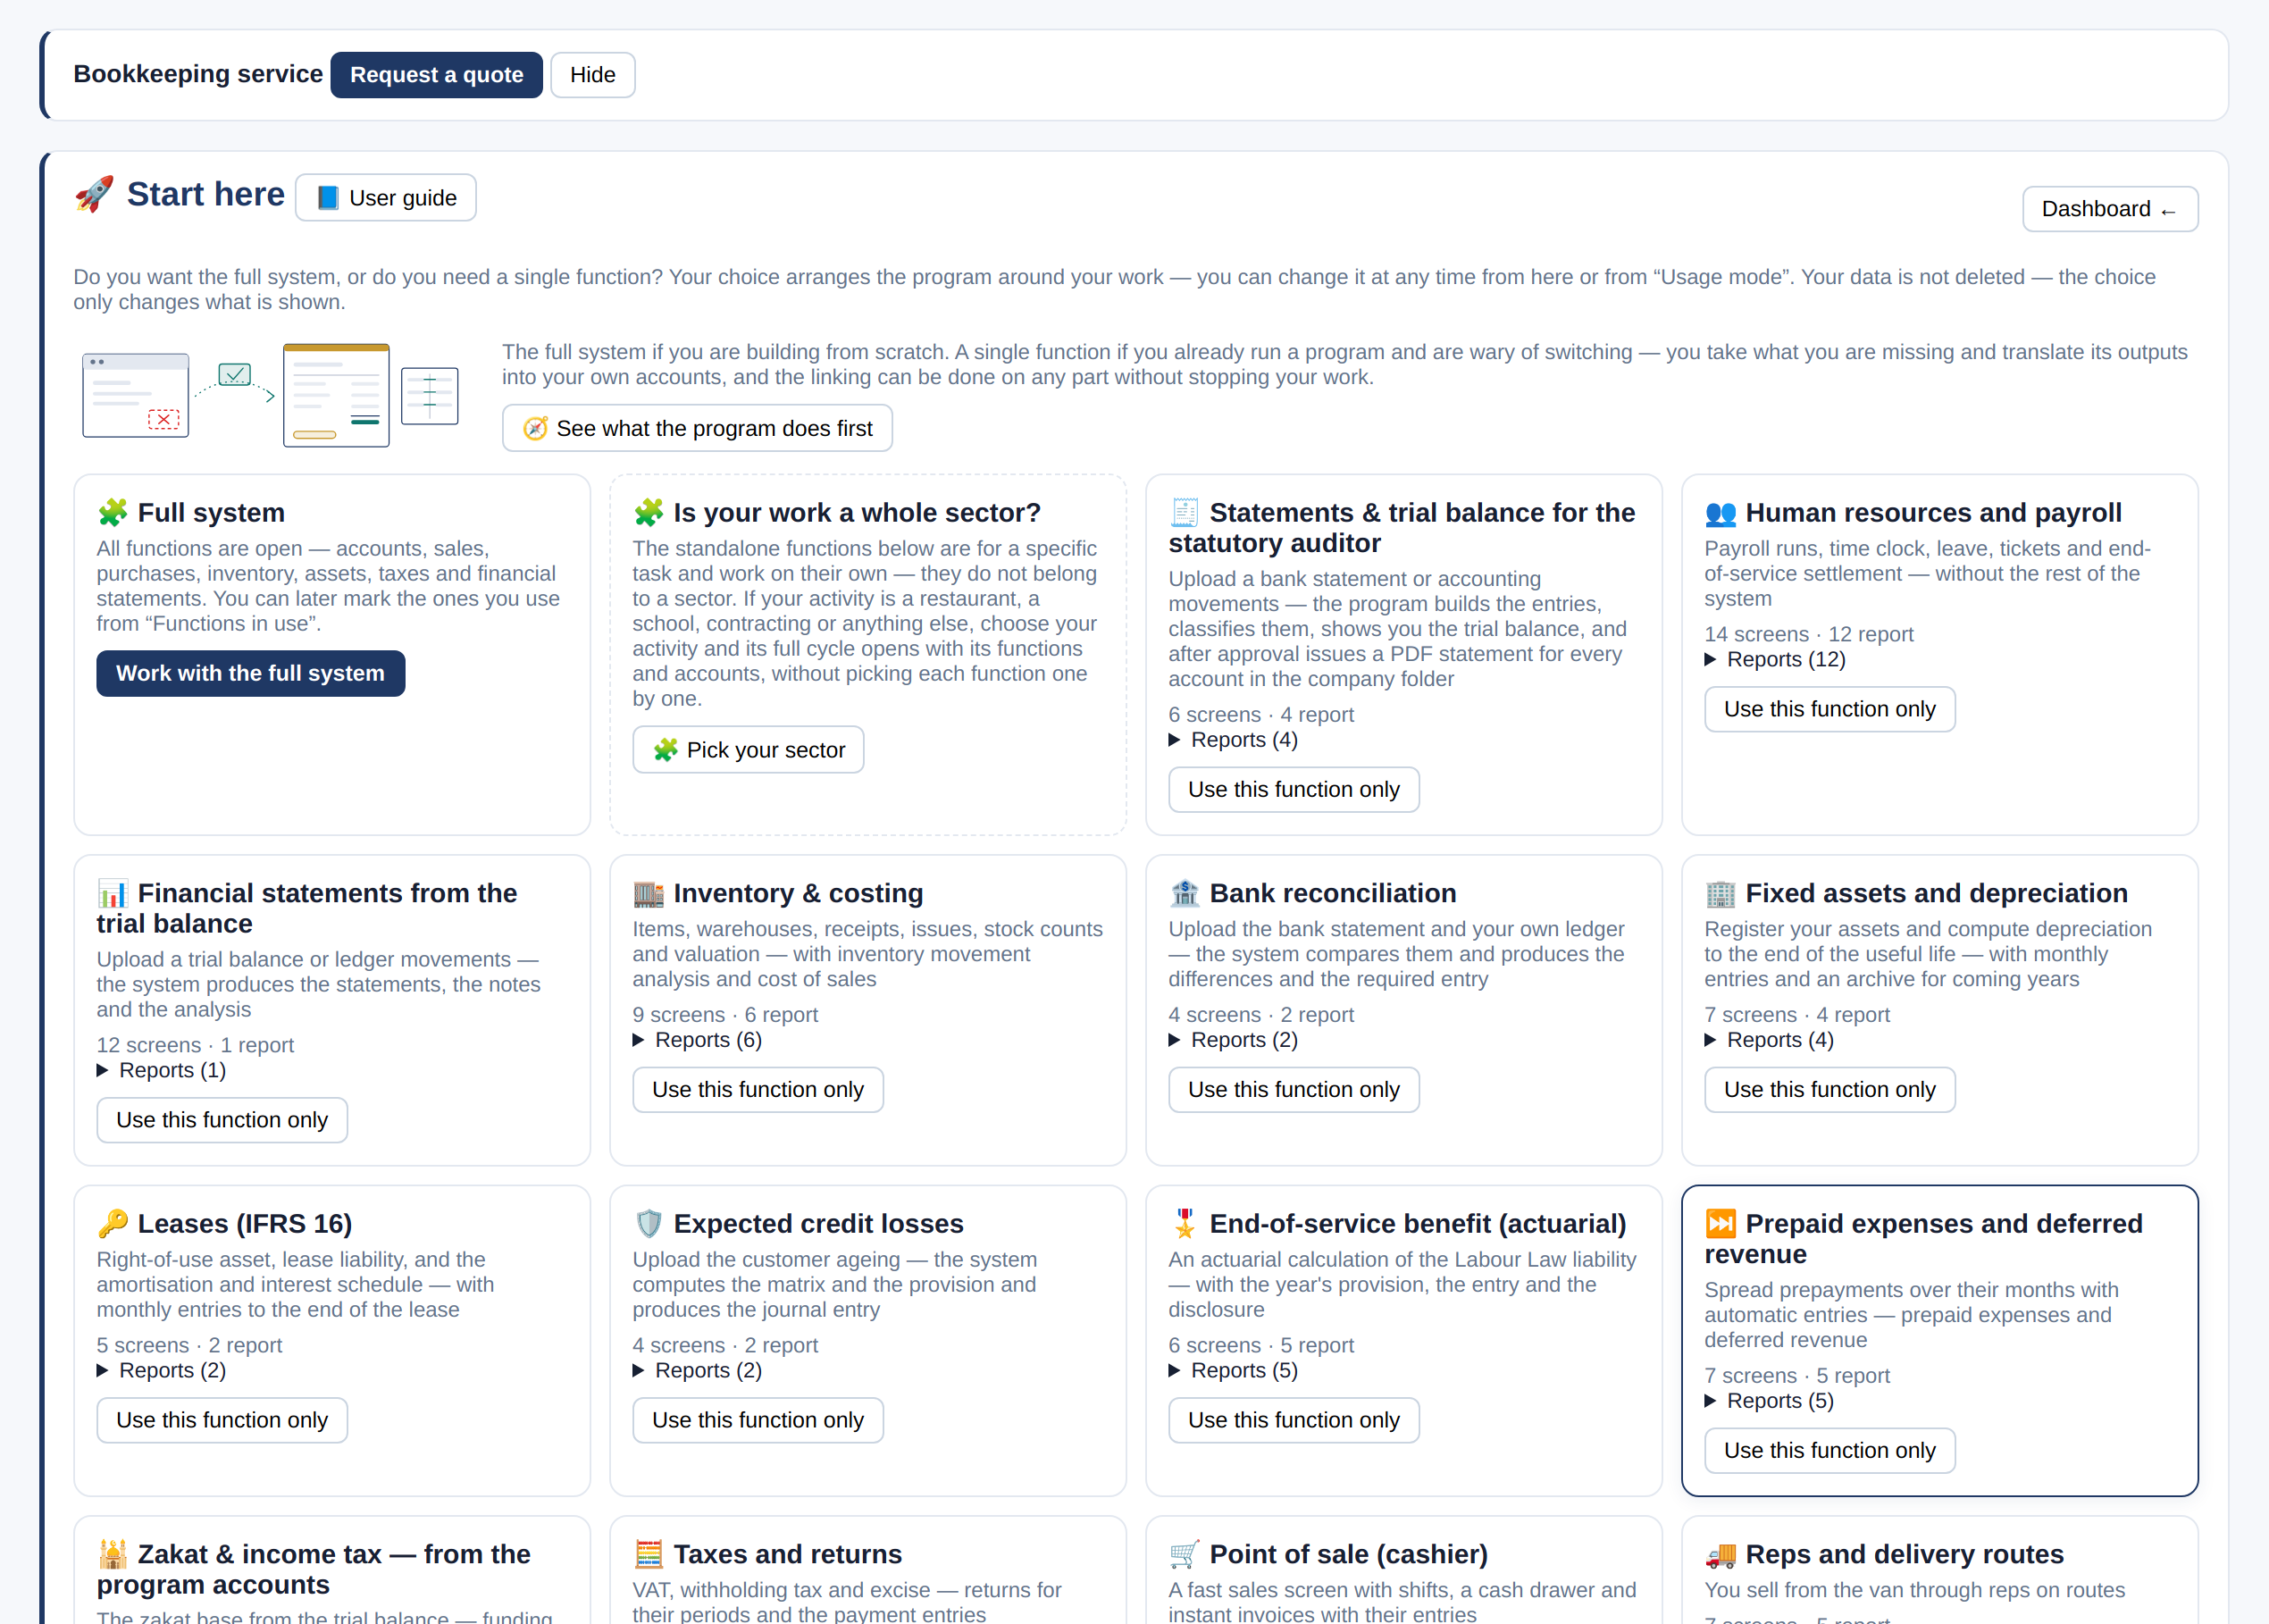
- «Start here» asks: the full system, or just one function?
- «Work with the full system» — every function: accounts, sales, purchases, inventory, assets, taxes and payroll.
- Or pick one function card and click «Work on this only» — the program shows just that.
- «Get to know the program first» takes you on a quick tour.
Your sector modules
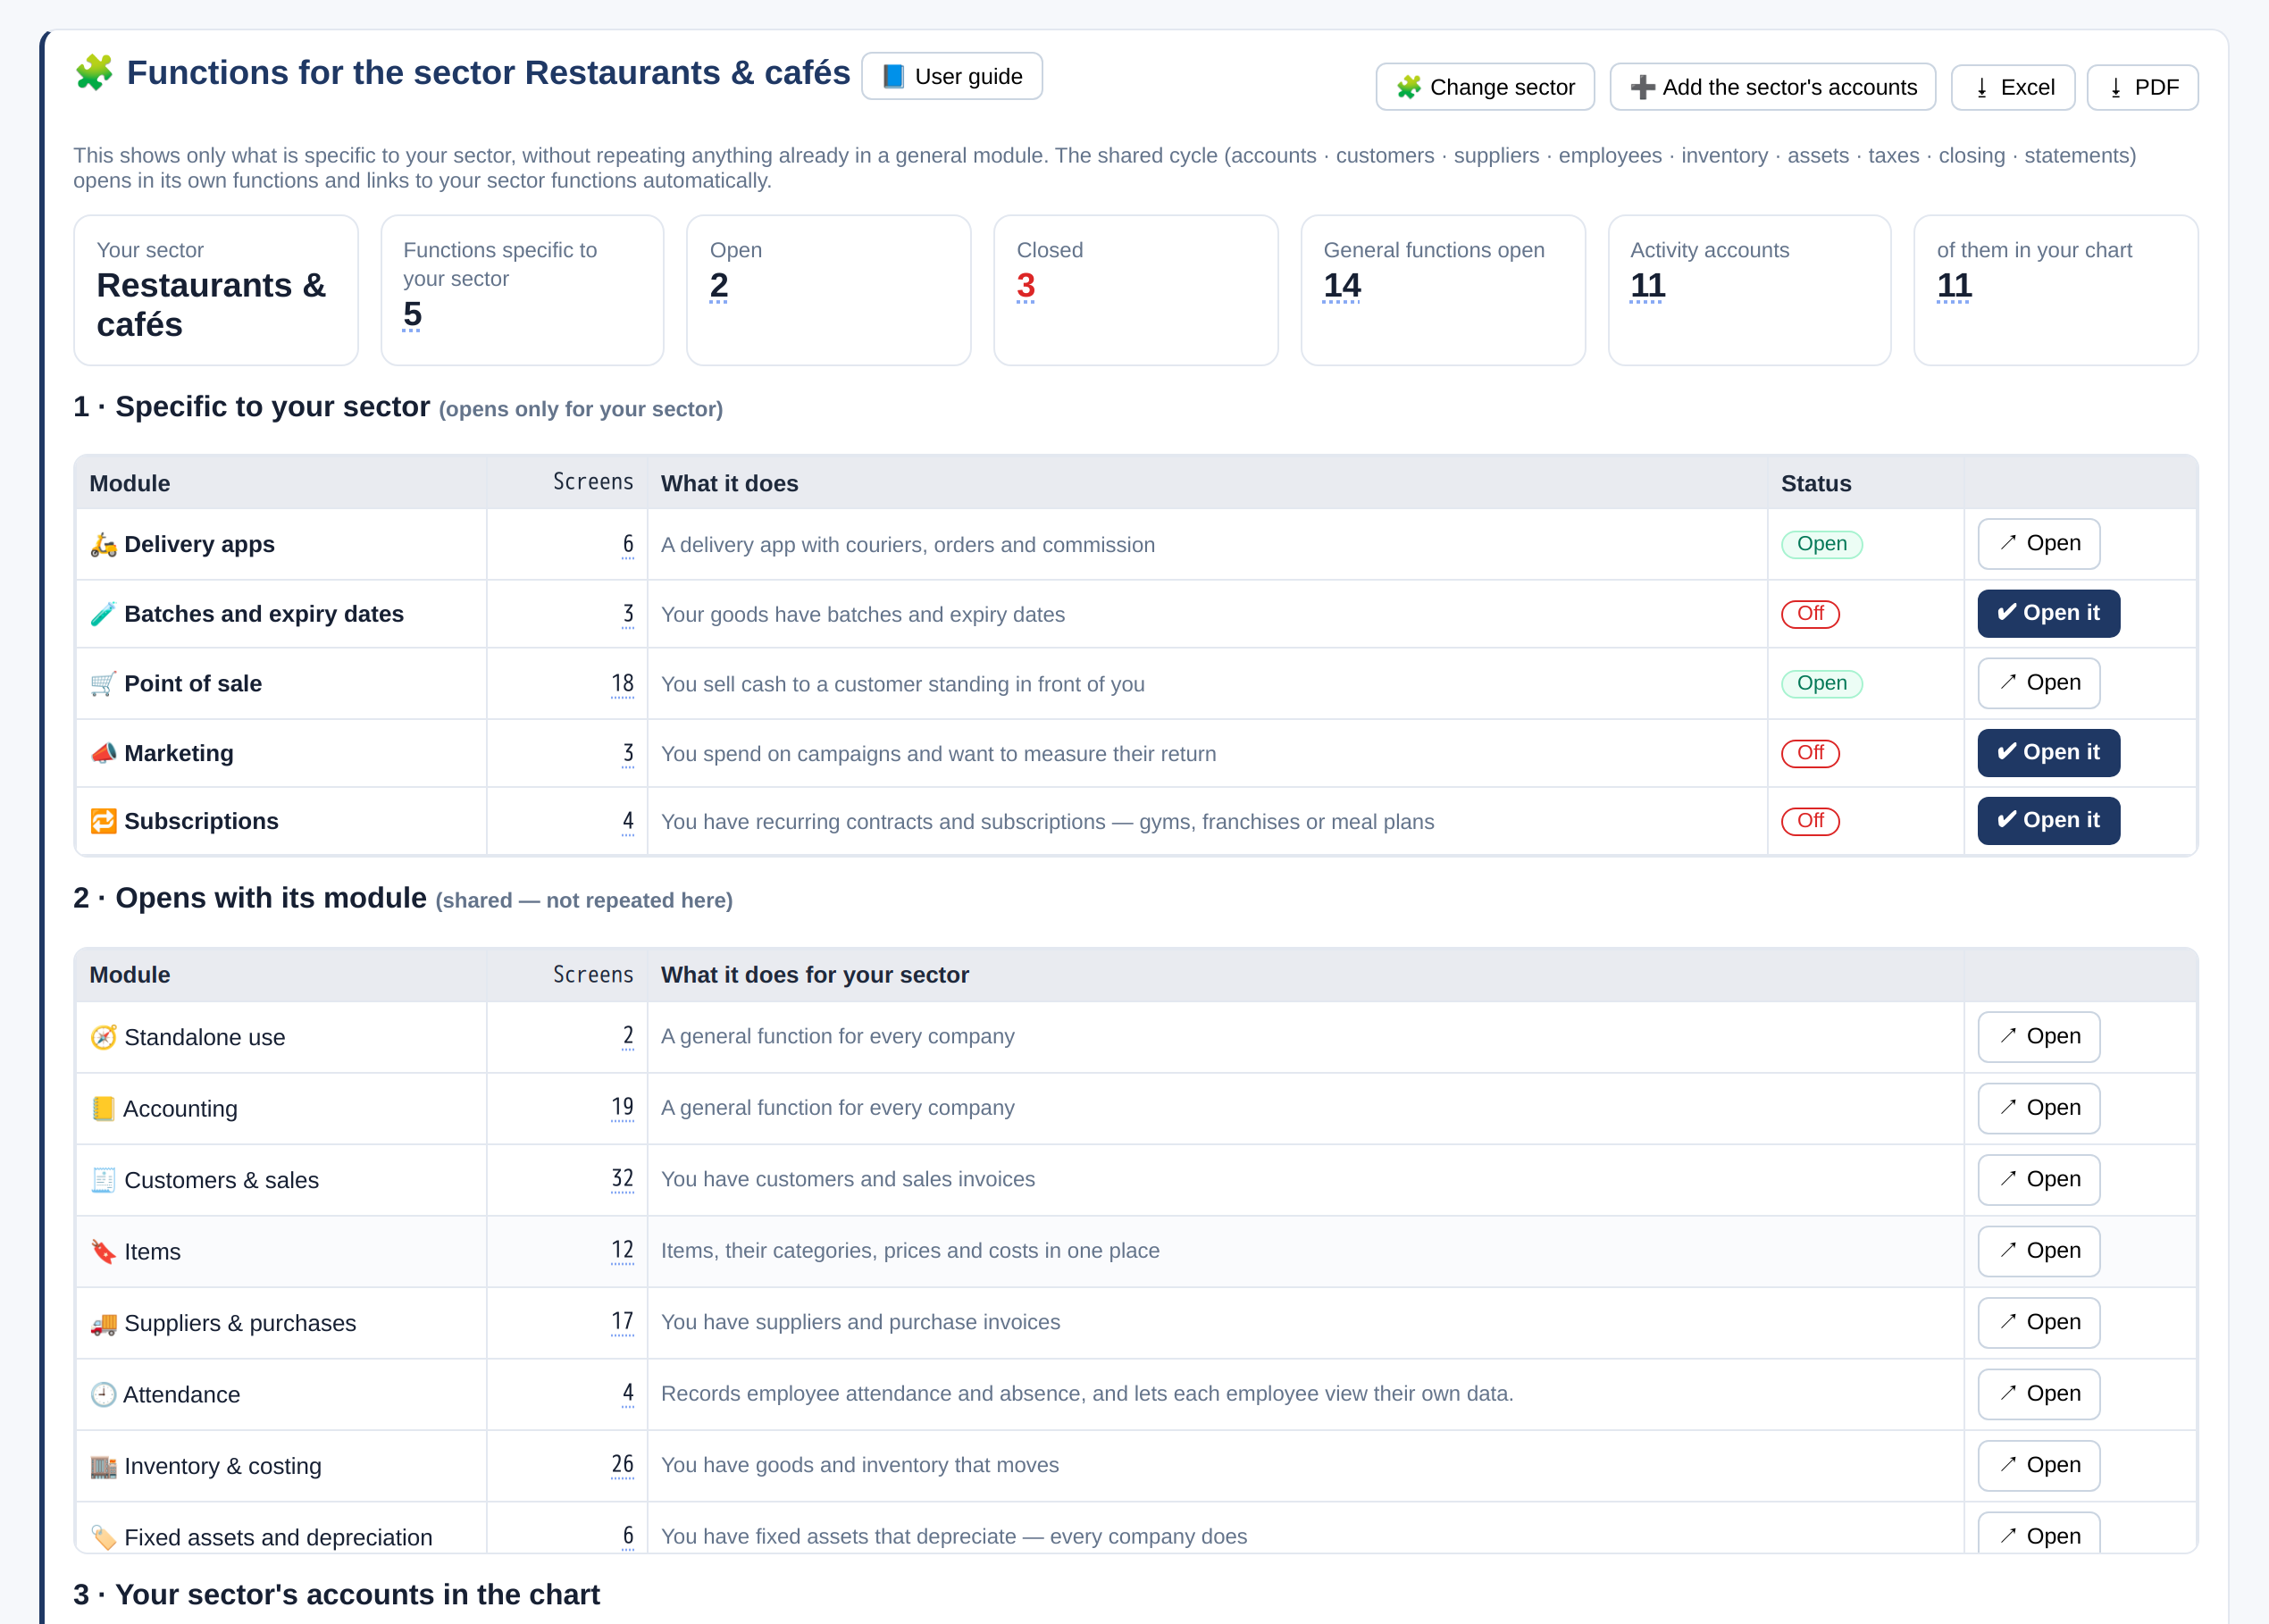
- «Modules for your activity» shows only what belongs to your sector, with the accounts it adds to the chart.
- «➕ Add sector accounts» adds your sector's accounts; «🧩 Change activity» if you picked the wrong one.
- «↗ Open» next to any module takes you to its screen.
Setup: company, chart of accounts, opening balances
Before the first entry: complete the company details, review the chart of accounts, and enter the balances you start with.
Company settings
- Upload the logo (shown on invoices and reports) and enter the name in Arabic and English.
- Complete the CR number, VAT number, unified number and address.
- Under functions, tick only what you use — unticked functions disappear from the menu without deleting their data.
- Ownership and partners set how Zakat (Saudi/GCC share) and income tax (foreign share) apply.
- Click «Save settings».
Chart of accounts
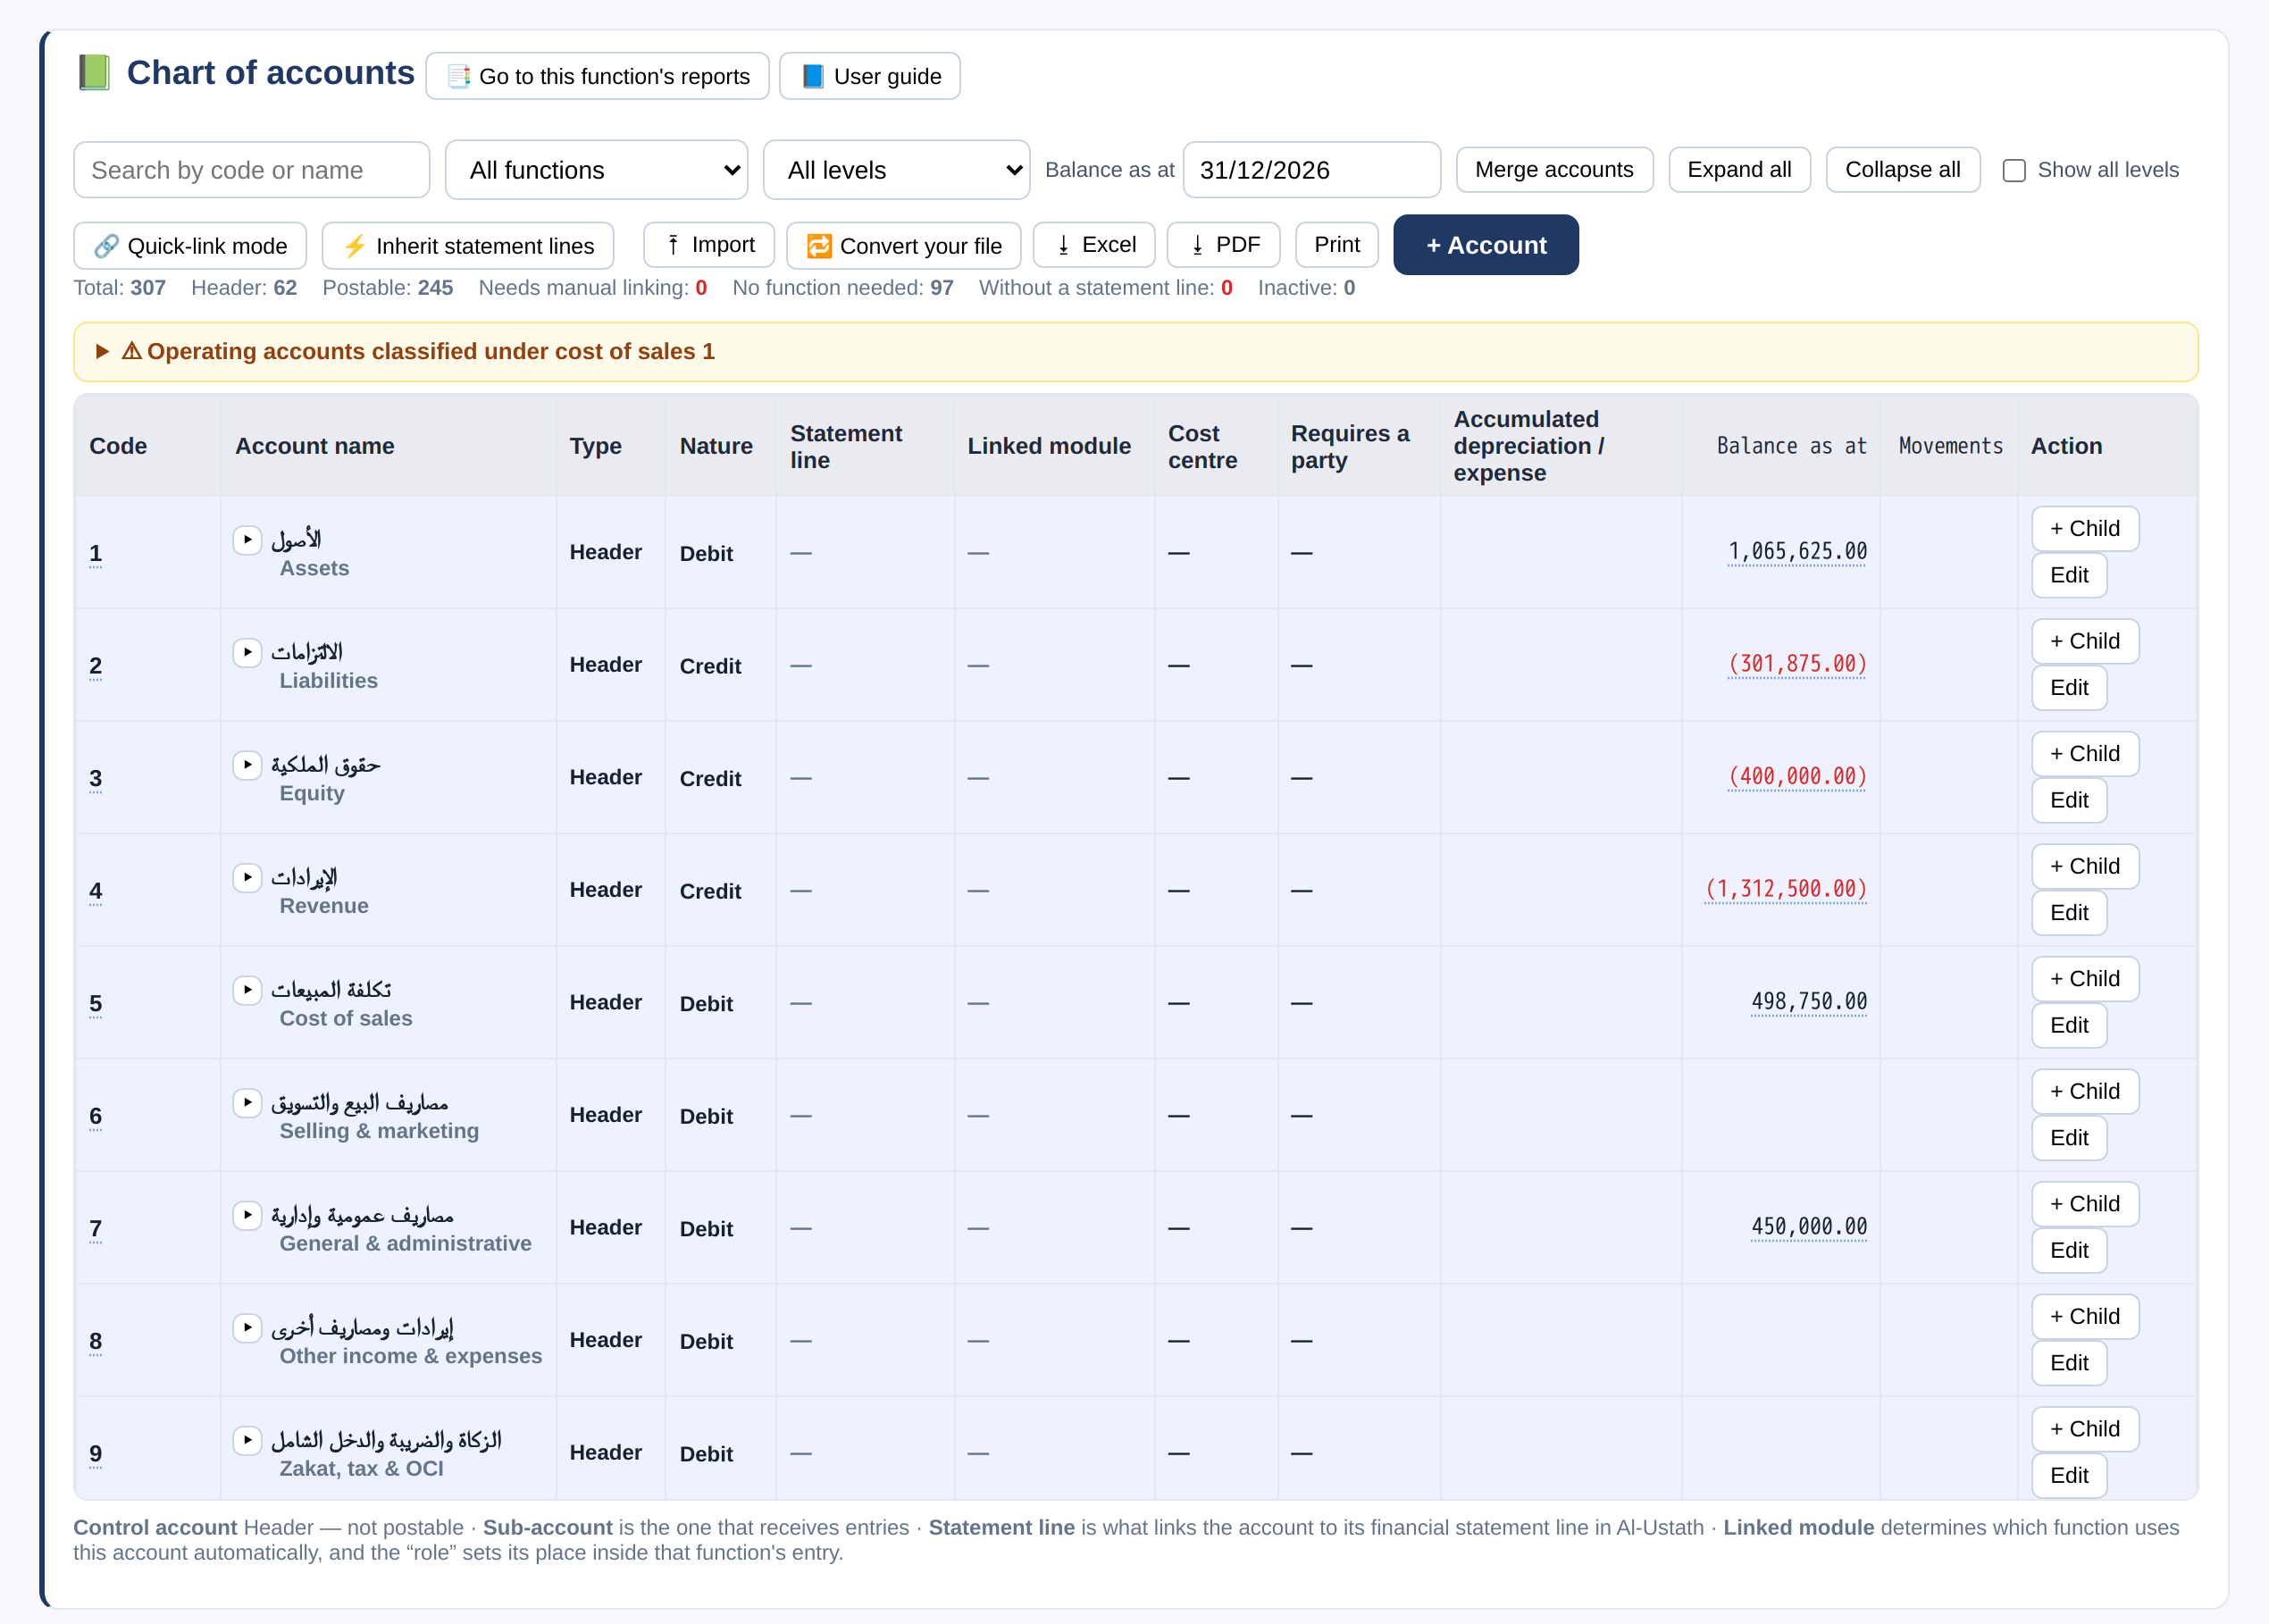
- The chart is ready for your sector. Main accounts are summary accounts; entries post to sub-accounts.
- «+ Account» adds a main account; «+ Under» adds a sub-account under an existing one.
- Each account has a statement line that links it to a line in the financial statements.
- Import your own chart from Excel with «⭱ Import», or export to Excel/PDF.
Opening balances
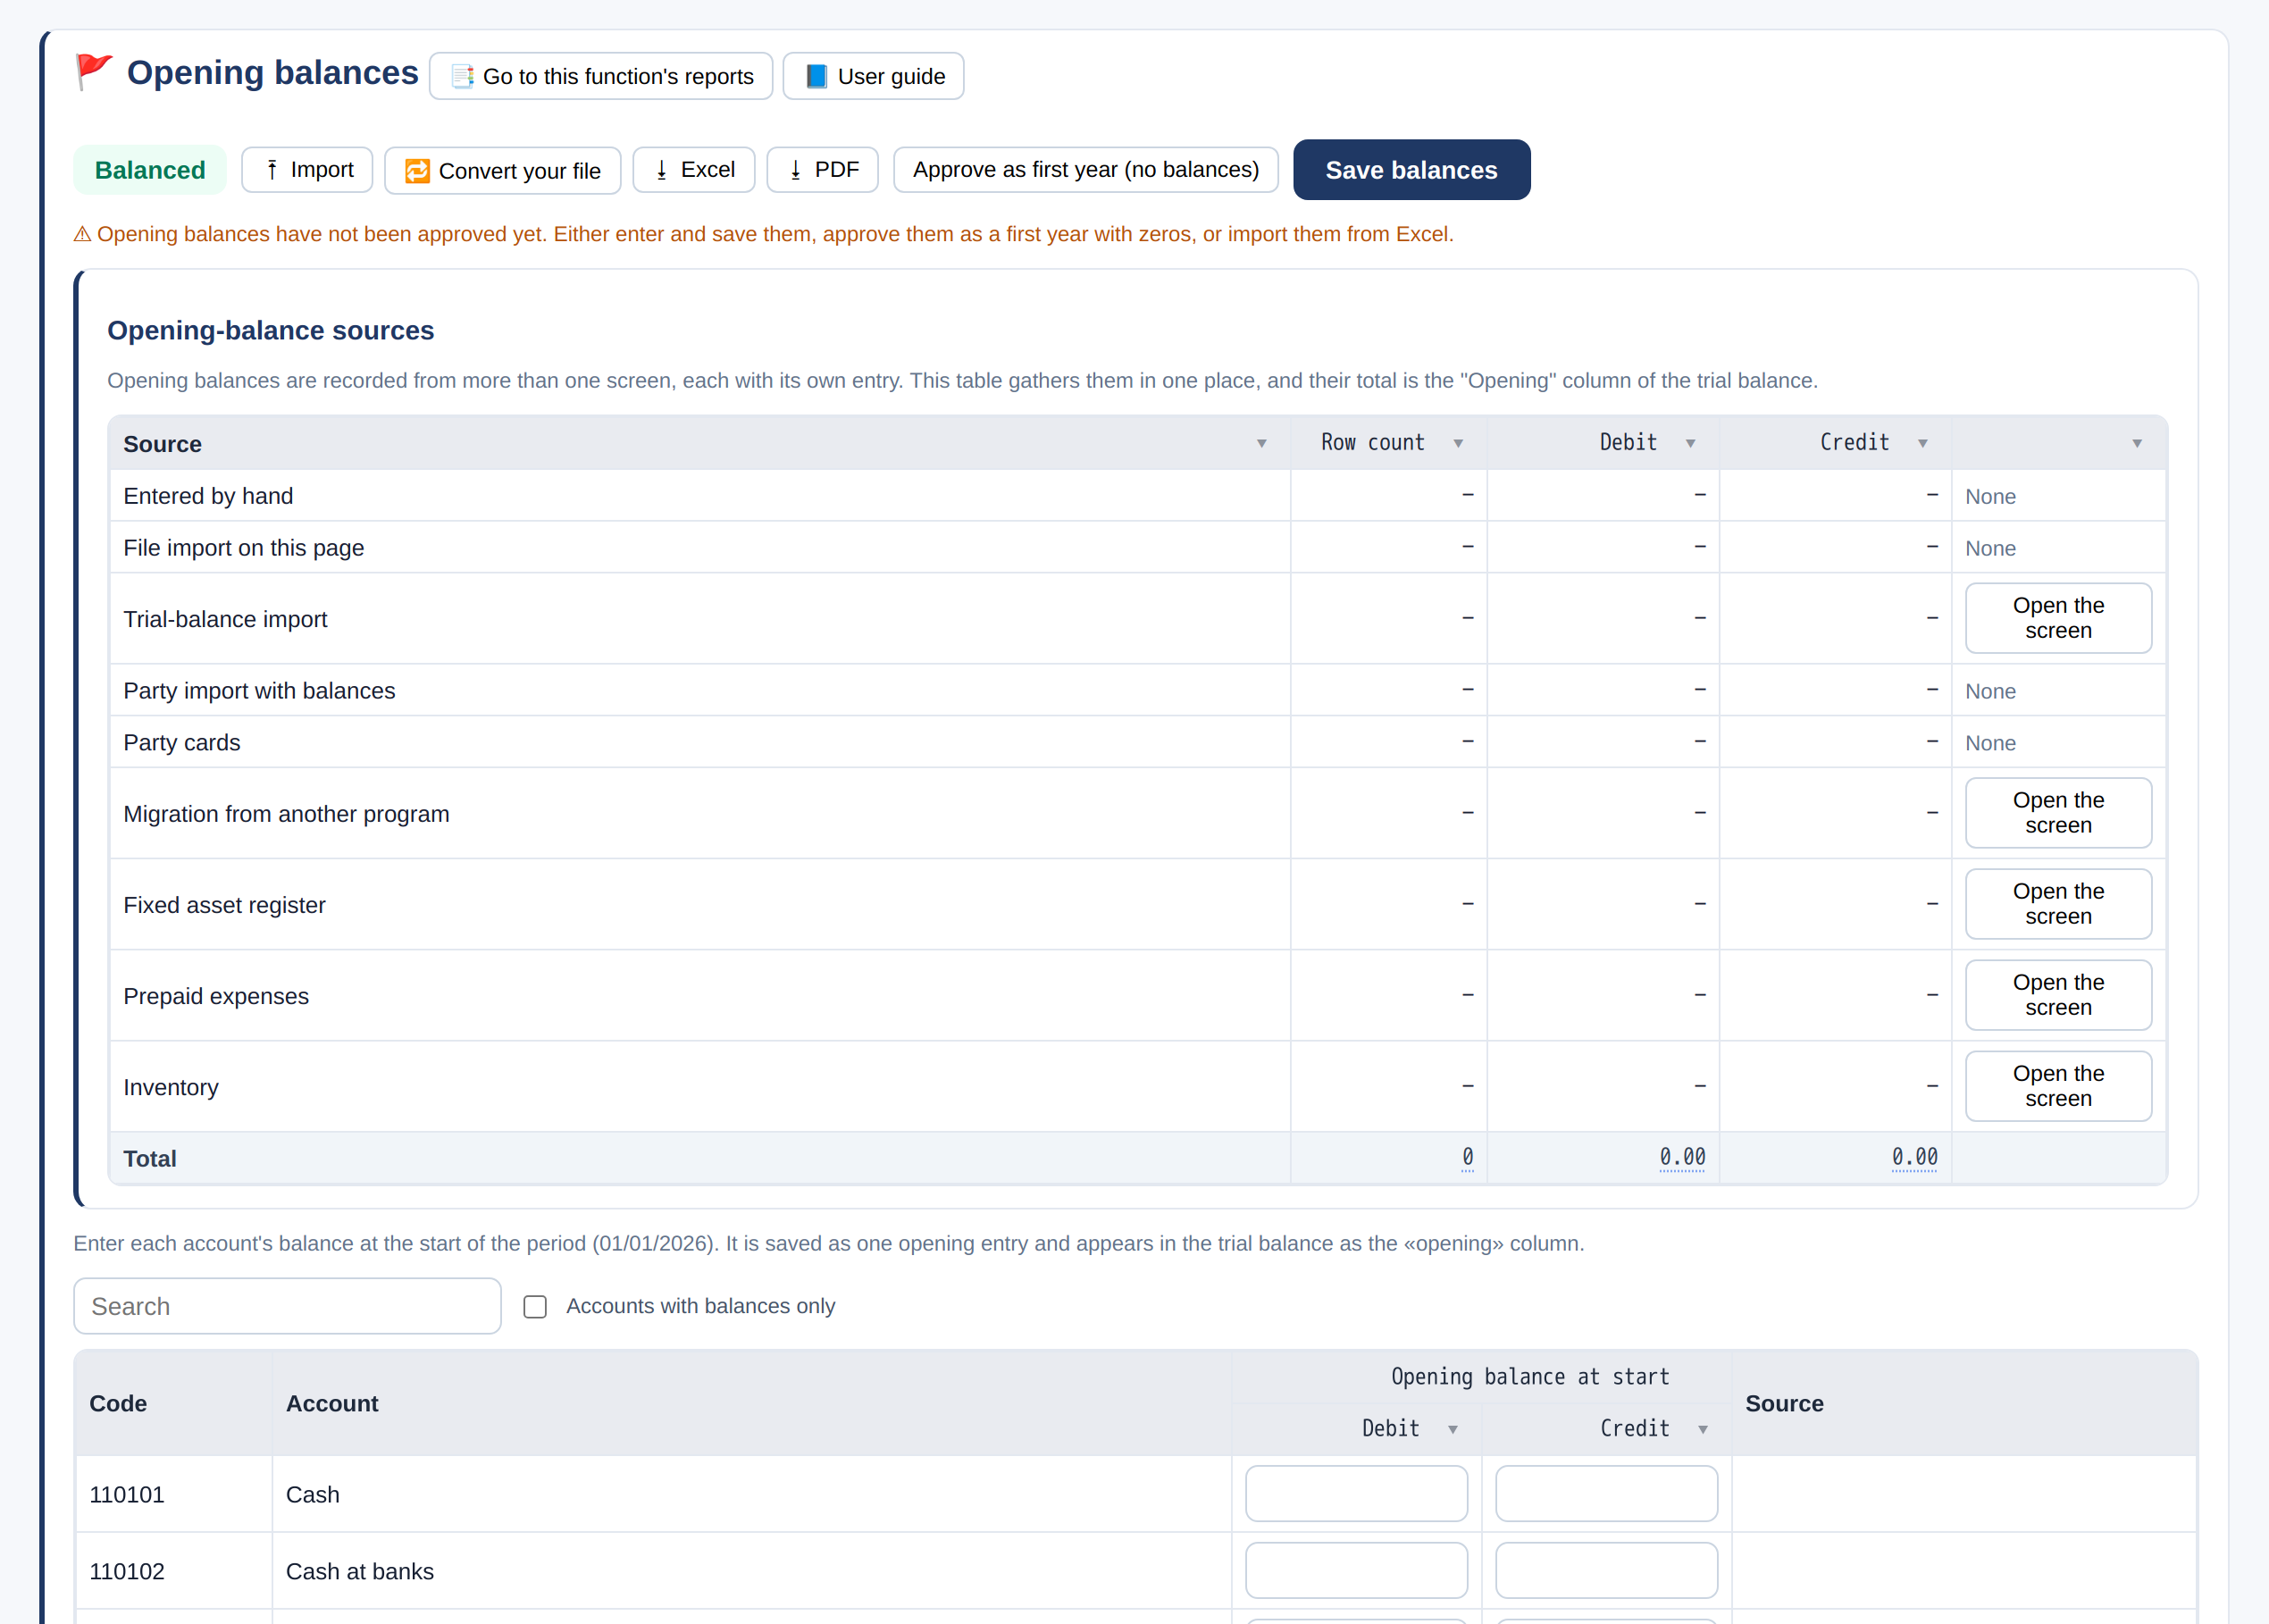
- Enter each account's balance at the start of the period: debit or credit.
- Click «Save balances» — they are recorded as one opening entry and show in the trial balance as «Opening».
- If this is a first year with no balances: «Approve as first year (no balances)».
- Or import them from Excel with «⭱ Import».
Choosing how you work, once
Choosing «Full system» on the plan page is enough.
Full system
- If you chose «Full system» in «Plan & subscription», that is enough: the start dashboard doesn’t warn that you haven’t chosen yet, and the program doesn’t send you to «Start here» to choose again.
Hiding the modules you don’t use
Untick a module and save, and it disappears from the bar and stays hidden, without its data being deleted.
Hiding
- Open «Modules in use», untick any module you don’t use, then press «Save modules». The screen says: «Any unmarked module disappears from the bar when you save».
- The module stays hidden after signing out and in, whatever the subscription plan. To bring it back, tick it and save, or press «Tick all».
- Hiding does not delete the module’s data.
Customers, suppliers and items
The cards you use on every invoice: who you sell to, who you buy from, and what you sell.
Customers
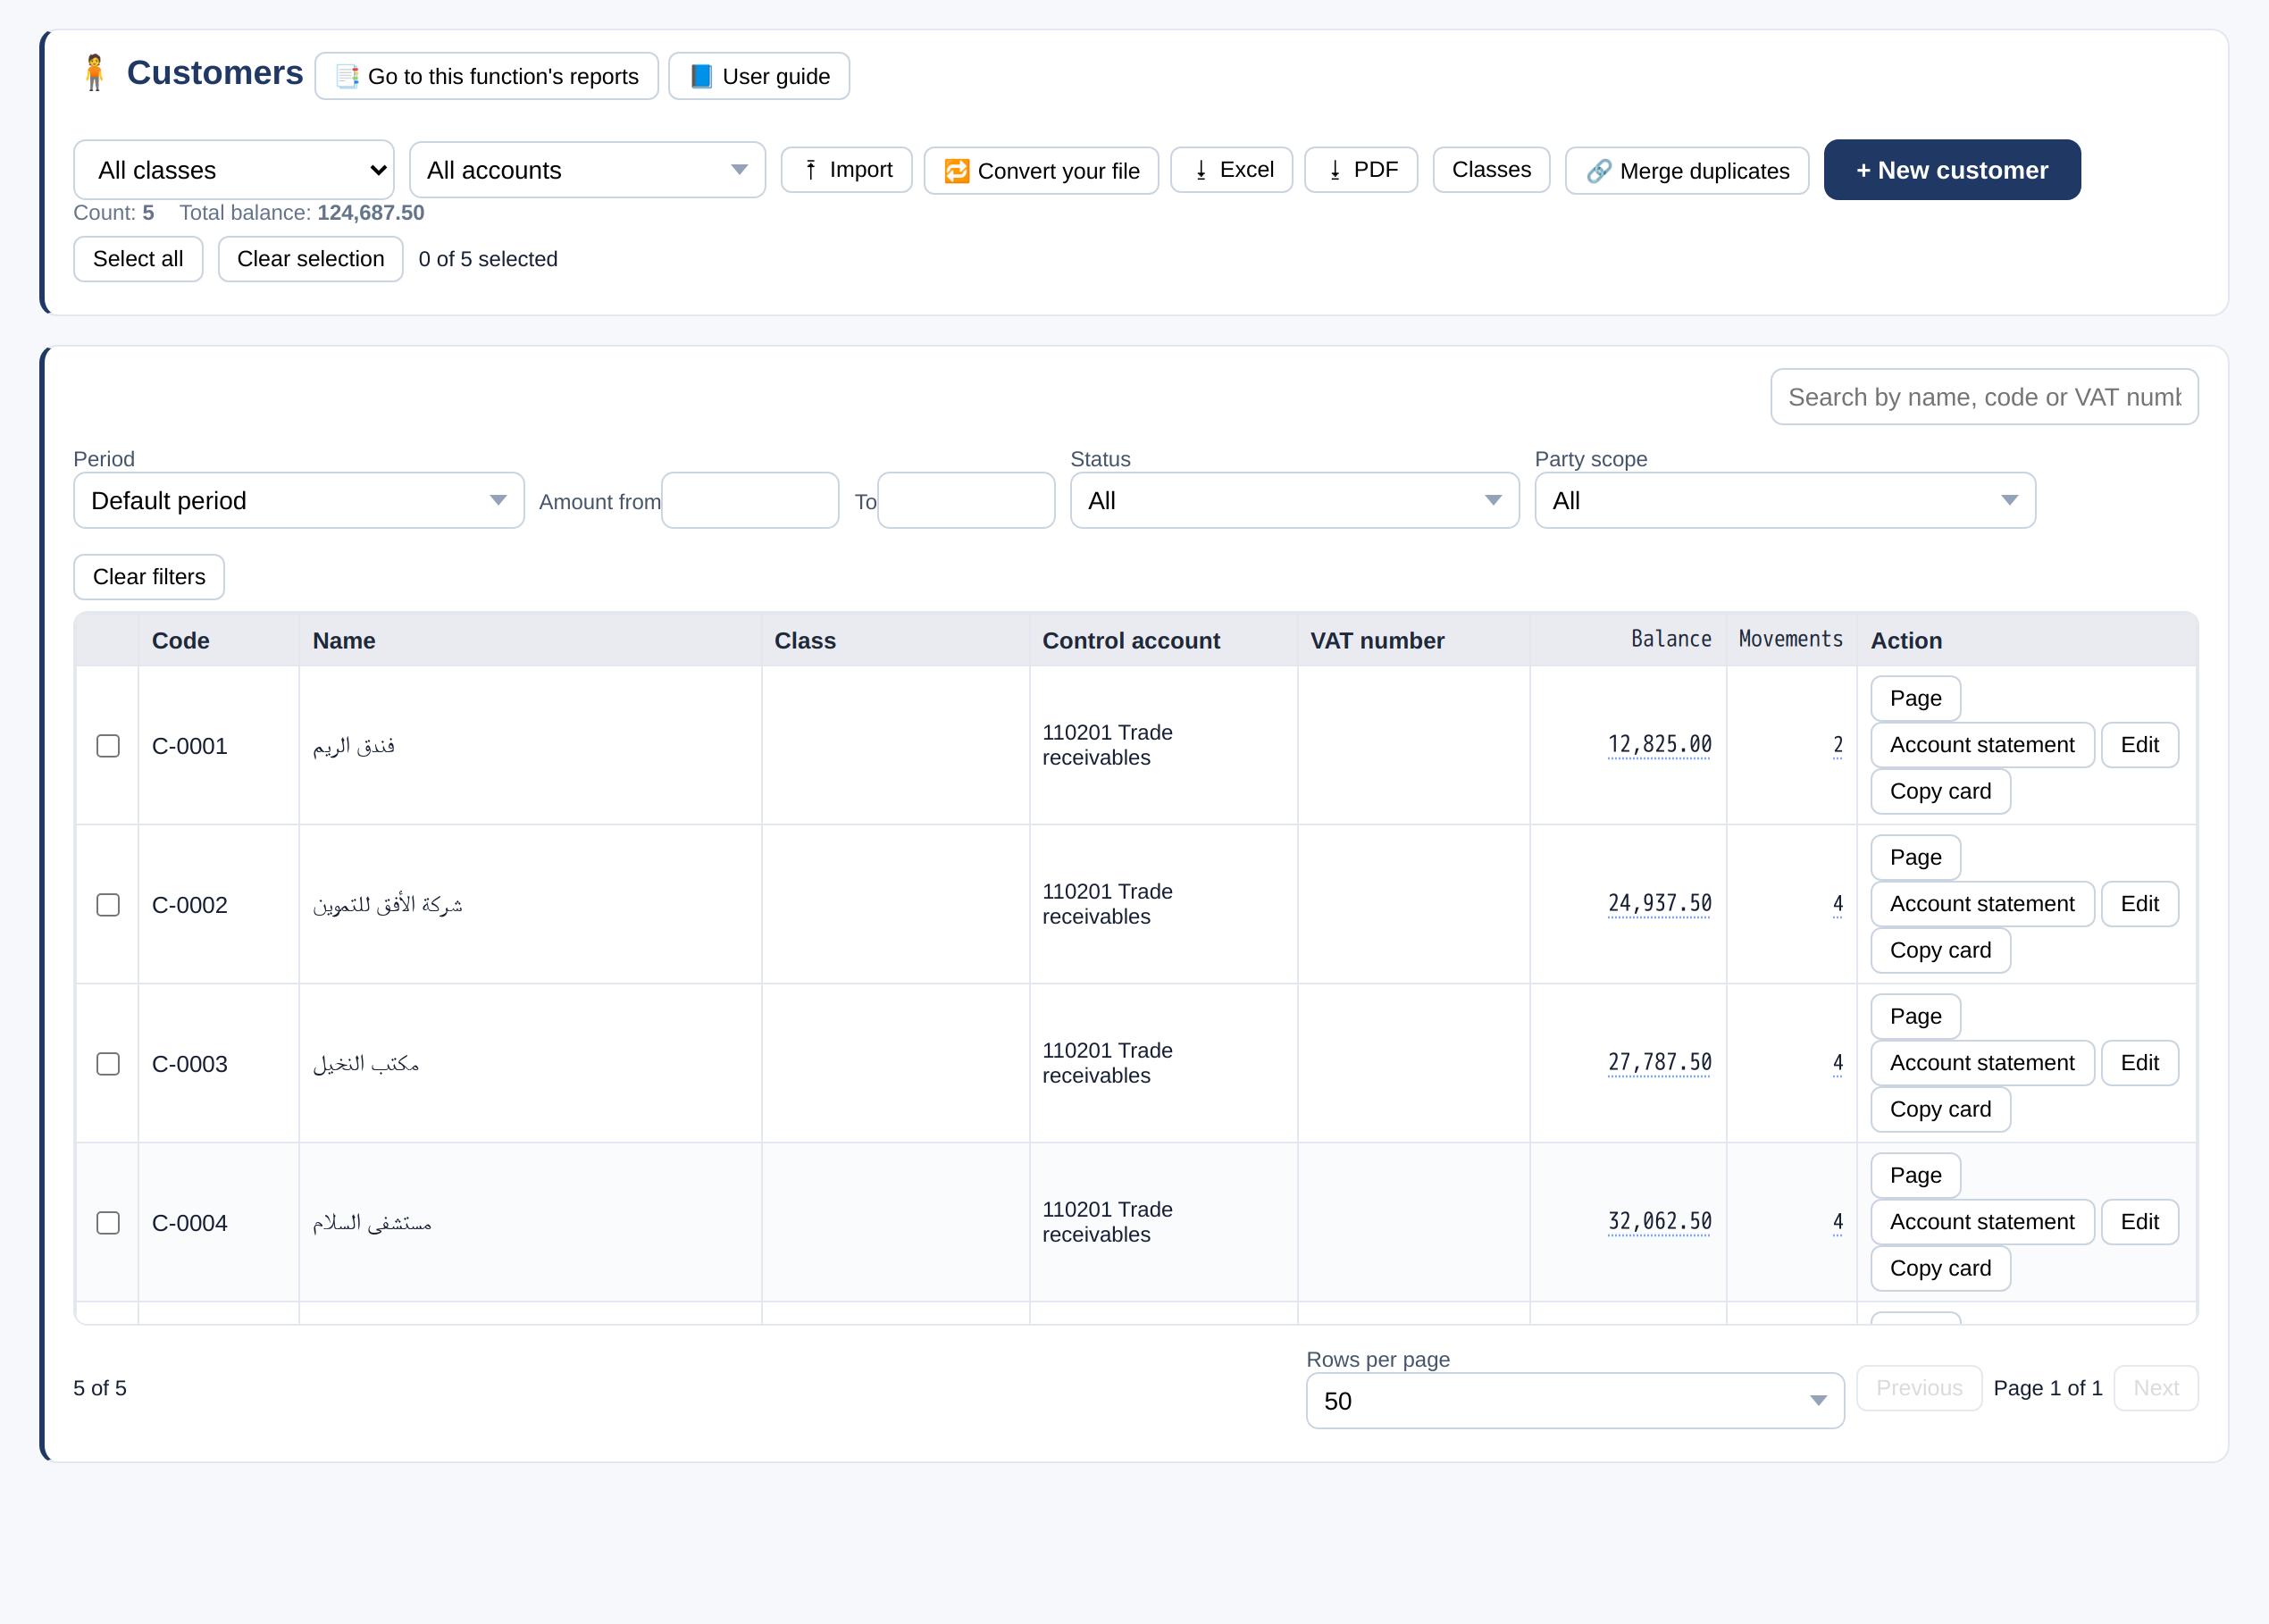
- «+ New customer»: code, name, category, VAT number and payment terms.
- The table shows each customer's balance and number of transactions; «Statement» opens the full history.
- «⭱ Import» from Excel, and «🔗 Merge duplicates» if the same customer was entered twice — merging is for the manager only, because it changes posted entries and cannot be undone.
Suppliers
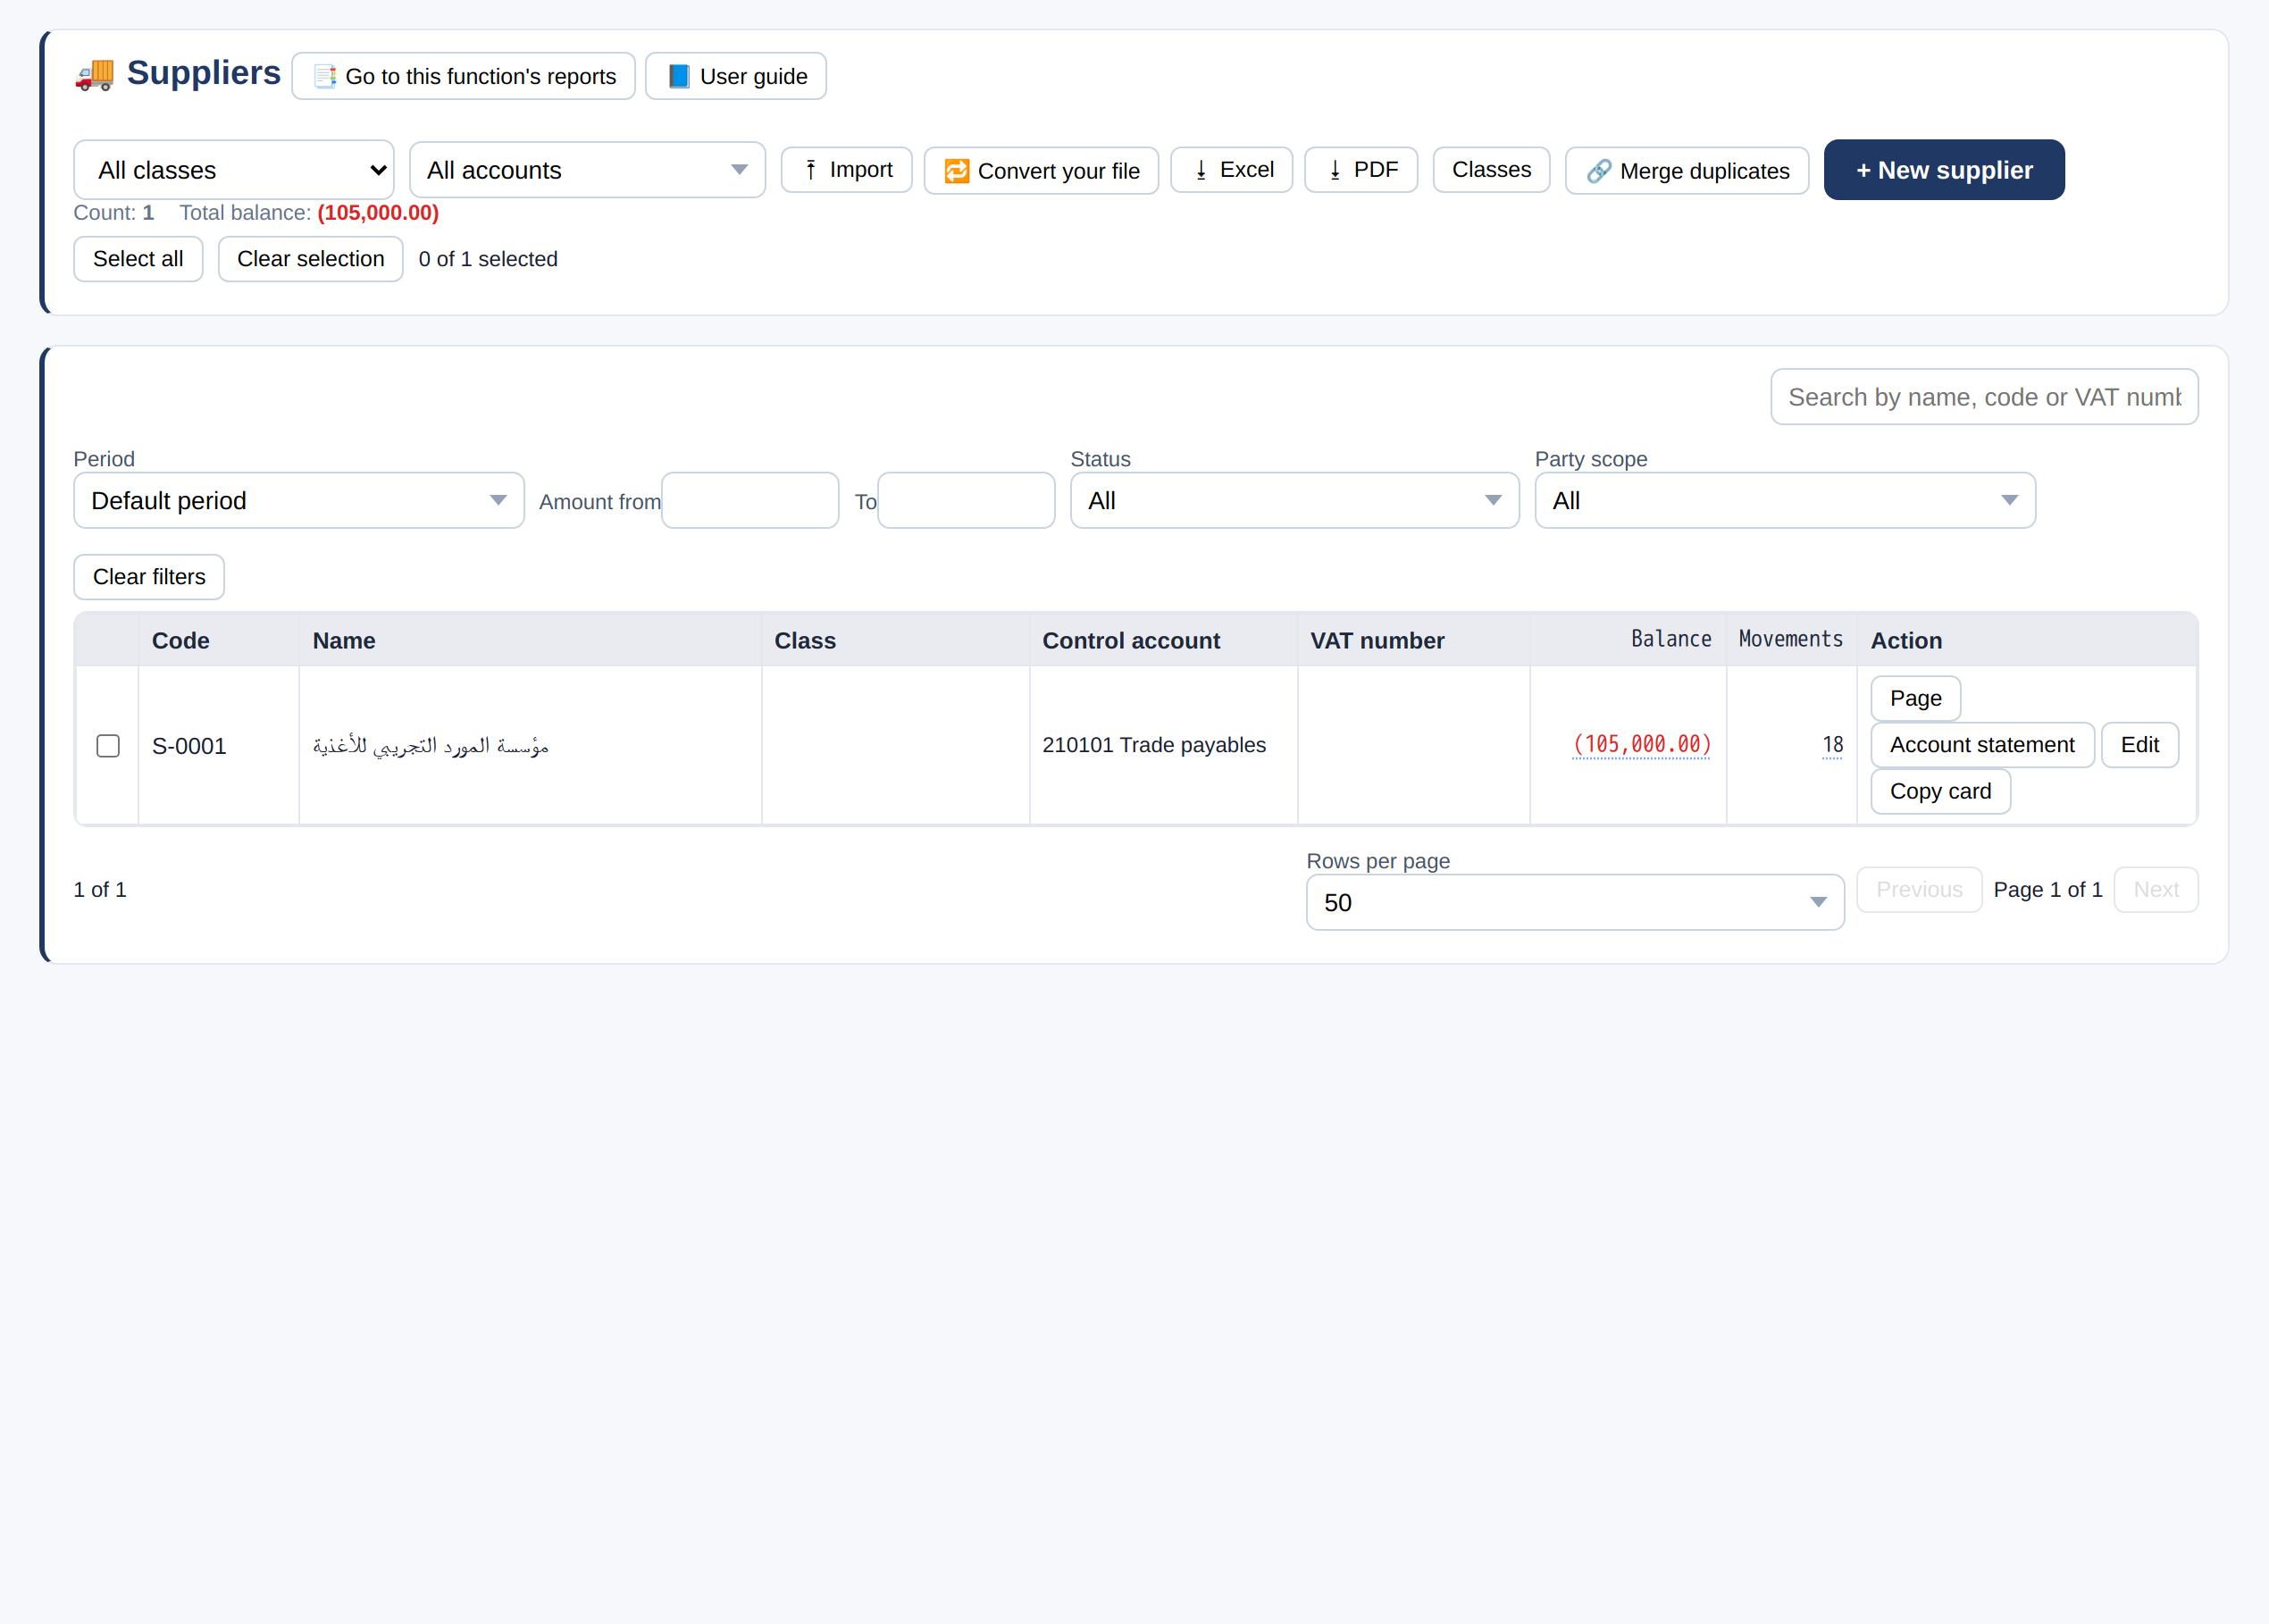
- Same as customers: «+ New supplier», balance, «Statement», import and merge.
Items and services
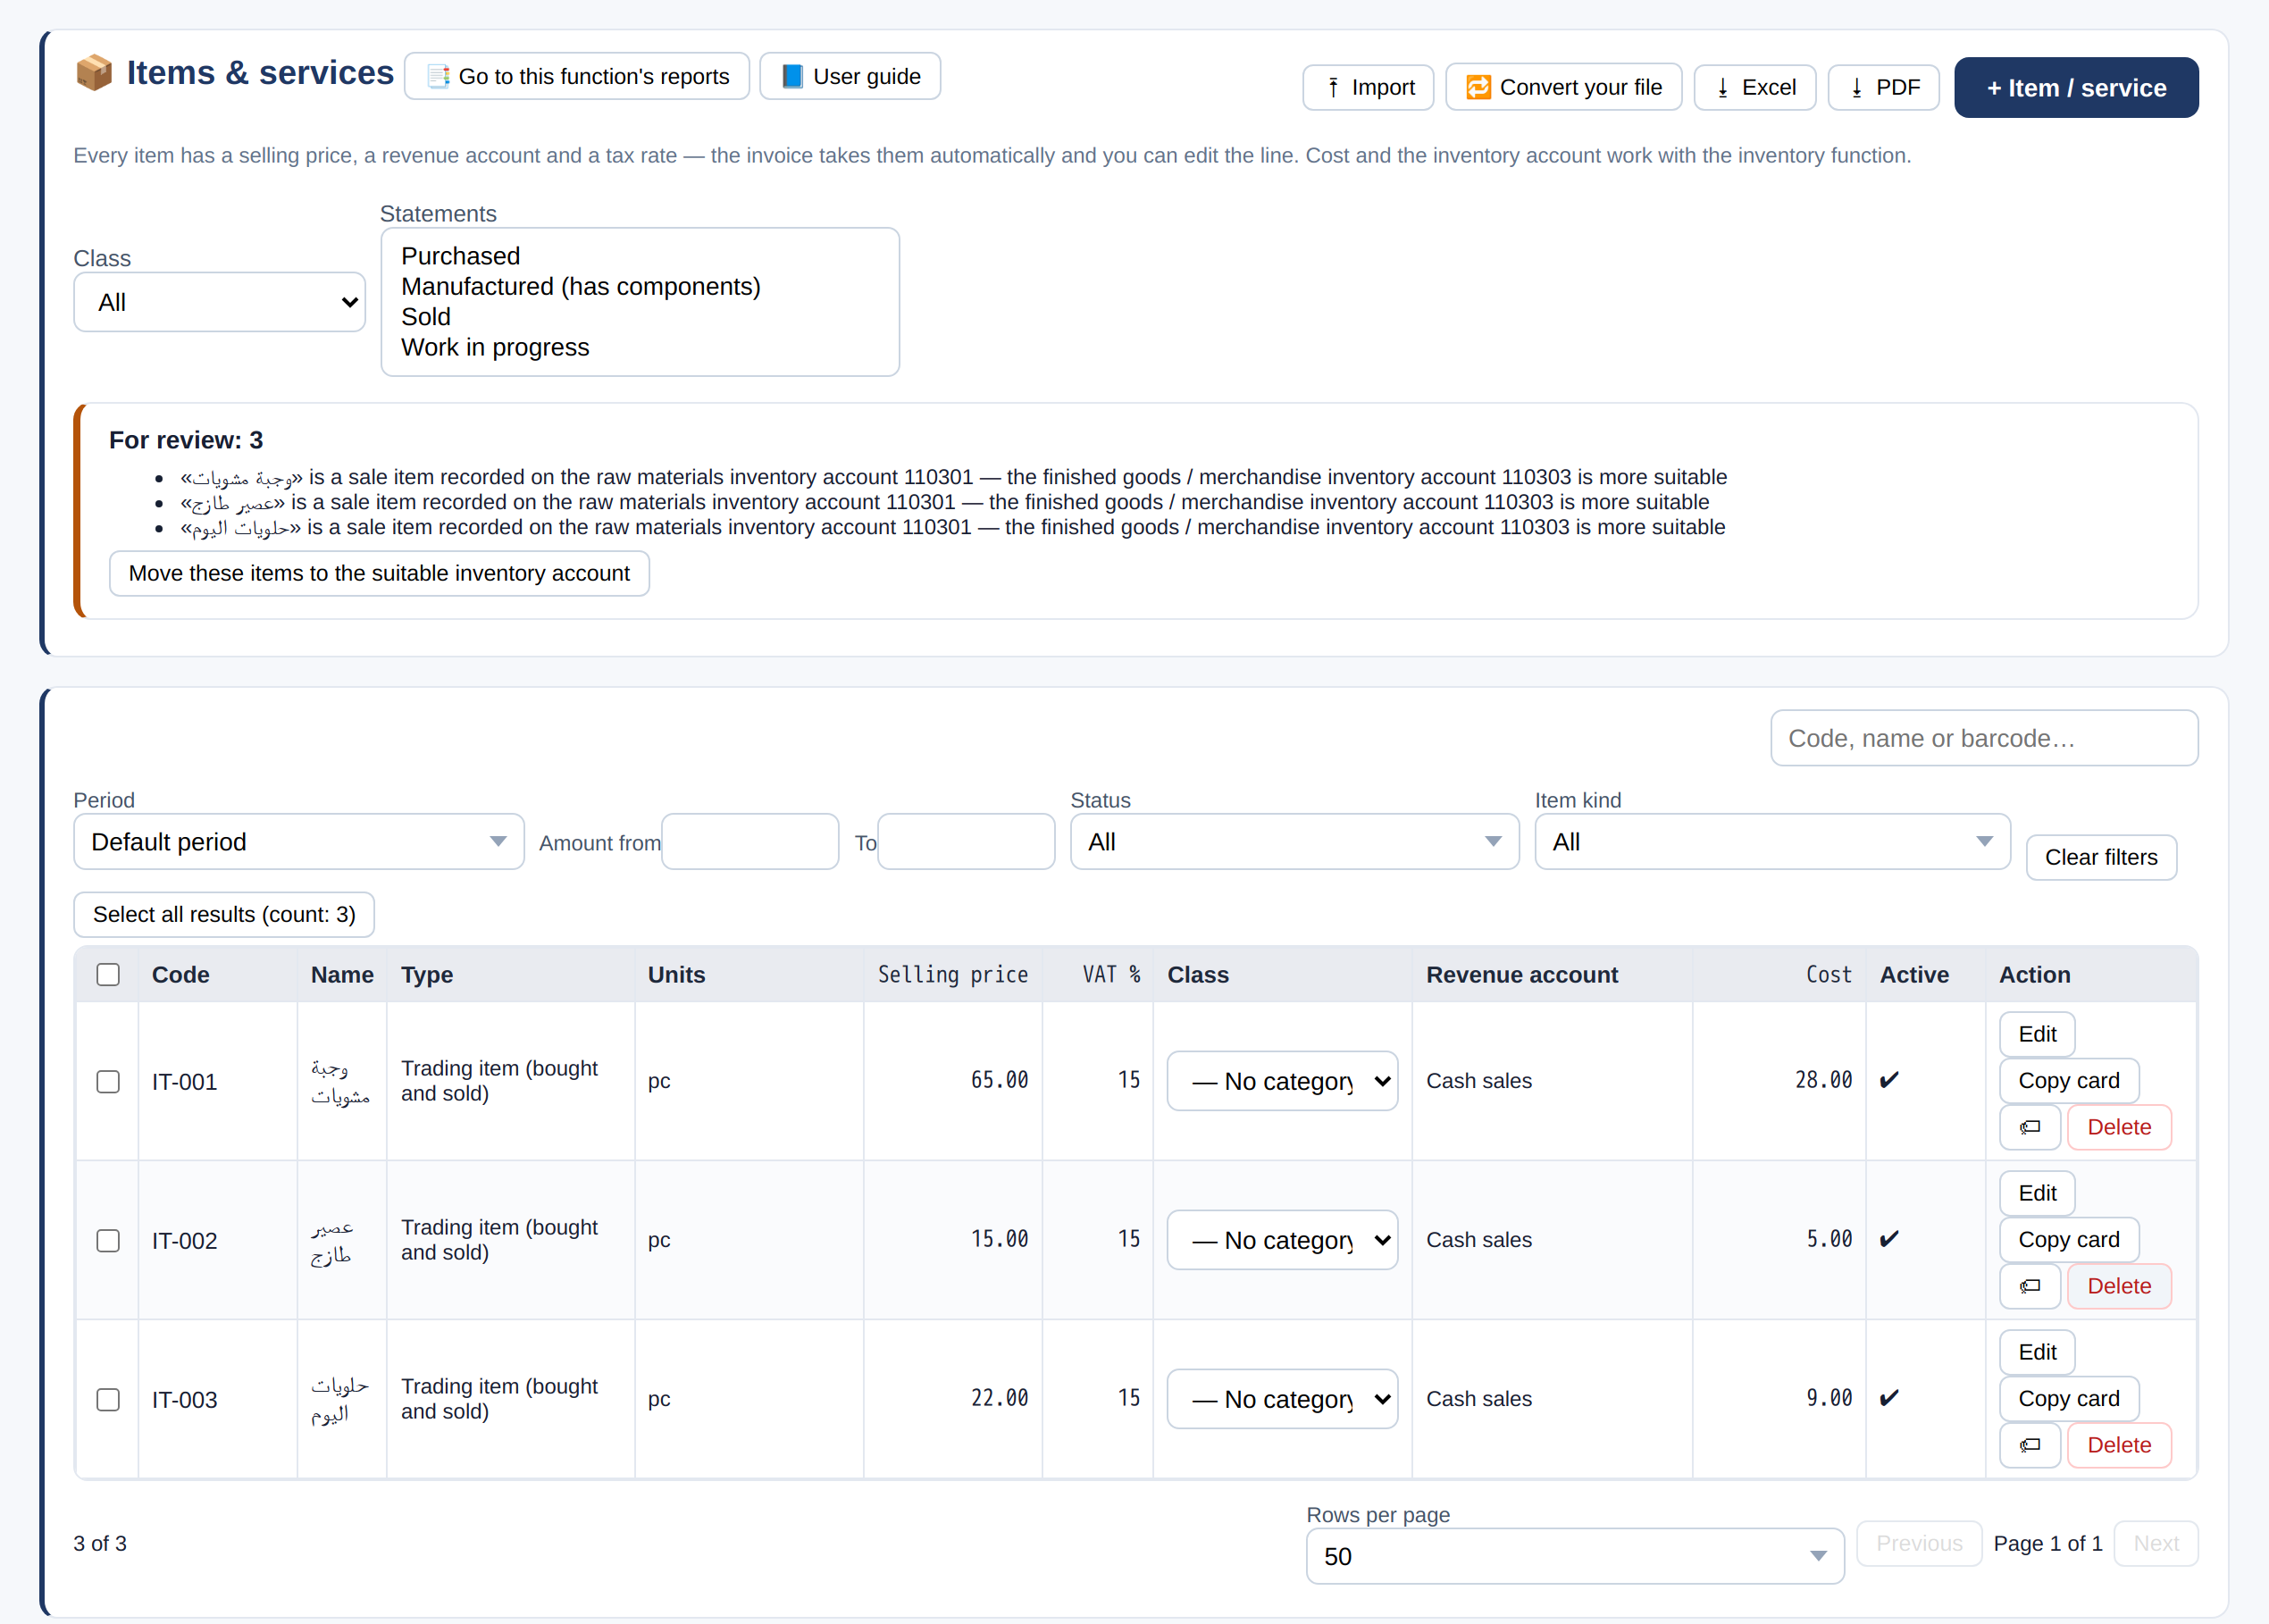
- «+ Item / service»: code, name, type, units, sale price, VAT rate and revenue account.
- Invoices take the price, tax and account from the item automatically; you can edit them on the line.
- Cost and the inventory account work with the inventory function.
Warehouses
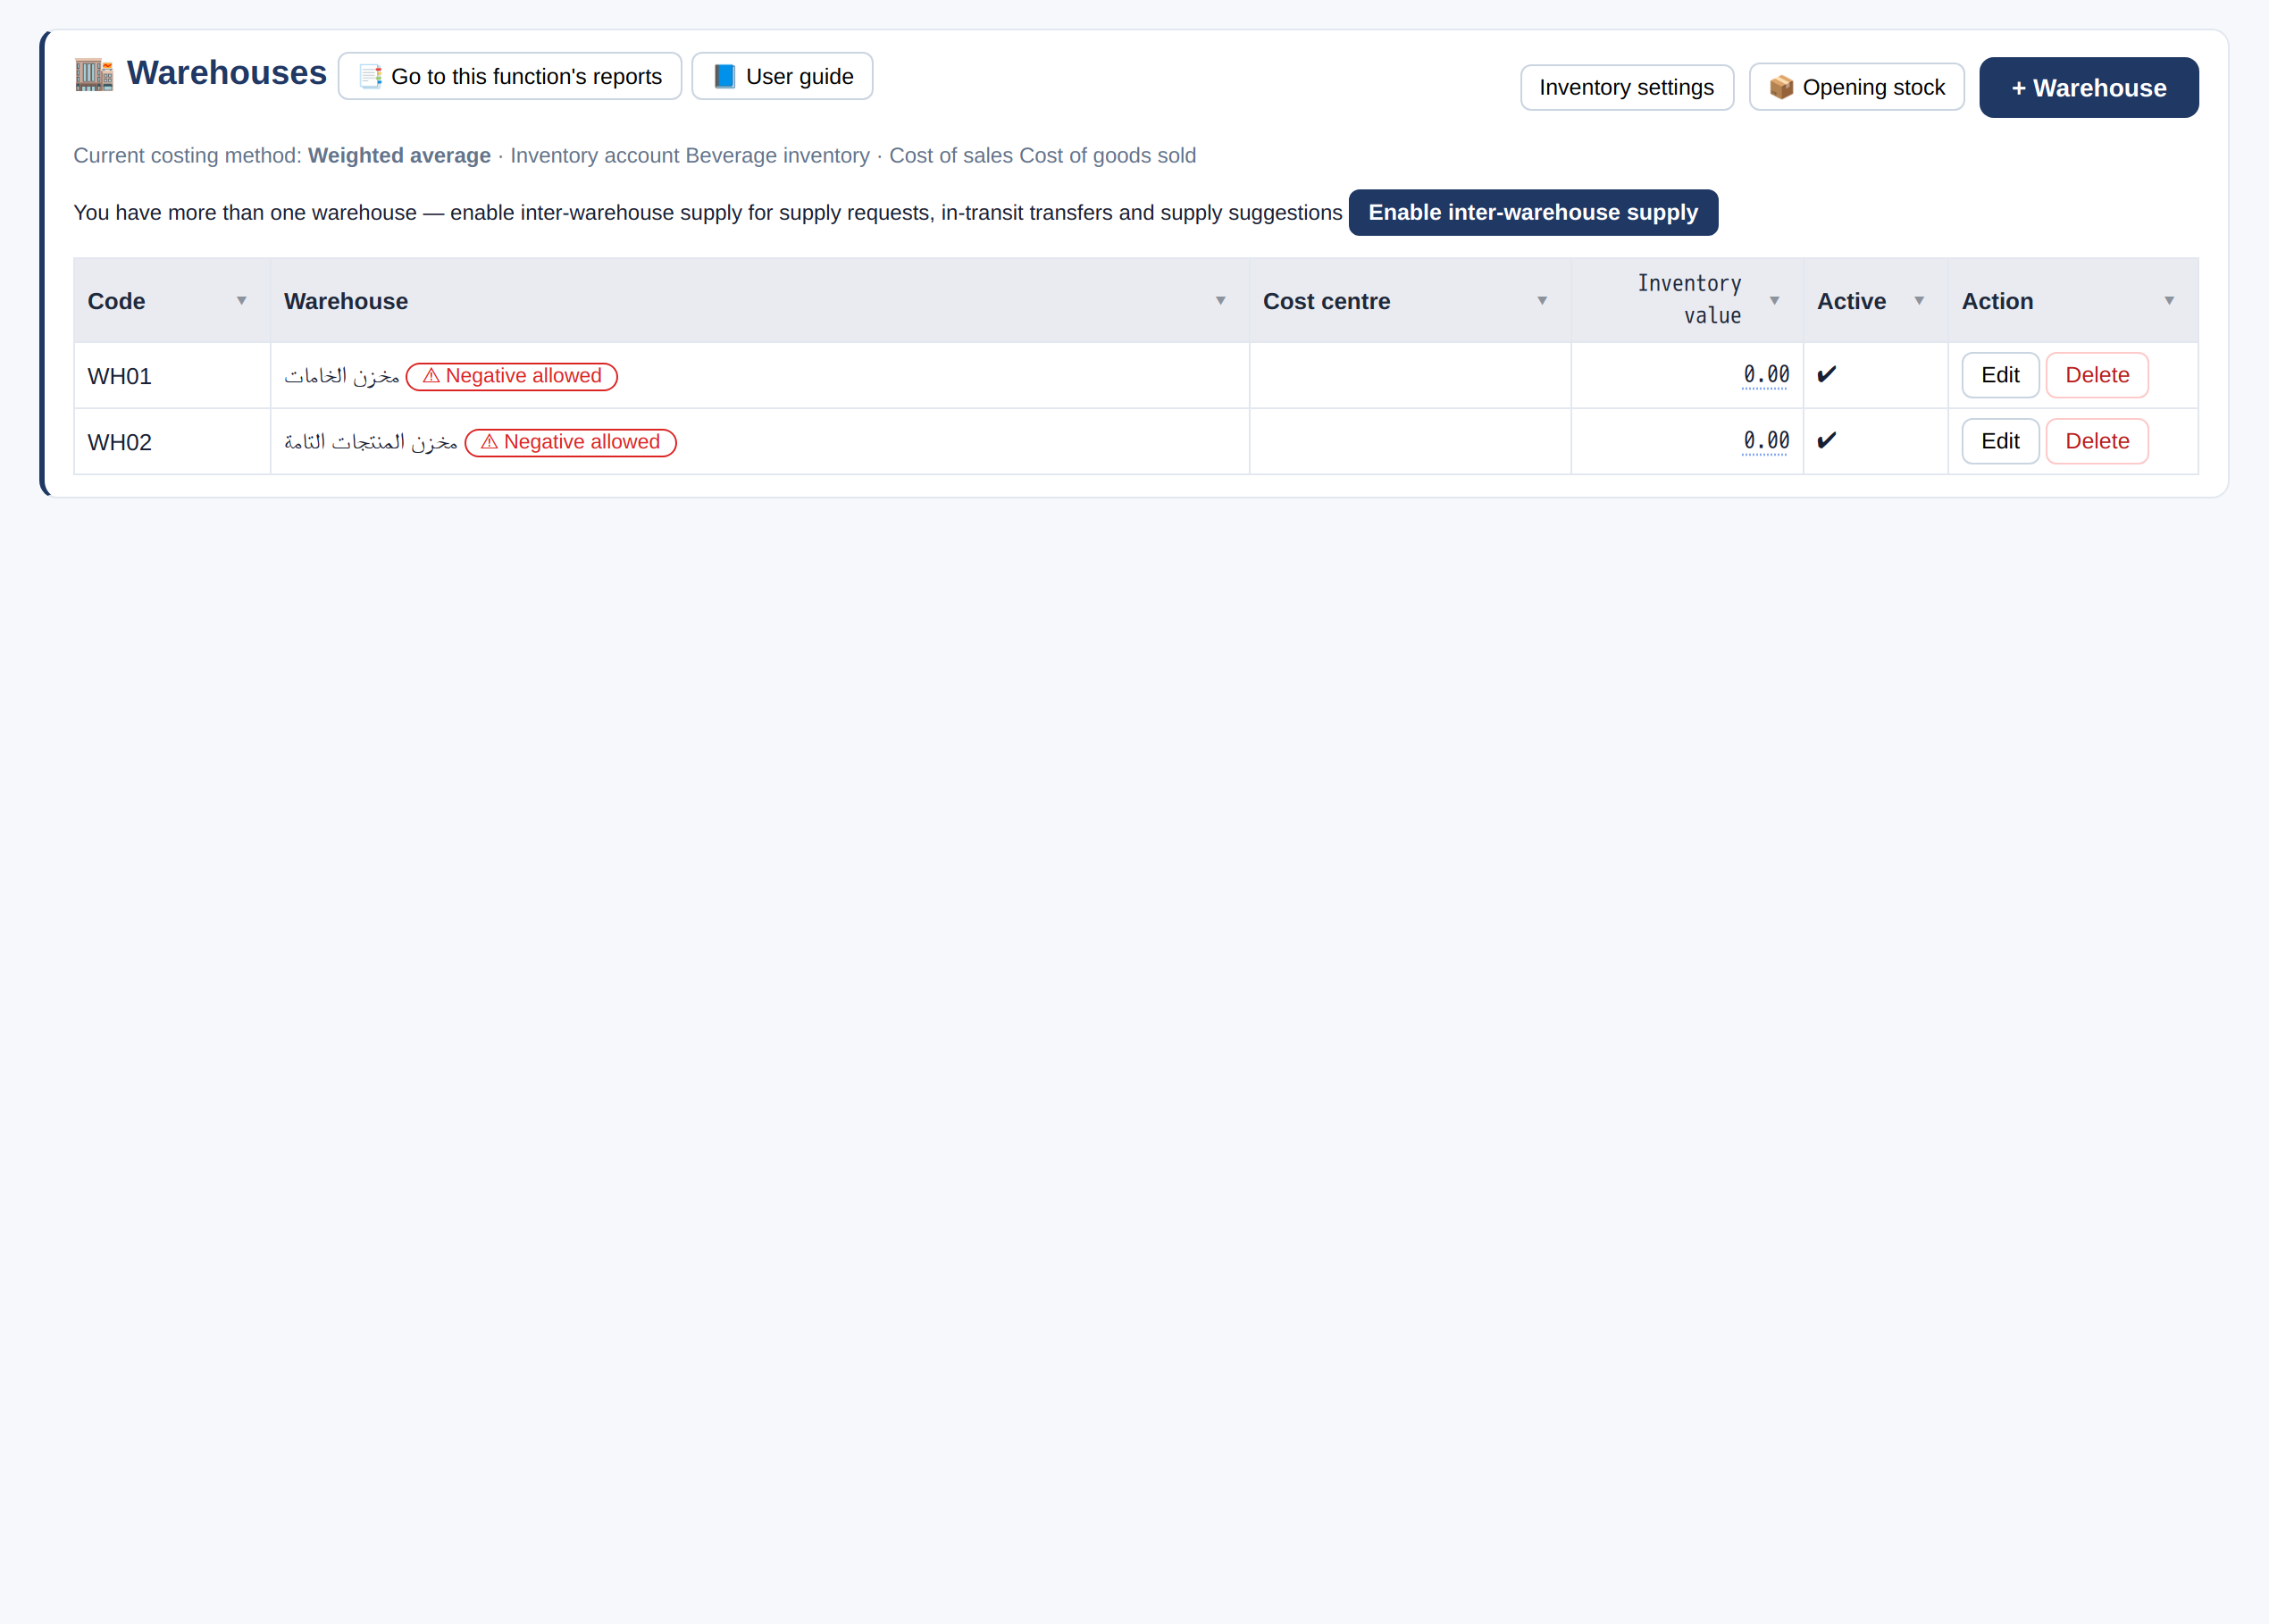
- «+ Warehouse» for each place that holds stock, linked to a cost center.
- «Inventory settings»: costing method (weighted average), inventory account and cost of sales.
Sales and collections
An invoice creates its own journal entry: revenue, VAT and the customer account — plus cost of goods if you track stock.
Sales invoice
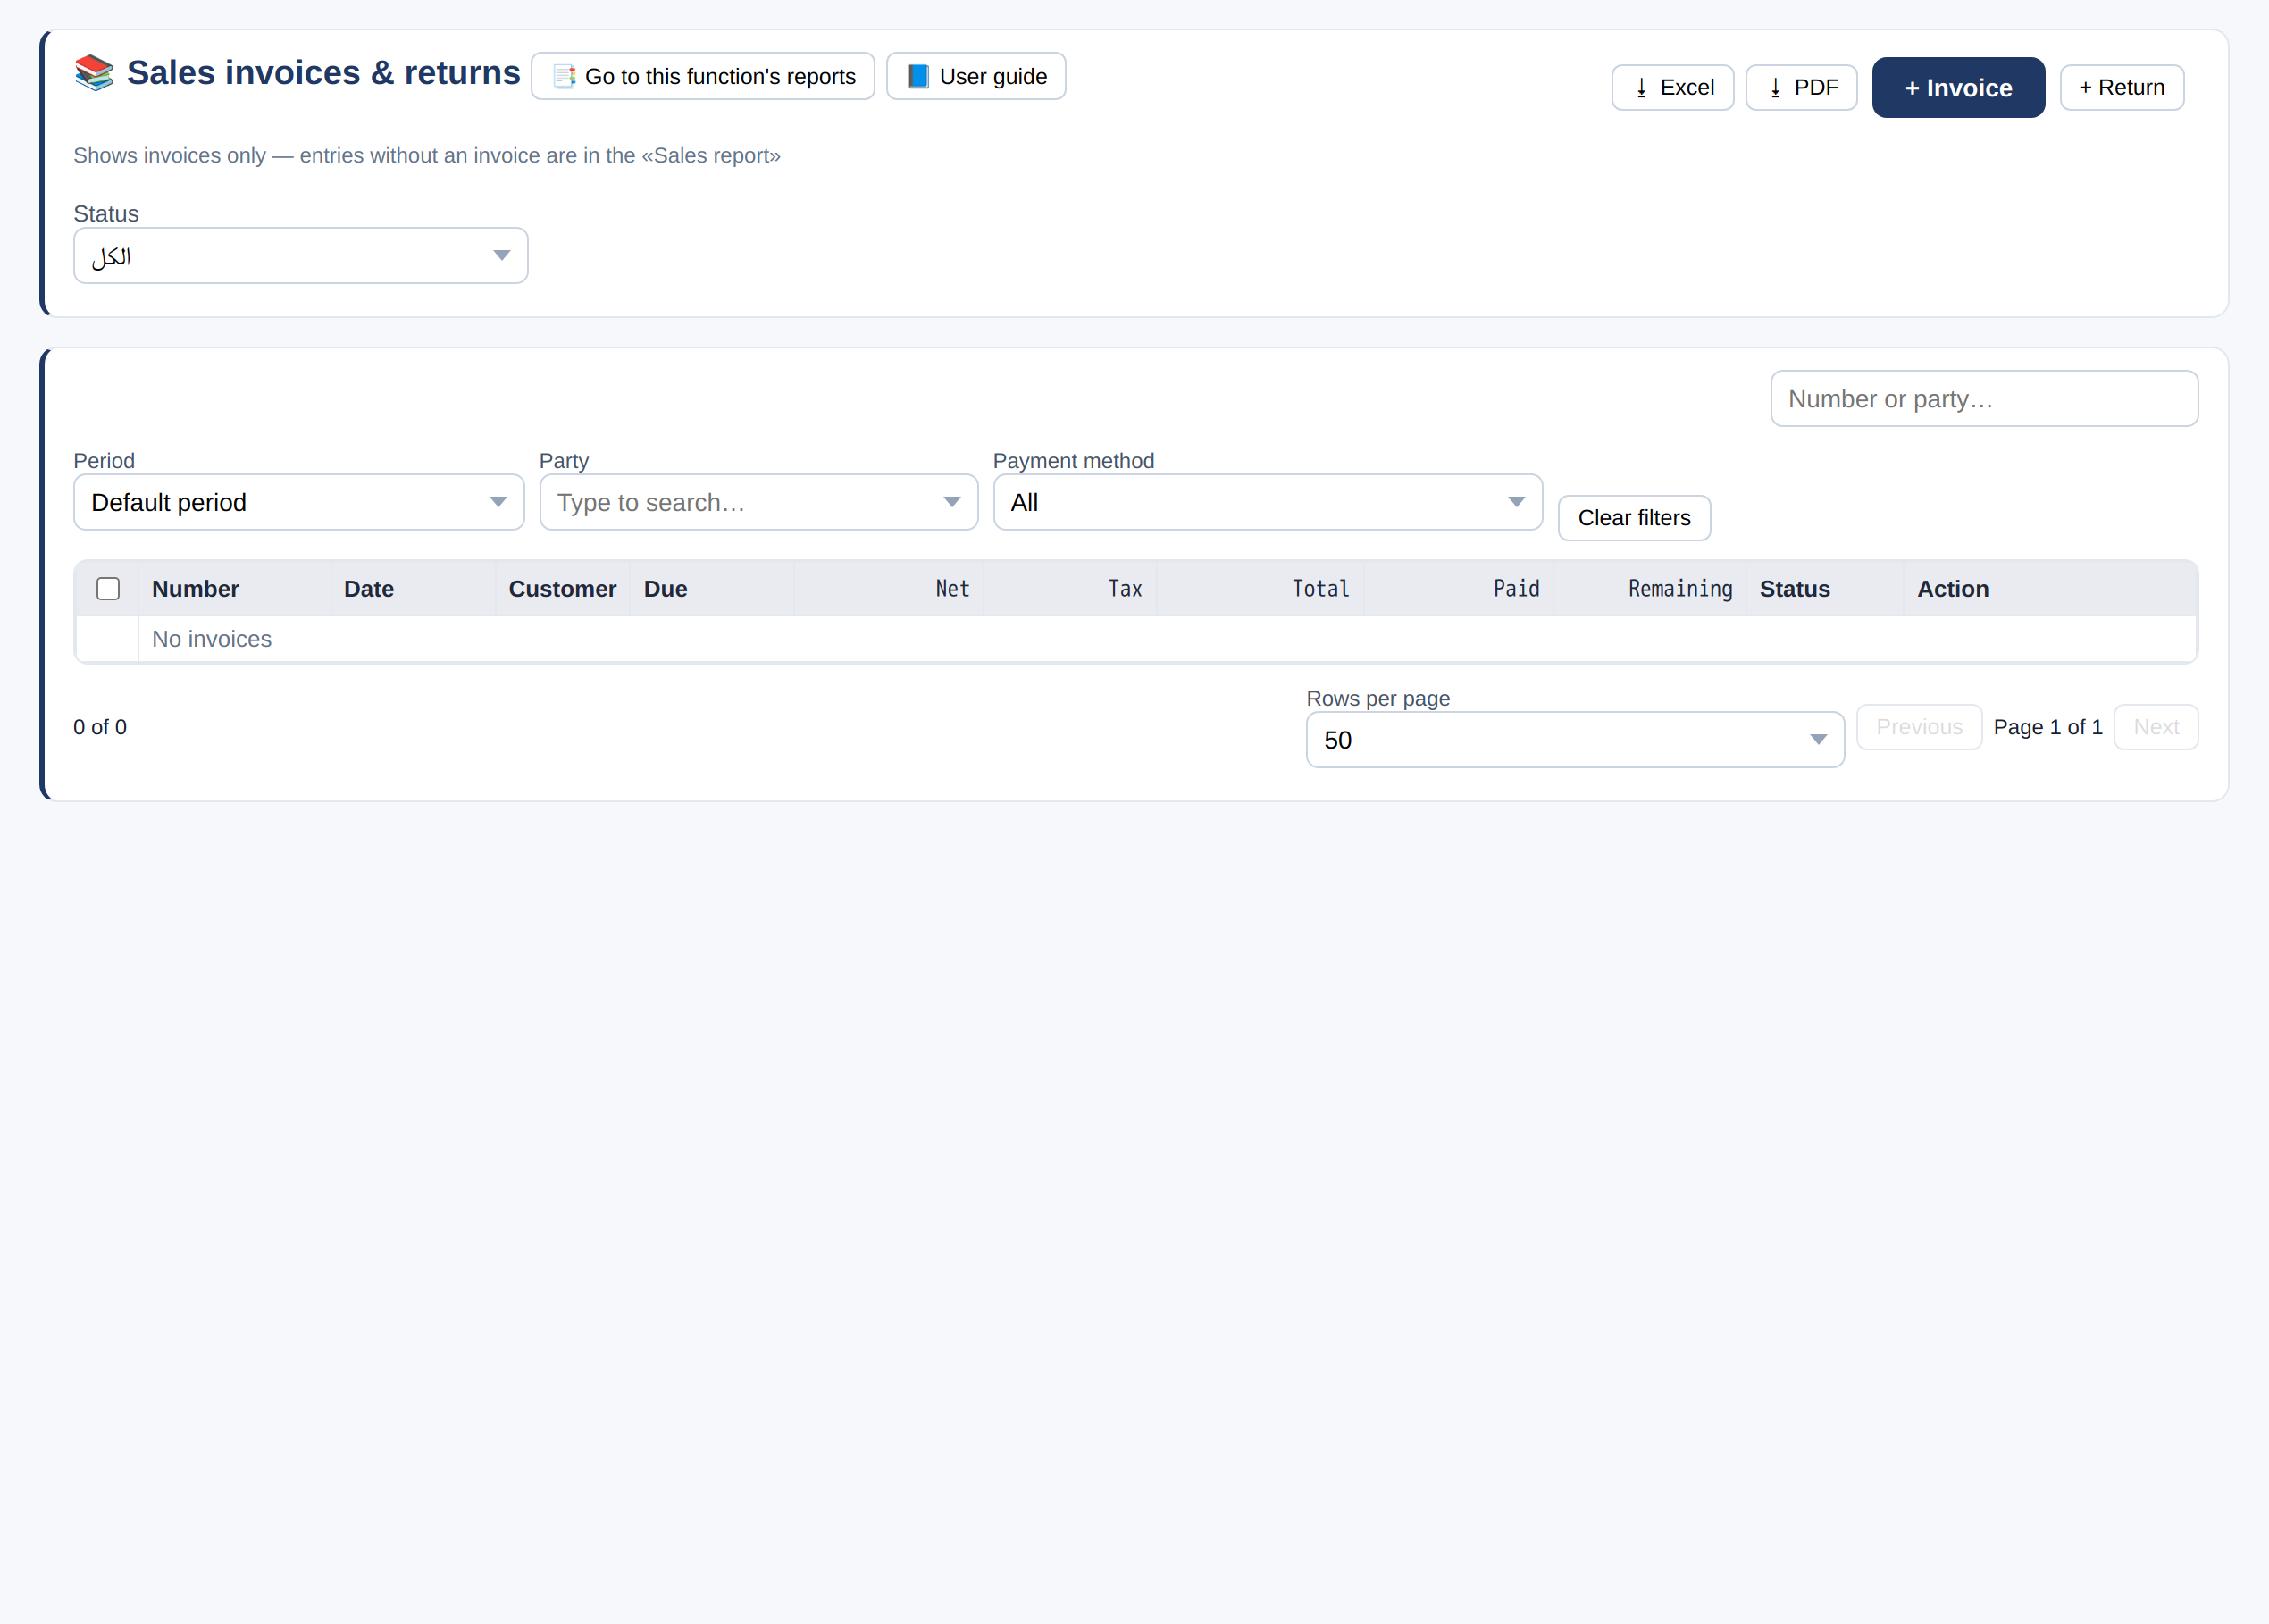
- Choose the customer and date — the due date is calculated from the customer's terms.
- On each line: item or service, quantity, price, discount and VAT rate — the total is calculated for you.
- «+ Line» adds a line; «Invoice discount» applies a discount to the total.
- «Post invoice» records the entry, or «Save as draft» if it is not ready.
- «Invoice list» shows every invoice with its status, paid and outstanding amounts.
Customer receipt
- Choose the customer, enter the amount received and the account it went into (cash or bank).
- «Auto-allocate to oldest» settles the oldest invoices first — or pick specific invoices from «Show open invoices».
- Enter the reference (cheque or transfer number) and save.
Point of sale (cashier)
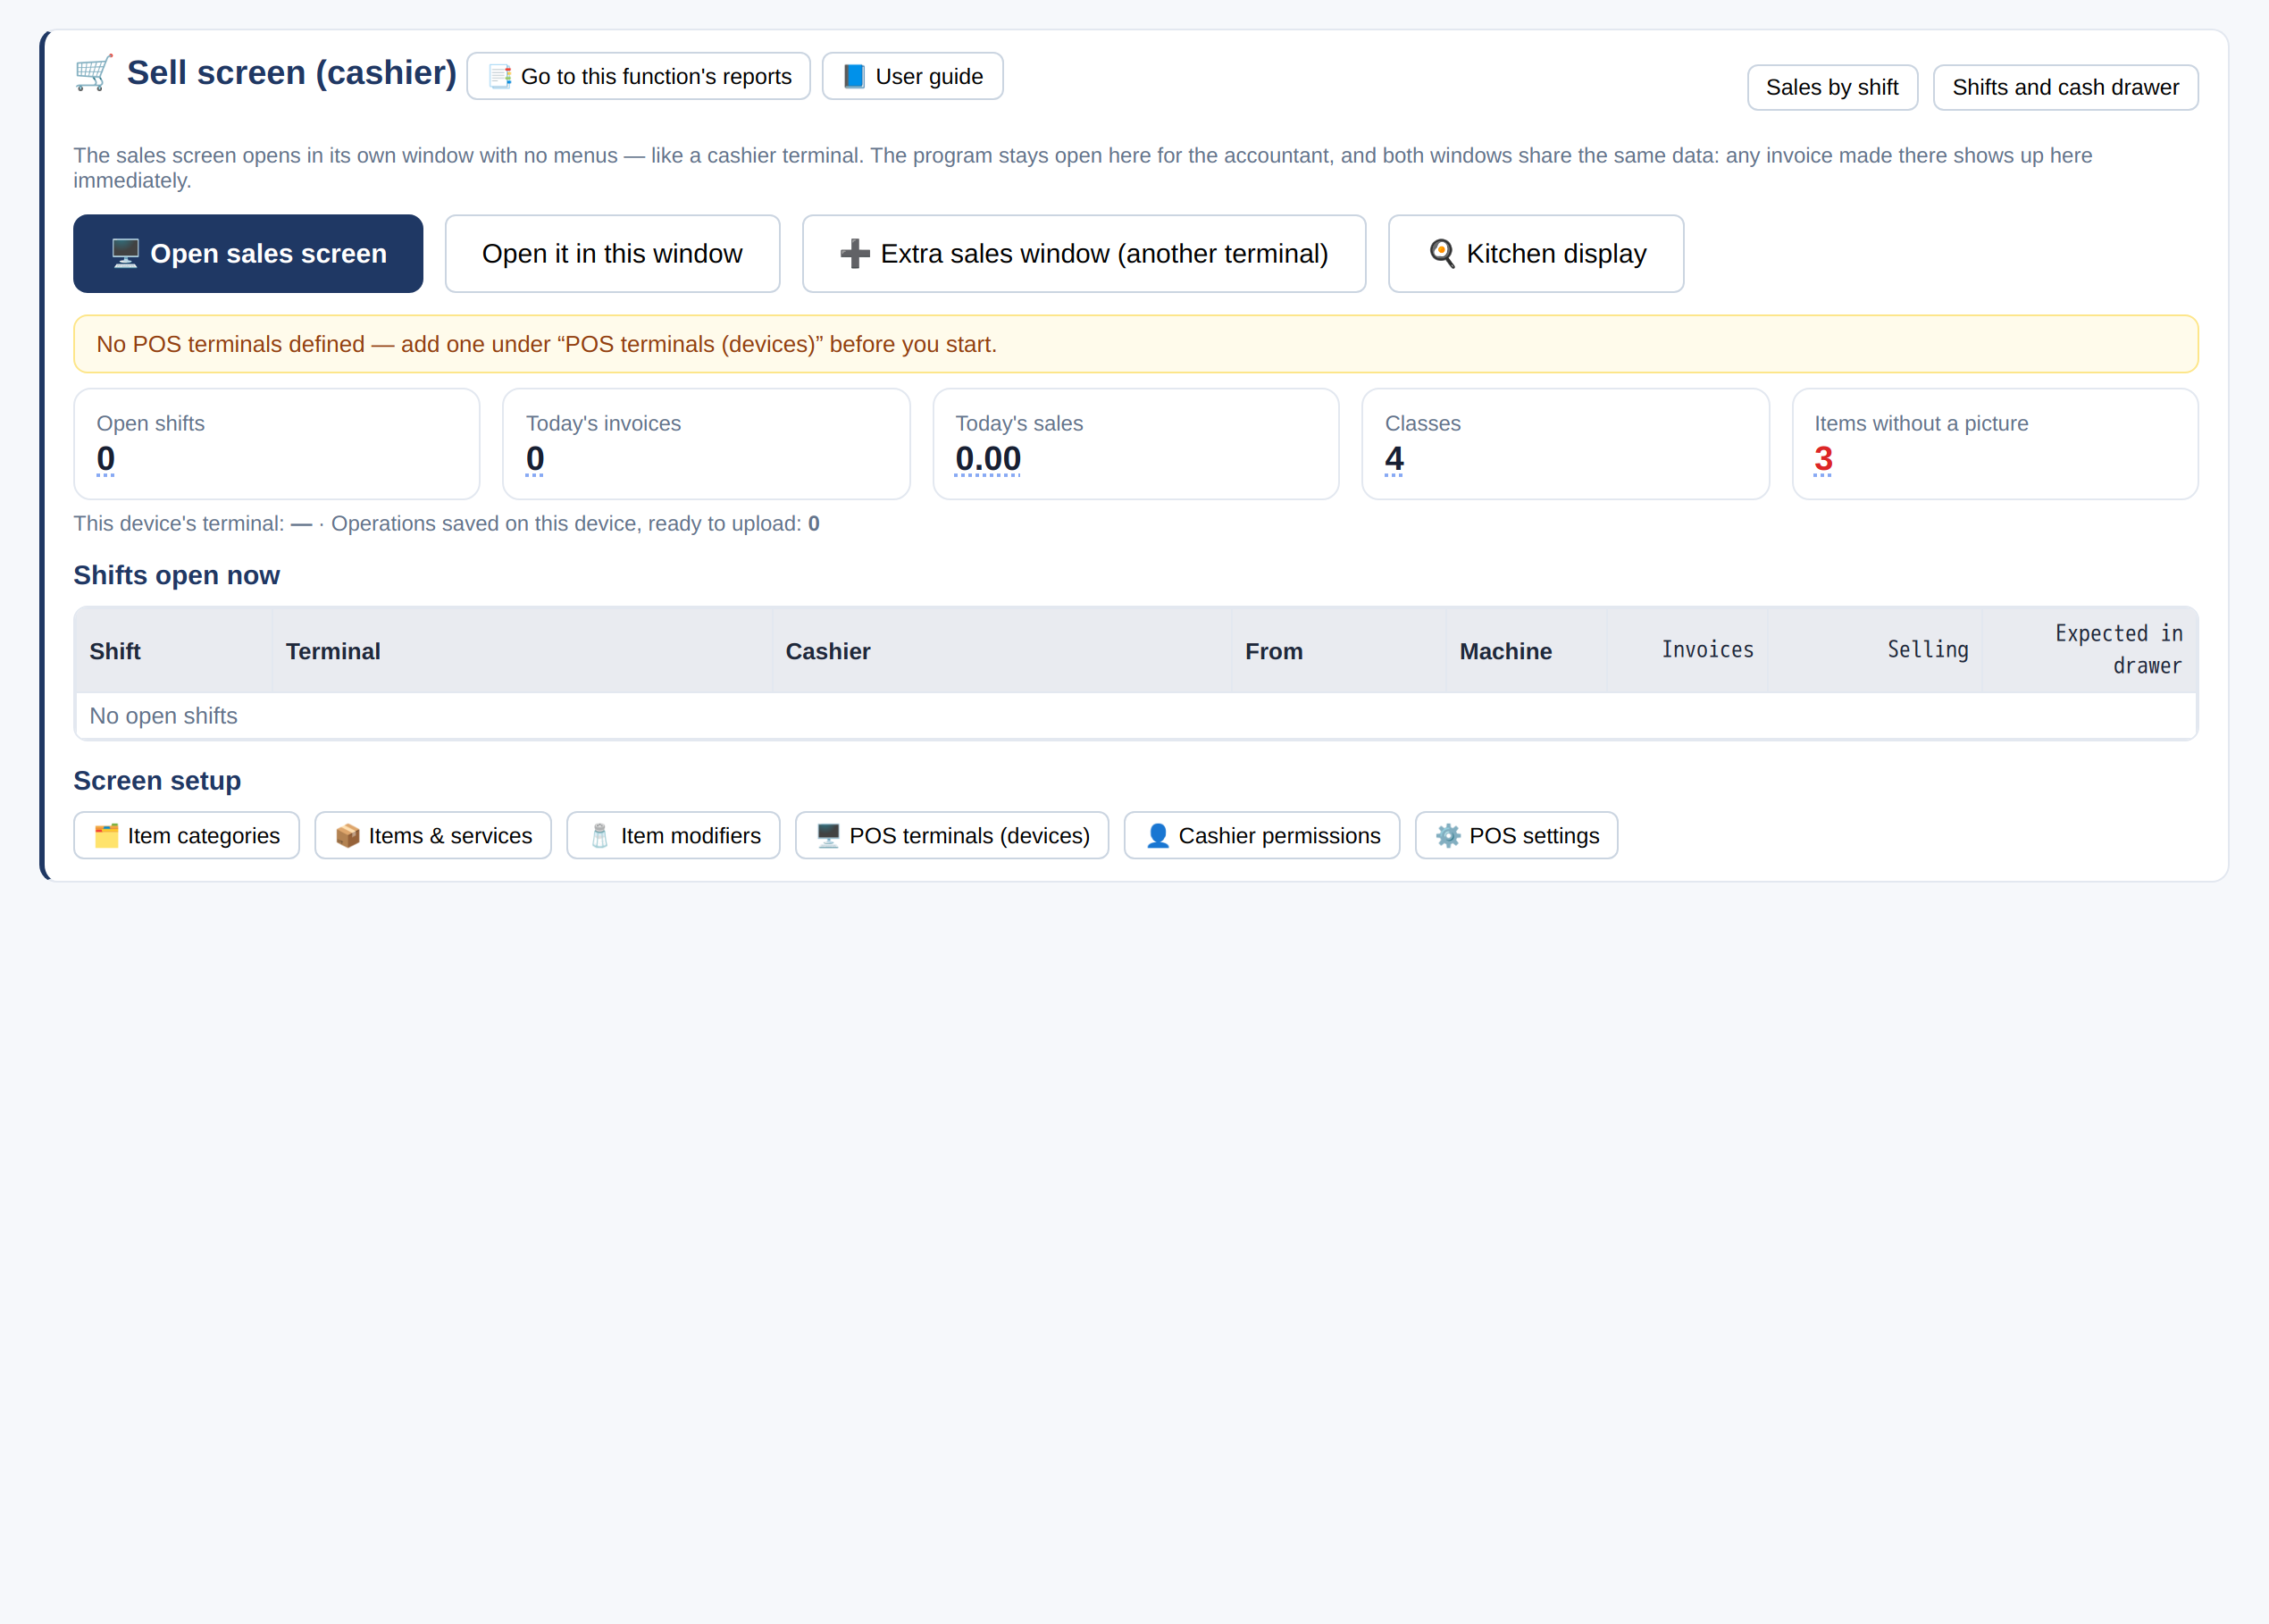
- Every sale happens inside a shift: choose the POS, the date and the opening cash balance.
- Set the branch and the warehouse to issue from, then «Open shift and start selling».
- At the end of the shift you close it with the actual count, and the program shows any difference.
- The sales screen opens directly in its own window, and each point of sale is run from one window only so invoices never mix — use «➕ Extra sales window (another terminal)» for a second point of sale.
- For restaurants: tables come from the floor plan and bookings from table reservations (the next sections).
- A deposit is recorded with the payer’s mobile number and name, and the cashier sees it as «Deposit discount» on any later invoice.
Deposits
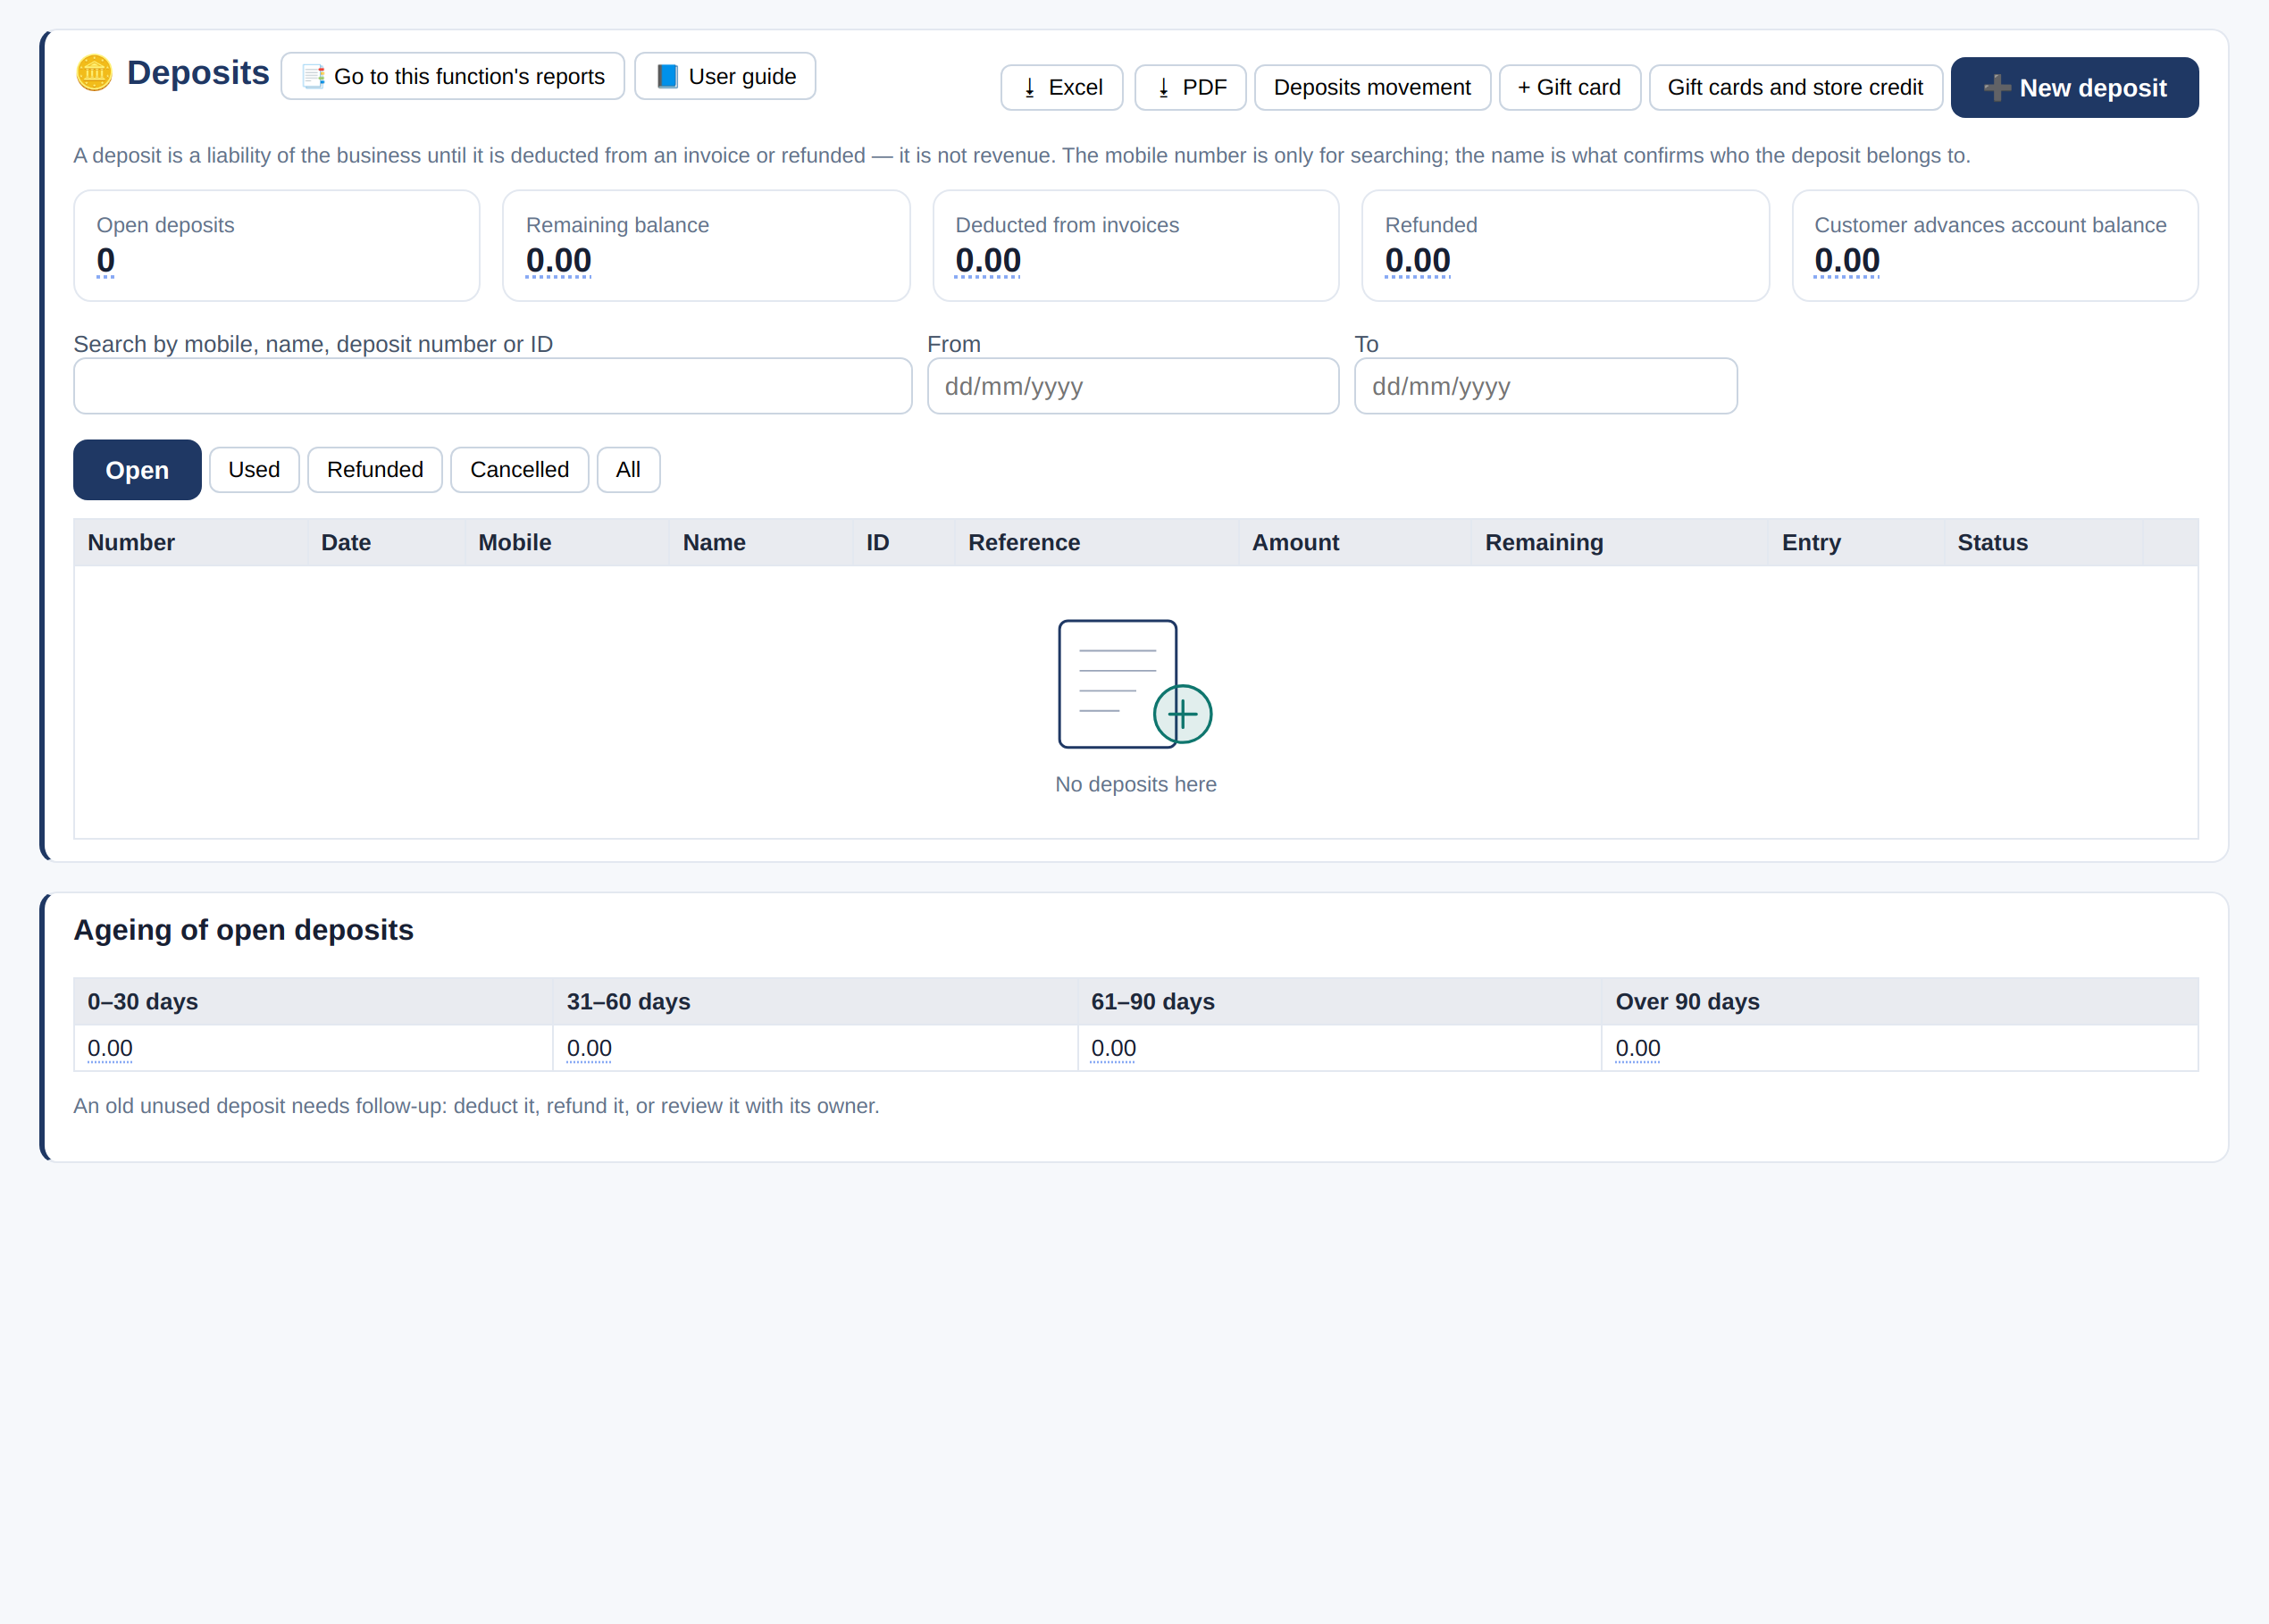
- «➕ New deposit»: the payer’s mobile number, name, amount and reference.
- A deposit is a liability of the business until it is deducted from an invoice or refunded — it is not revenue.
- At the till the cashier sees «Deposit discount» above the payment methods, and it can be deducted from any later invoice.
- The «Open», «Used», «Refunded» and «All» tabs, and the «Ageing of open deposits» table shows what needs follow-up.
Floor plan and tables
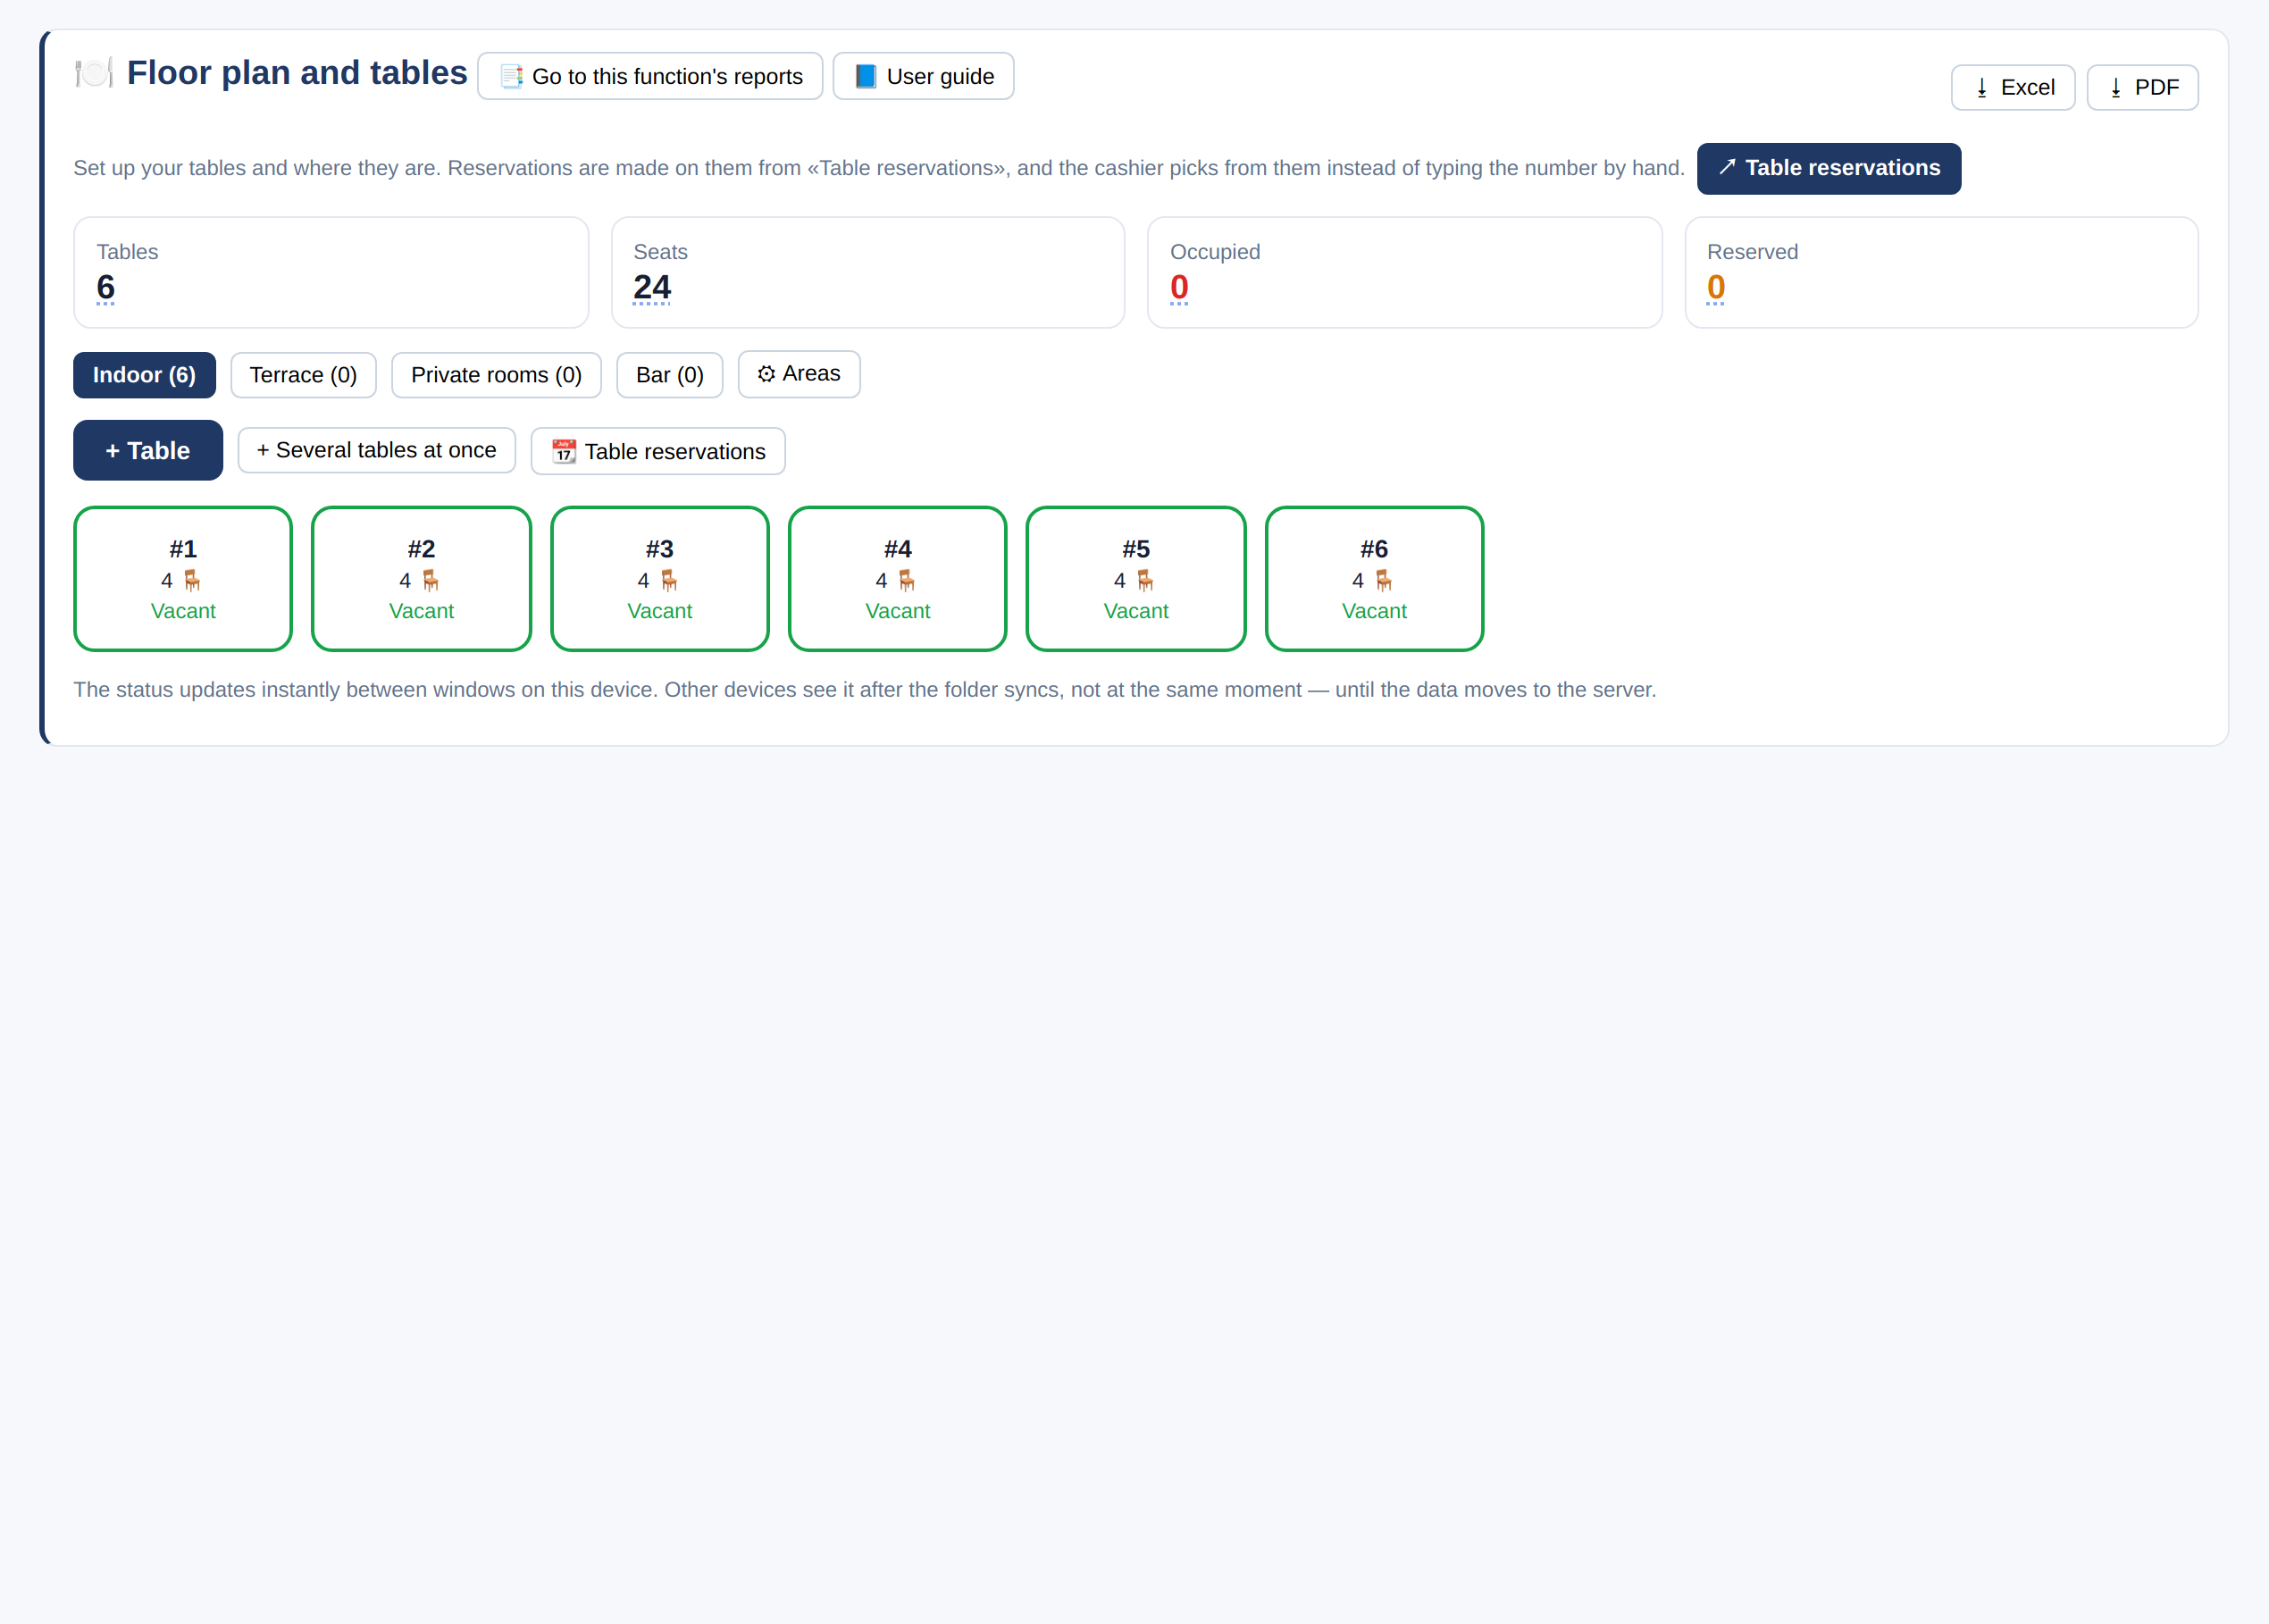
- Split the venue into areas: indoor hall, outdoor terrace, private rooms and bar.
- «+ Table» for one table, or «+ Several tables at once» to create numbered tables with a seat count each.
- The cards at the top show tables, seats, occupied and reserved right now.
- The cashier picks the table from the plan instead of typing its number, and the table shows the order’s name or number.
Table reservations
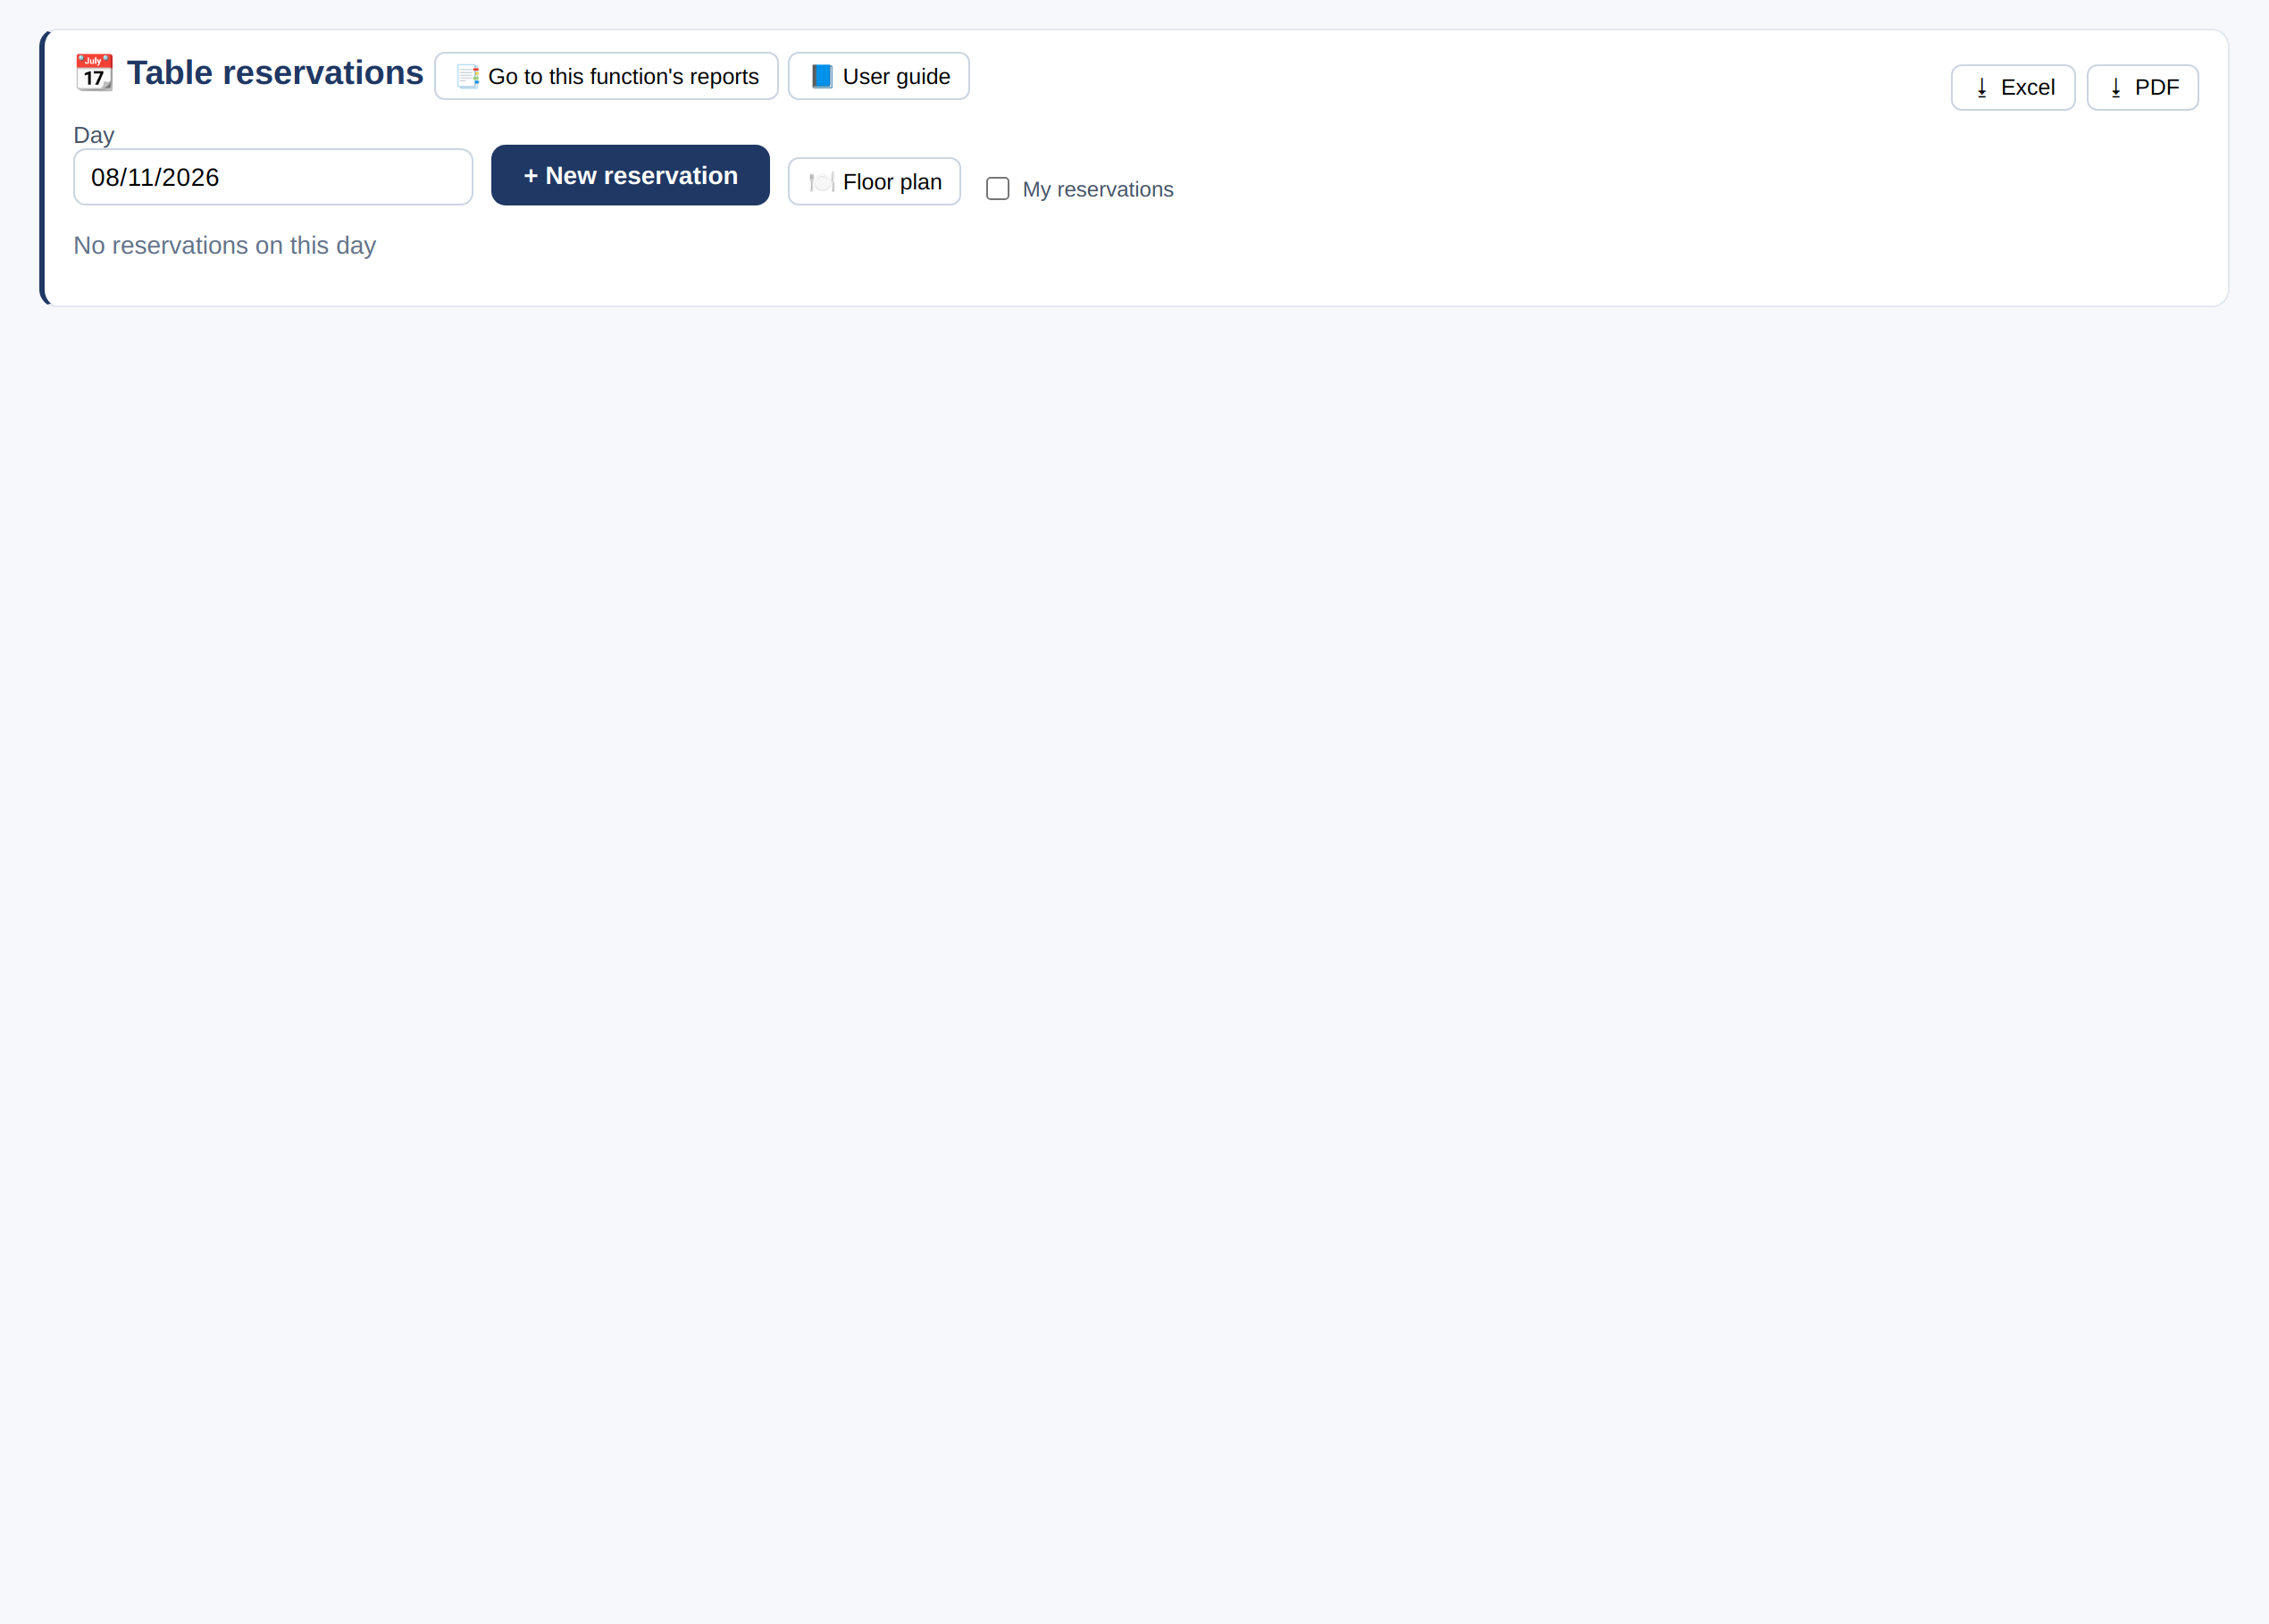
- Choose the day, then «+ New reservation»: the table, the guest’s name, mobile number, party size and time.
- The program warns you if the table is booked close to the same time, or the party is larger than its seats.
- «🍽️ Floor plan» to go back to the plan, and cancel a reservation when needed.
Property unit sale contracts: returned payments and cancellation
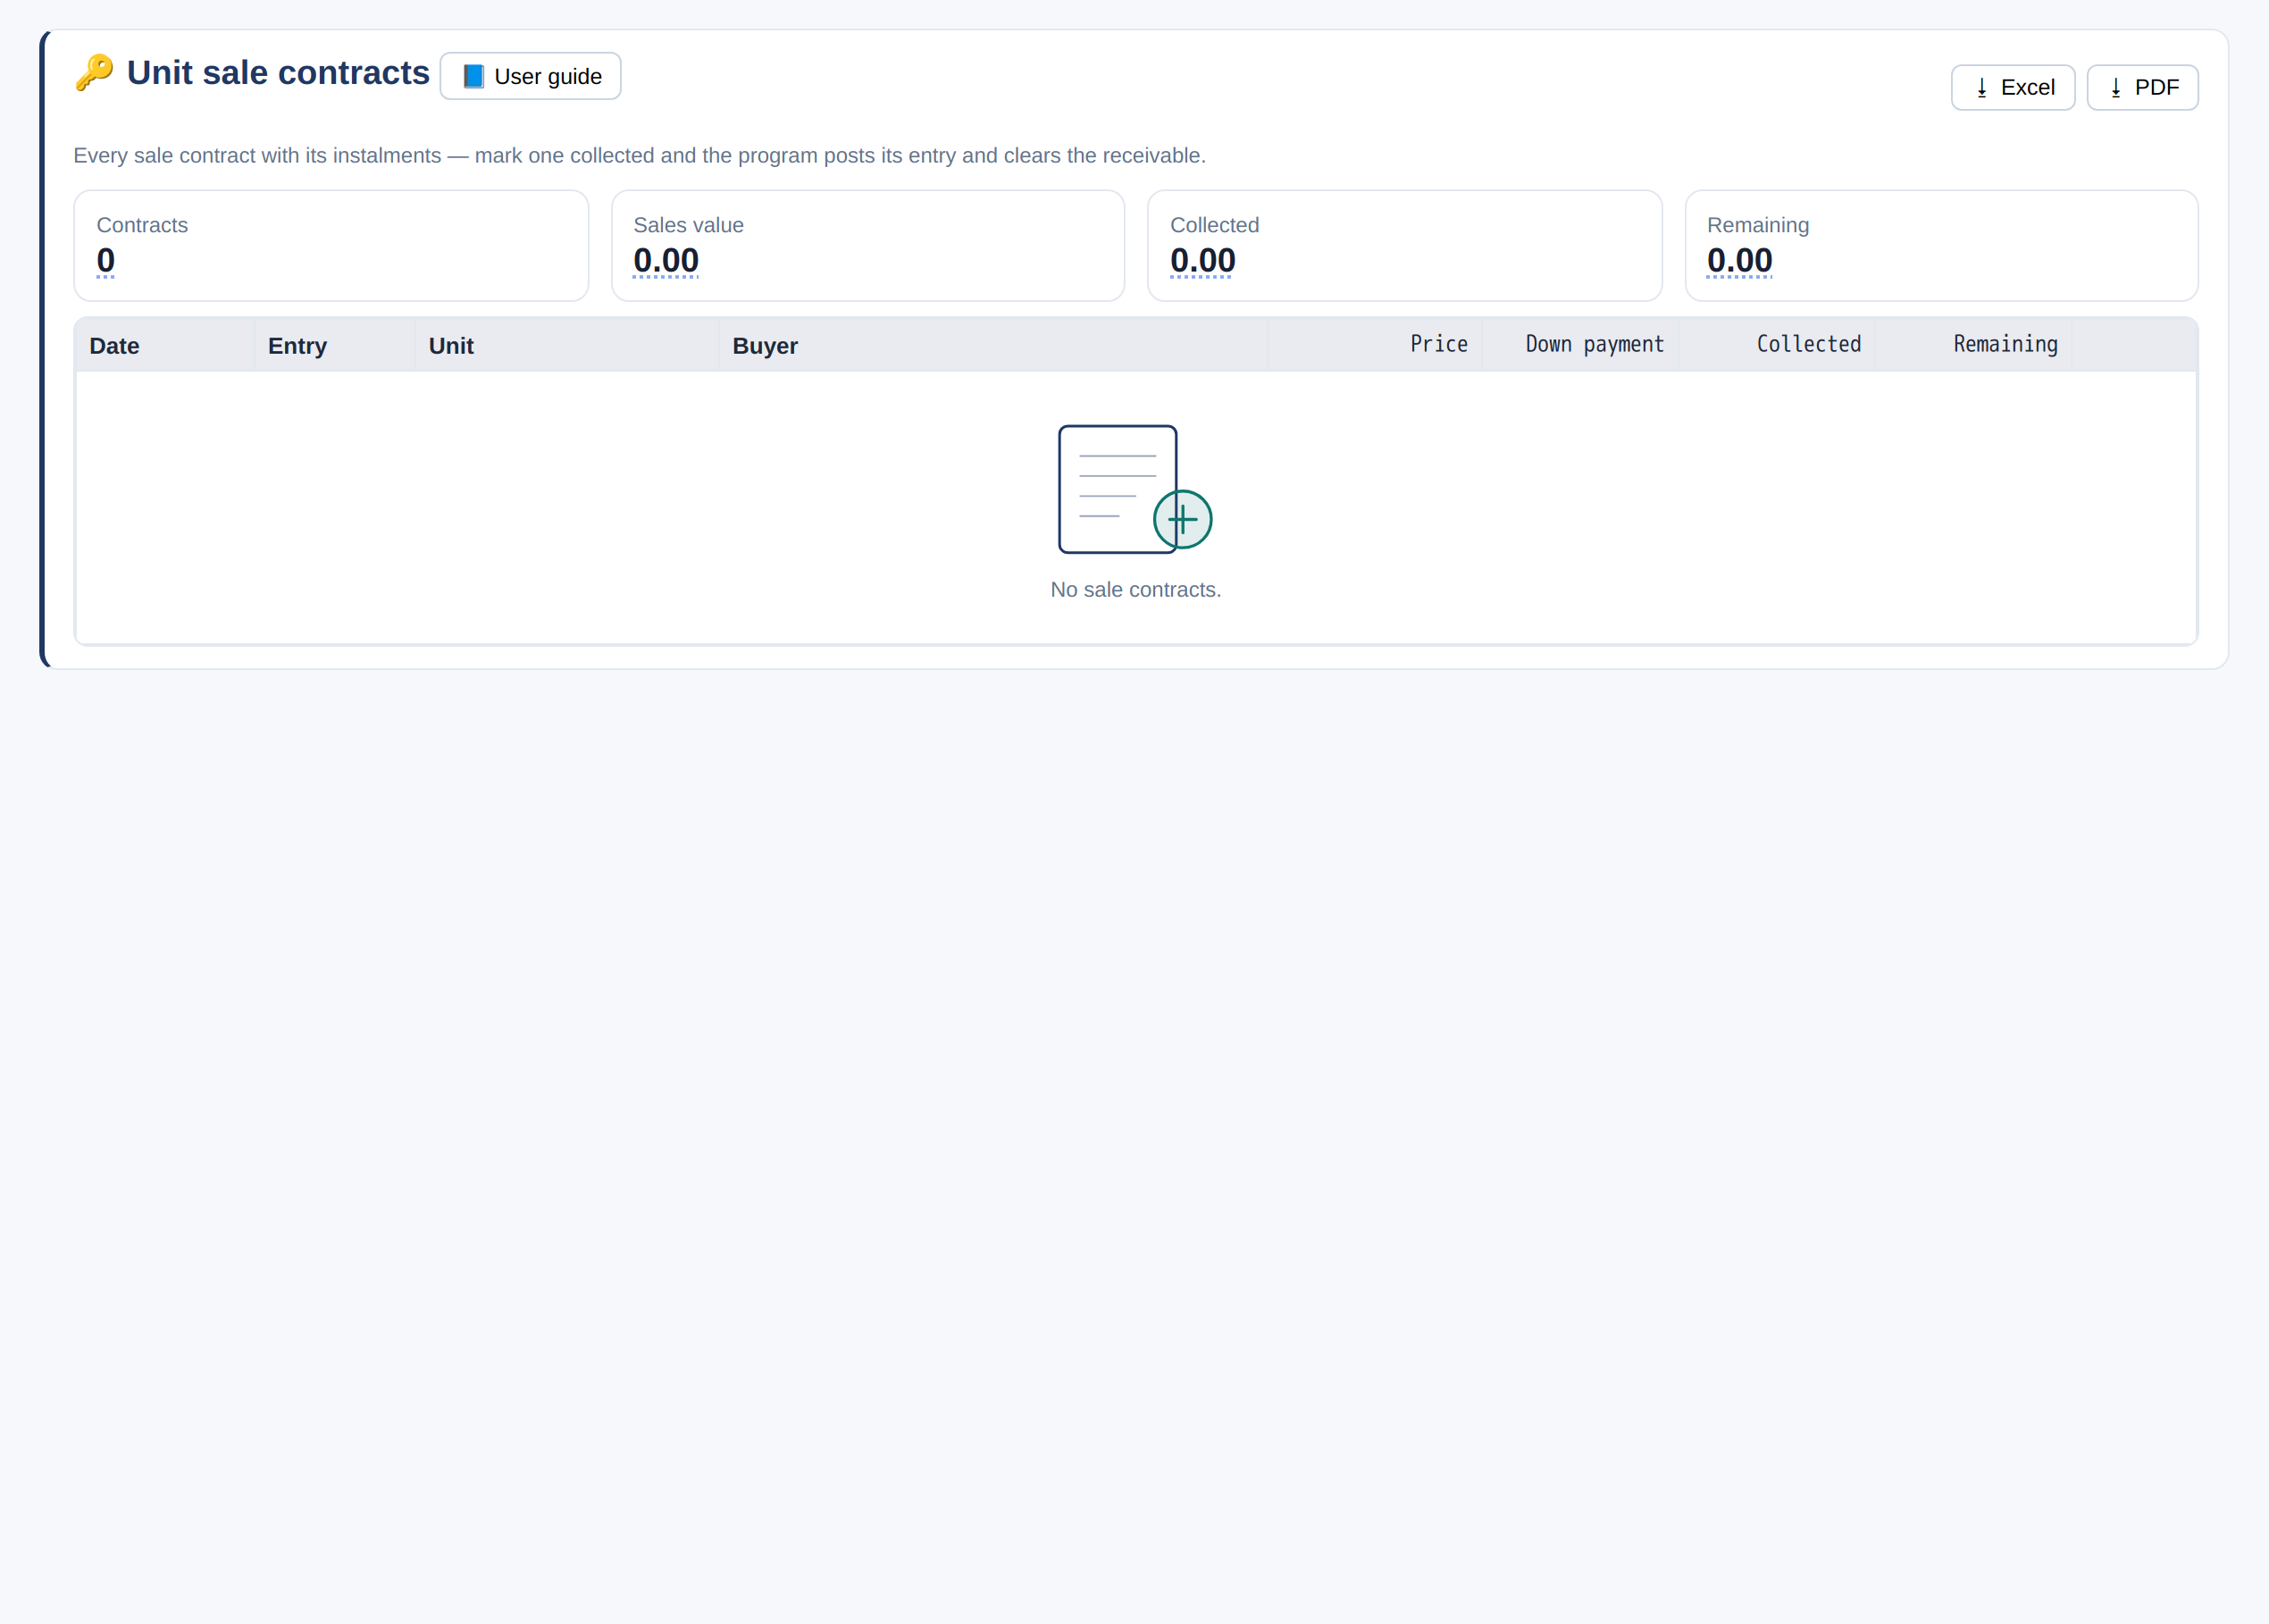
- Each sale contract has its payment schedule, and collected payments show as collected.
- If a cheque or transfer bounces: the undo button next to the collected payment — a reversing entry is posted, and the payment returns to uncollected and can be collected again.
- If the buyer withdraws: the cancel button next to the contract, then the cancellation date, the reason, and confirm — every entry of the contract (the sale and the collections) is reversed, the contract becomes void, and the unit is available for sale again.
Purchases and payments
The mirror of sales: the supplier invoice creates its entry, and the payment settles it.
Purchase invoice
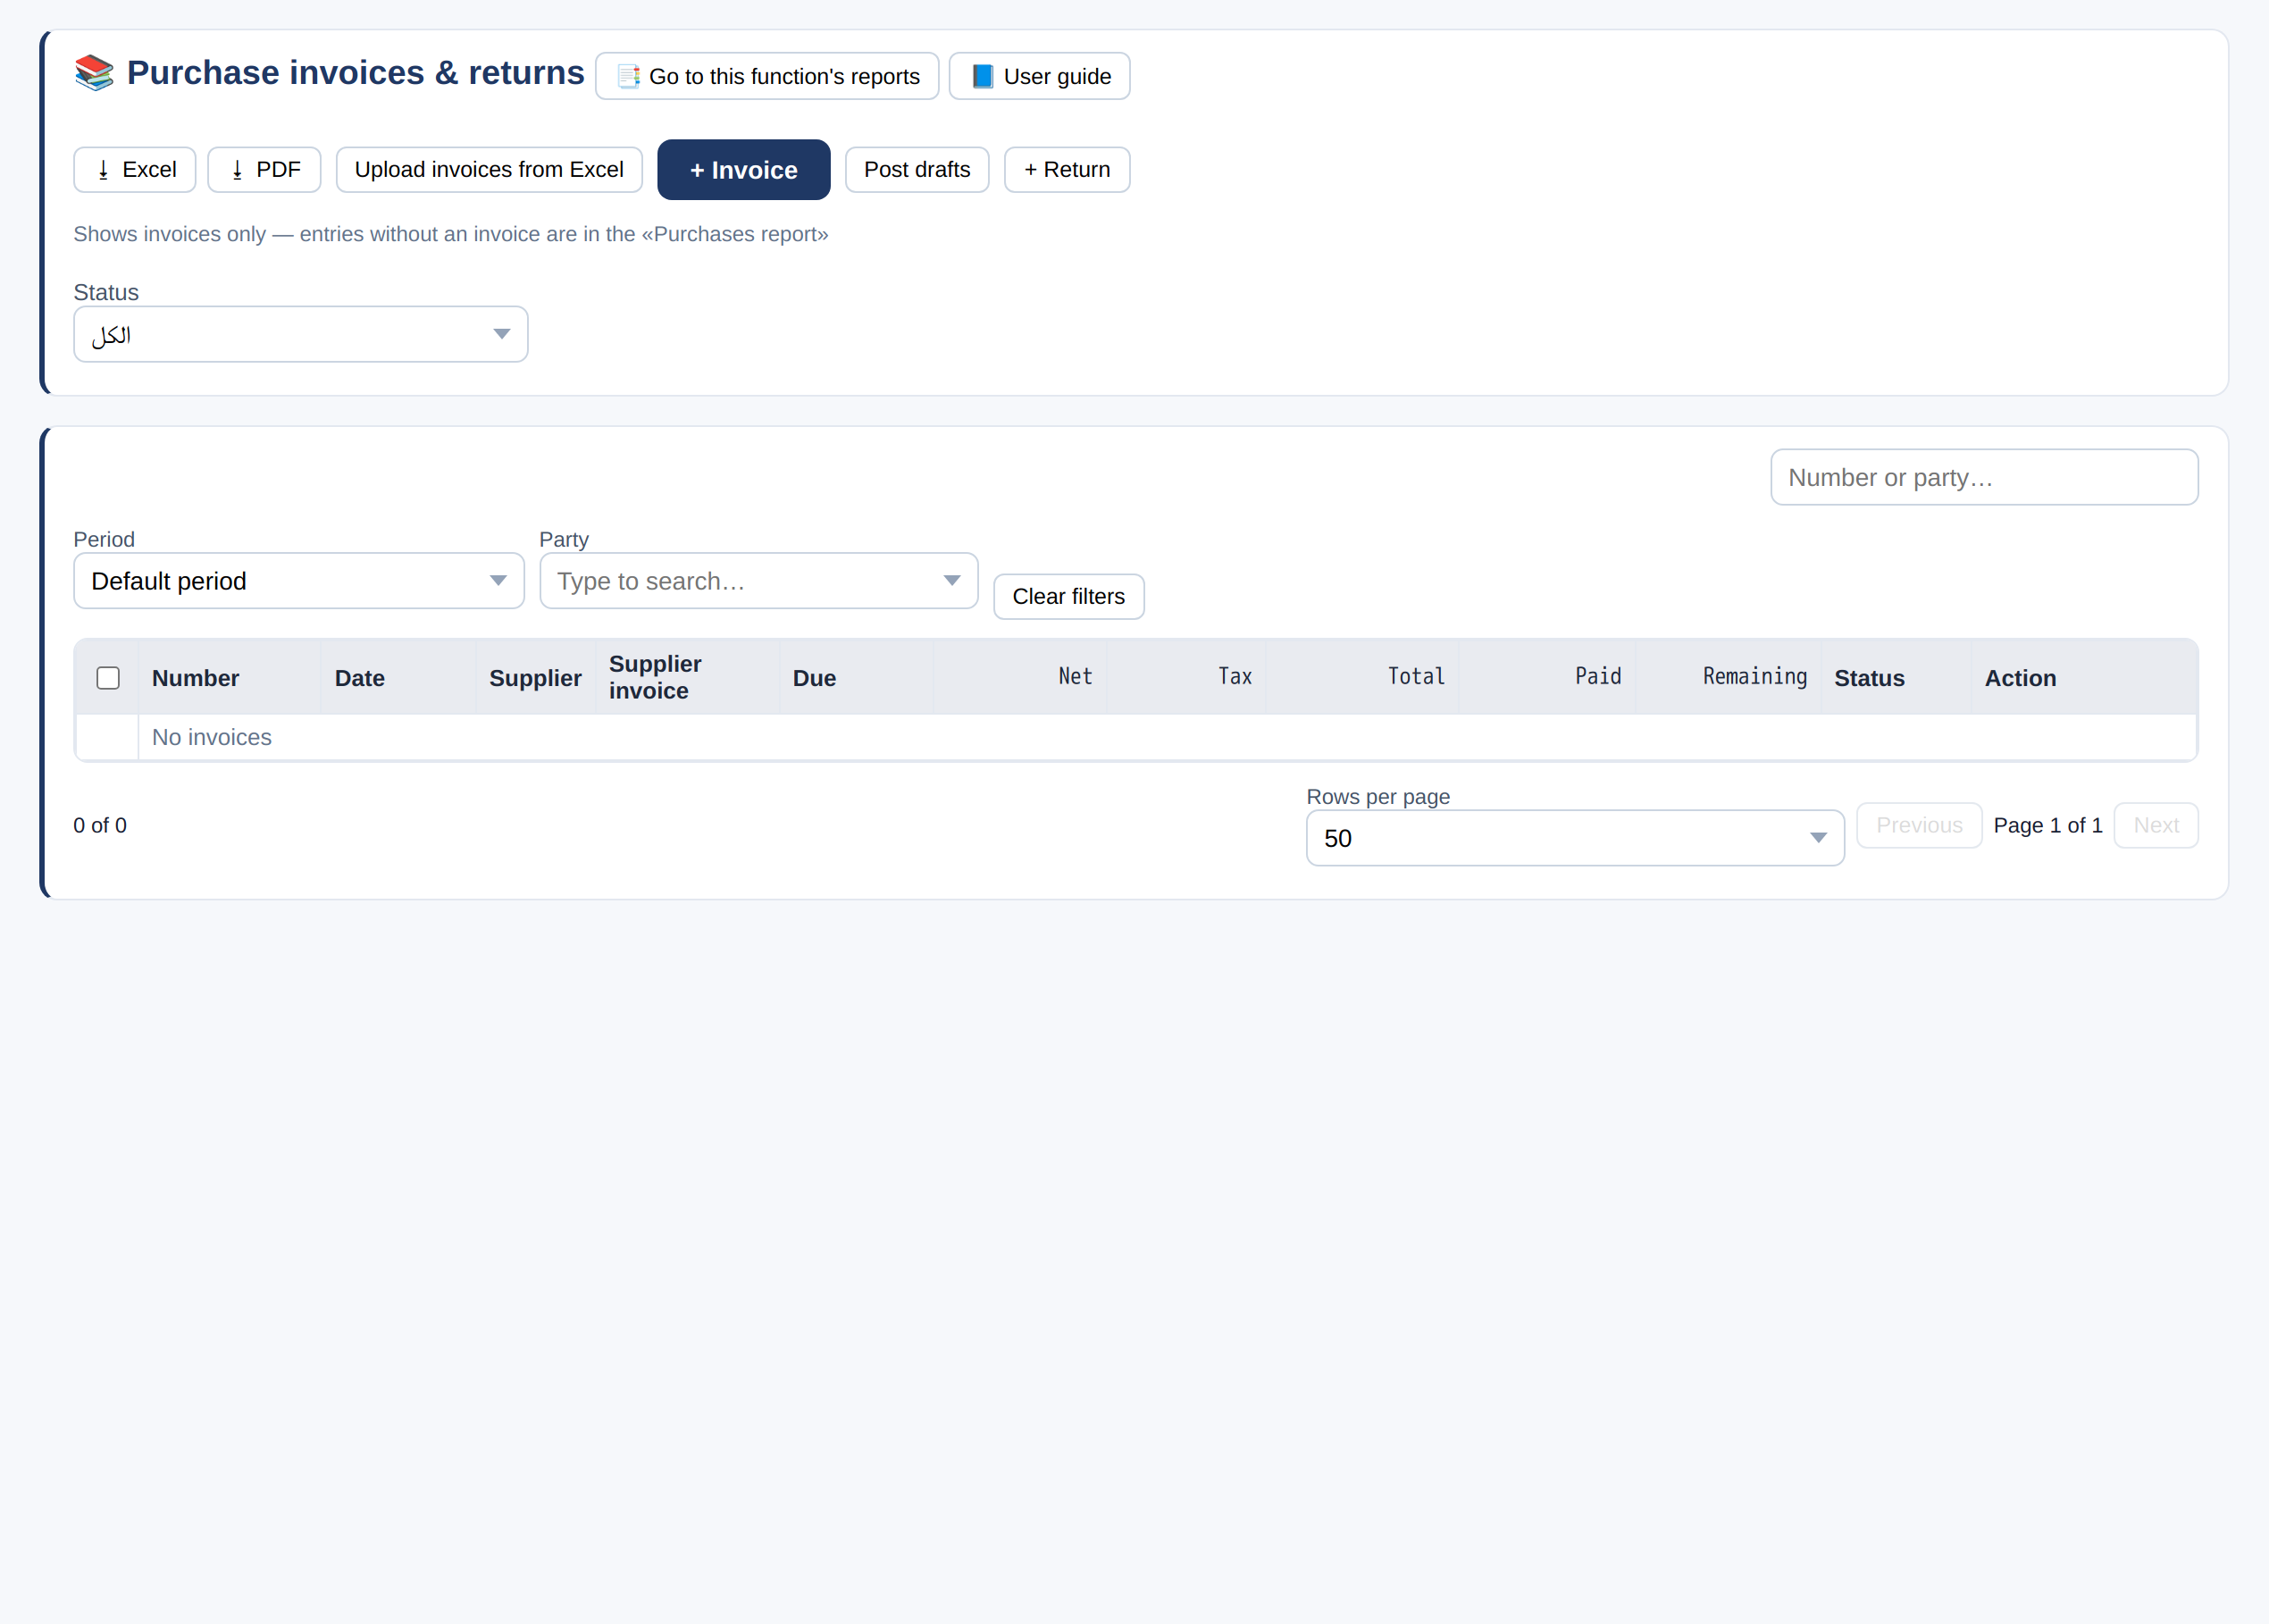
- Choose the supplier and enter the supplier's invoice number / reference.
- On each line: the item (optional) or the charge account — expense, inventory or asset.
- Set input VAT: deductible, or non-deductible (added to cost).
- «Post invoice» or «Save as draft».
Supplier payment
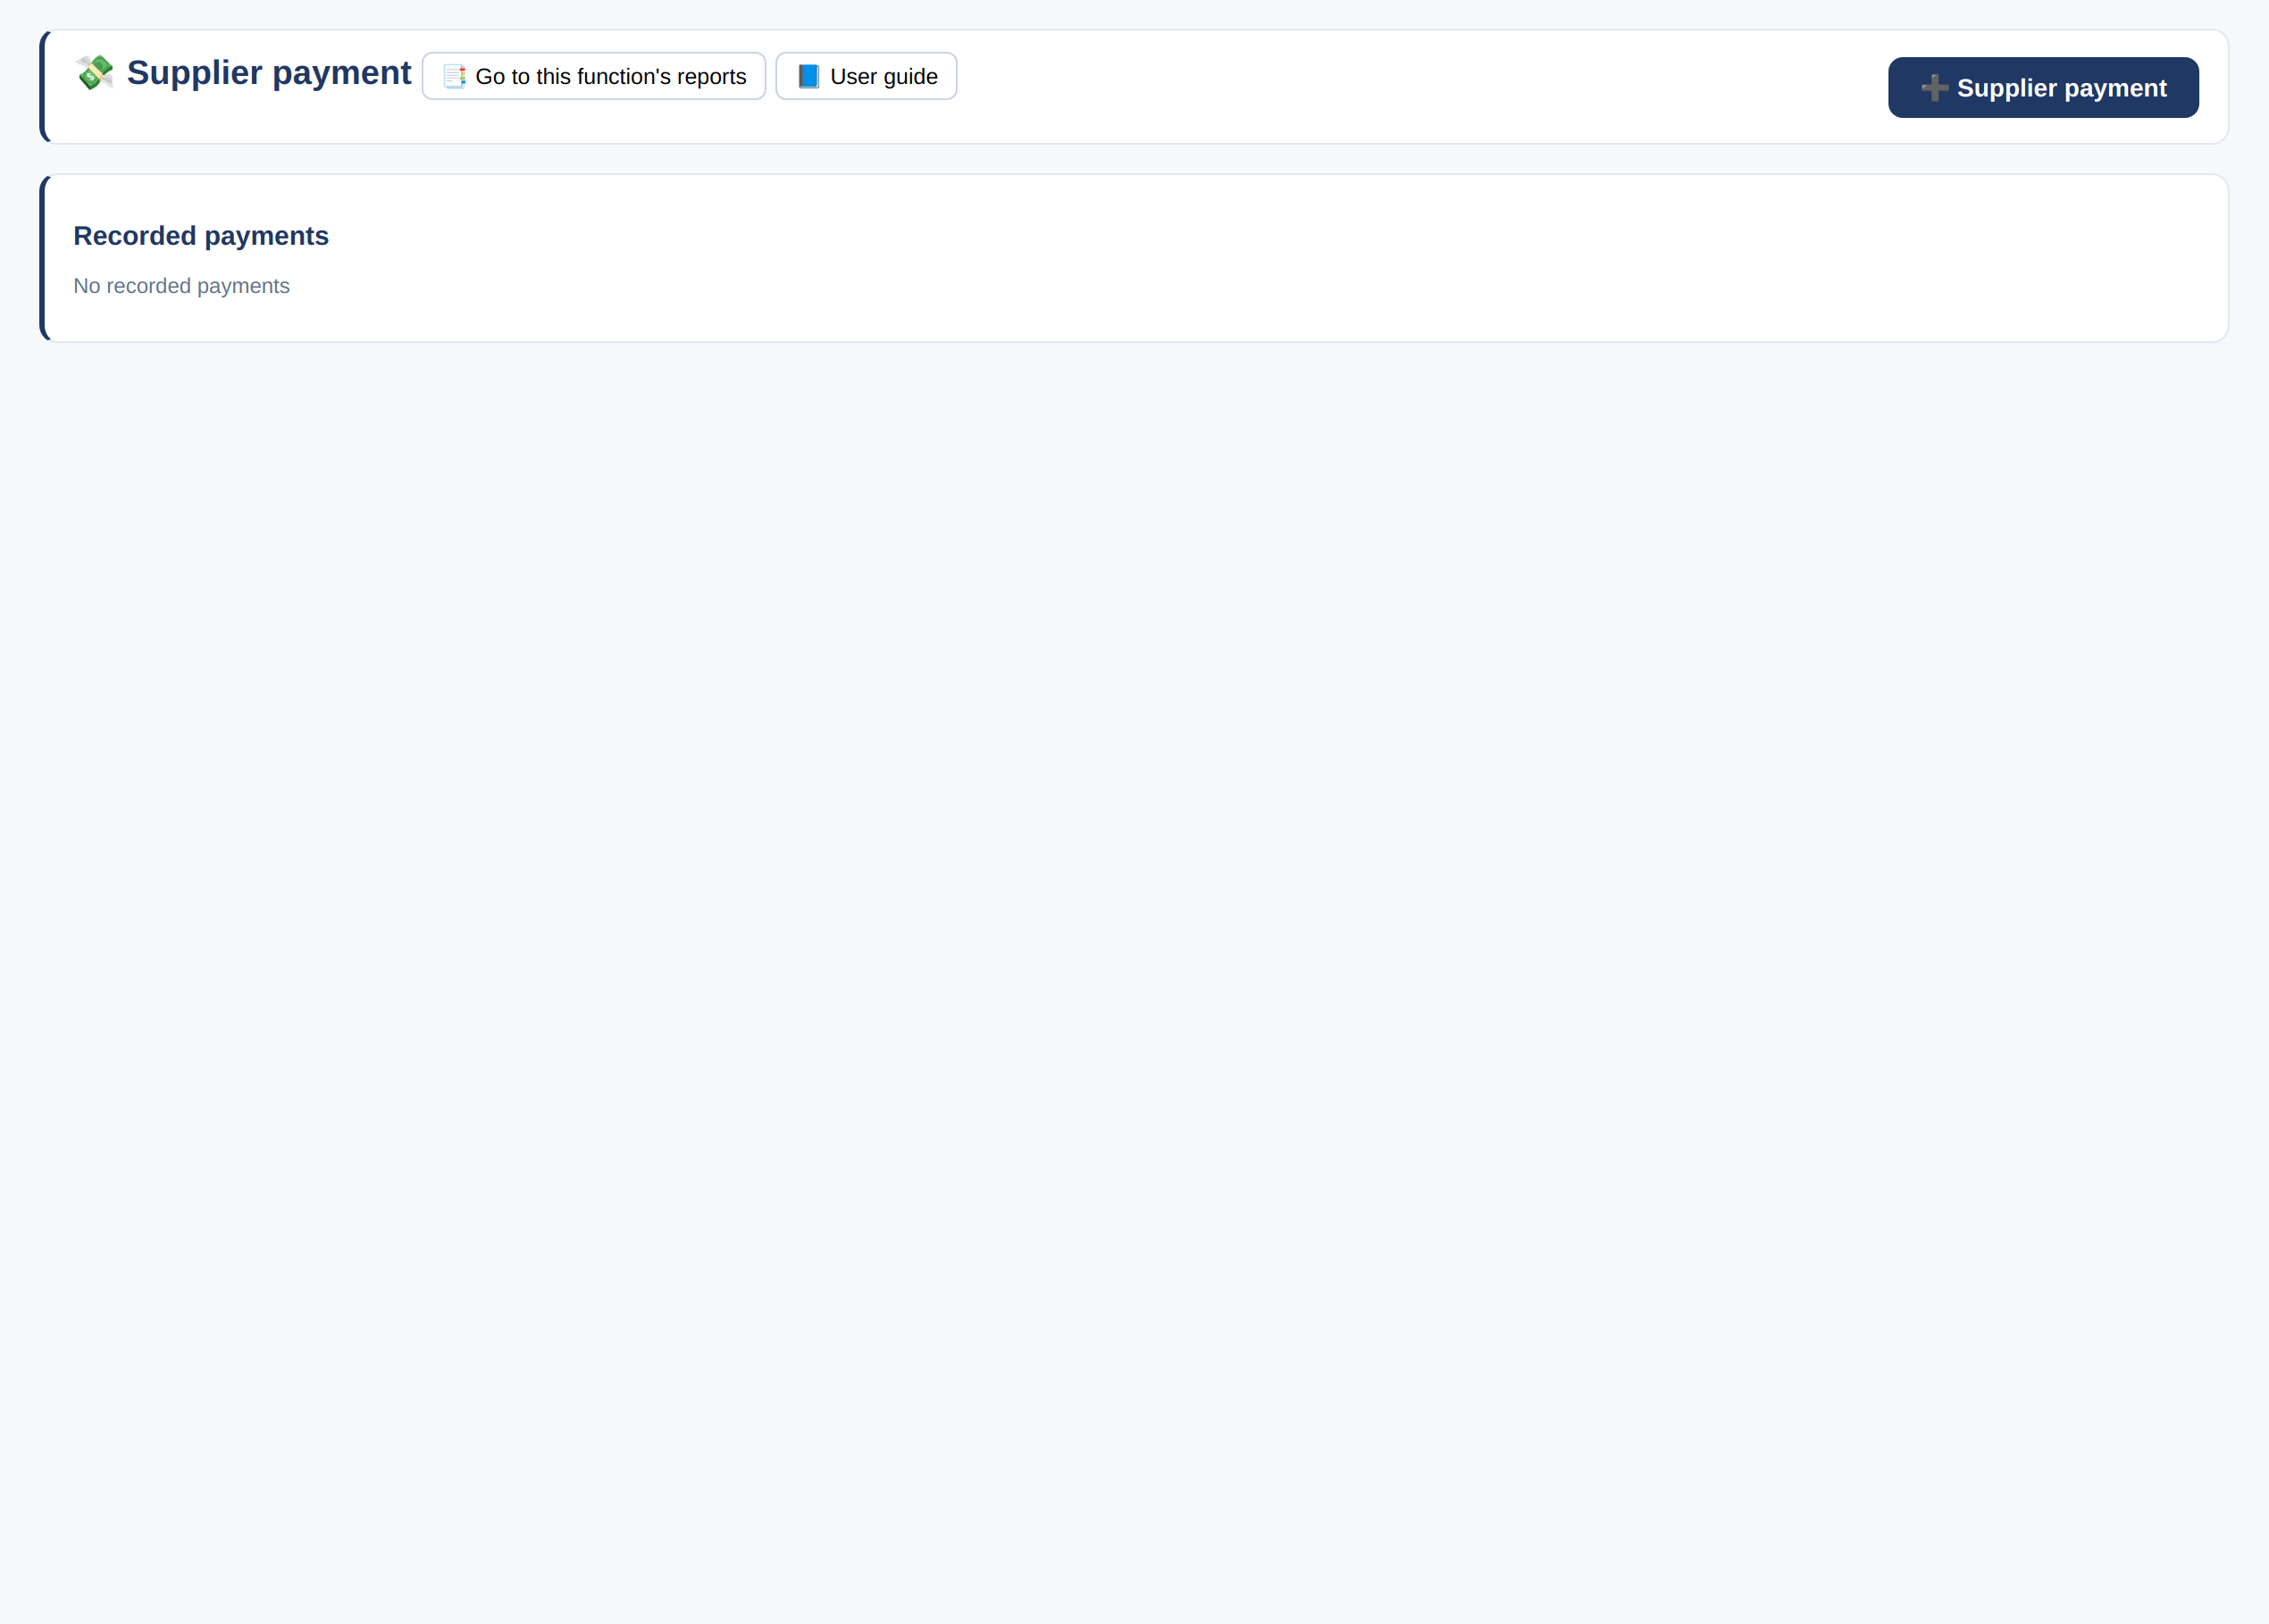
- Choose the supplier, enter the amount paid and the account it was paid from.
- «Auto-allocate to oldest» or pick the invoices yourself, and enter the reference.
Units of measure and inventory cost
How to write the relation between an item’s base unit and its receiving and selling units, and why you should review your older items.
The principle
- Inventory is always counted in the base unit. Every other unit is converted to it by a factor: how many base units are in that unit. So a wrong factor multiplies or divides the quantity in every movement.
Writing the factor
- In the item card: «Base unit (inventory)», then «Sales unit» with «How many base units in one sales unit», and «How many base units in one receiving unit».
- The factor is saved at full precision and can be written as a fraction such as 1/24. Example: base unit kilo and selling unit gram ⇒ factor 0.001, so selling 500 grams deducts 0.5 kilo. Base unit a carton of 24 and selling unit a piece ⇒ 1/24, so selling 24 pieces deducts one carton.
- Before this update, a small factor such as 0.001 was saved as 1.
- «Items & services» shows a list «Items whose unit factor needs review:» with the number of items whose saved factor is in doubt, along with «Saved factor», «Posted movements in this unit» and an «Open card» button. The list is for review only; the program changes nothing on its own.
Cost
- Selling the whole balance under the average method takes its whole value, so no small amounts are left hanging on a zero quantity.
- Under FIFO, an invoice with two lines for the same item now takes the second layer for the second line correctly.
Journal entries, vouchers and banks
For anything without its own screen: a journal entry or a receipt/payment voucher — and bank reconciliation from the statement.
Journal entry
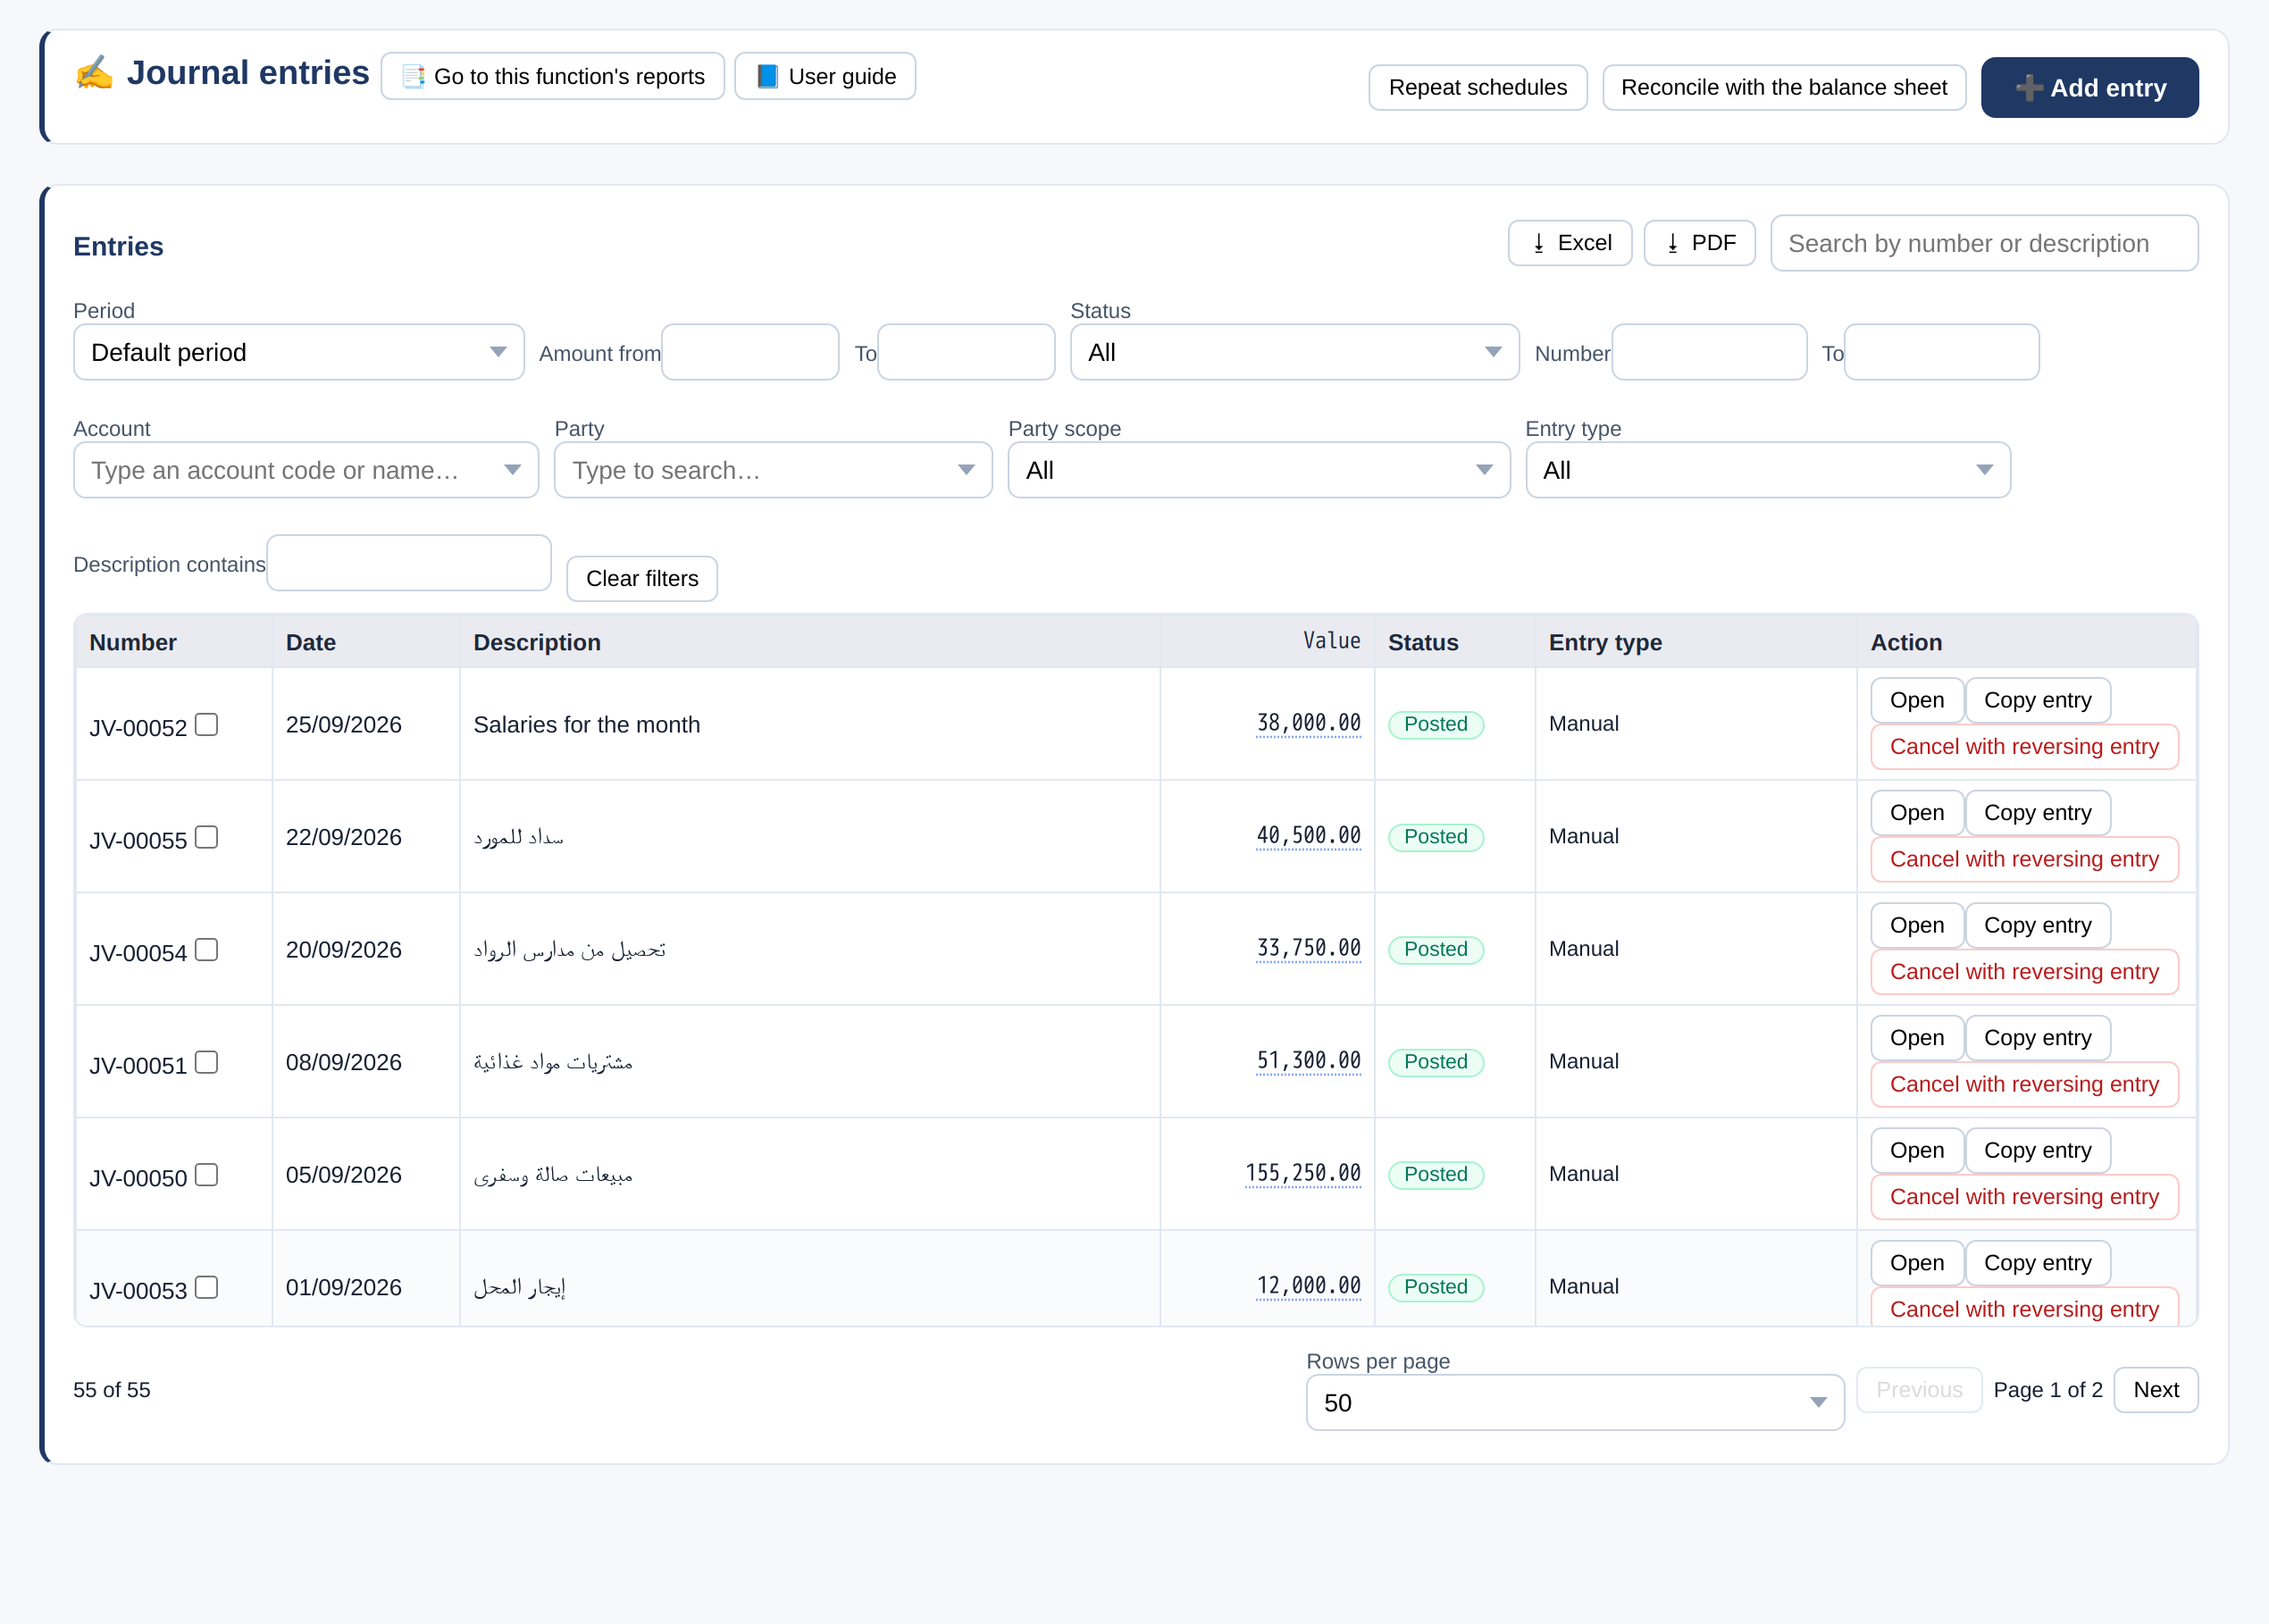
- The number is automatic, and each entry screen has its own series with a prefix taken from its name — so journal entry numbers are separate from voucher and invoice numbers. Enter the date, the reference / document and the description.
- On each line: the account, the party (customer/supplier/employee) if the account needs one, the cost center, and debit or credit.
- The entry must balance — debits = credits — before «Save and post».
- 📎 attaches the document; «Reversing entry» or «Unpost» correct it.
Receipt voucher
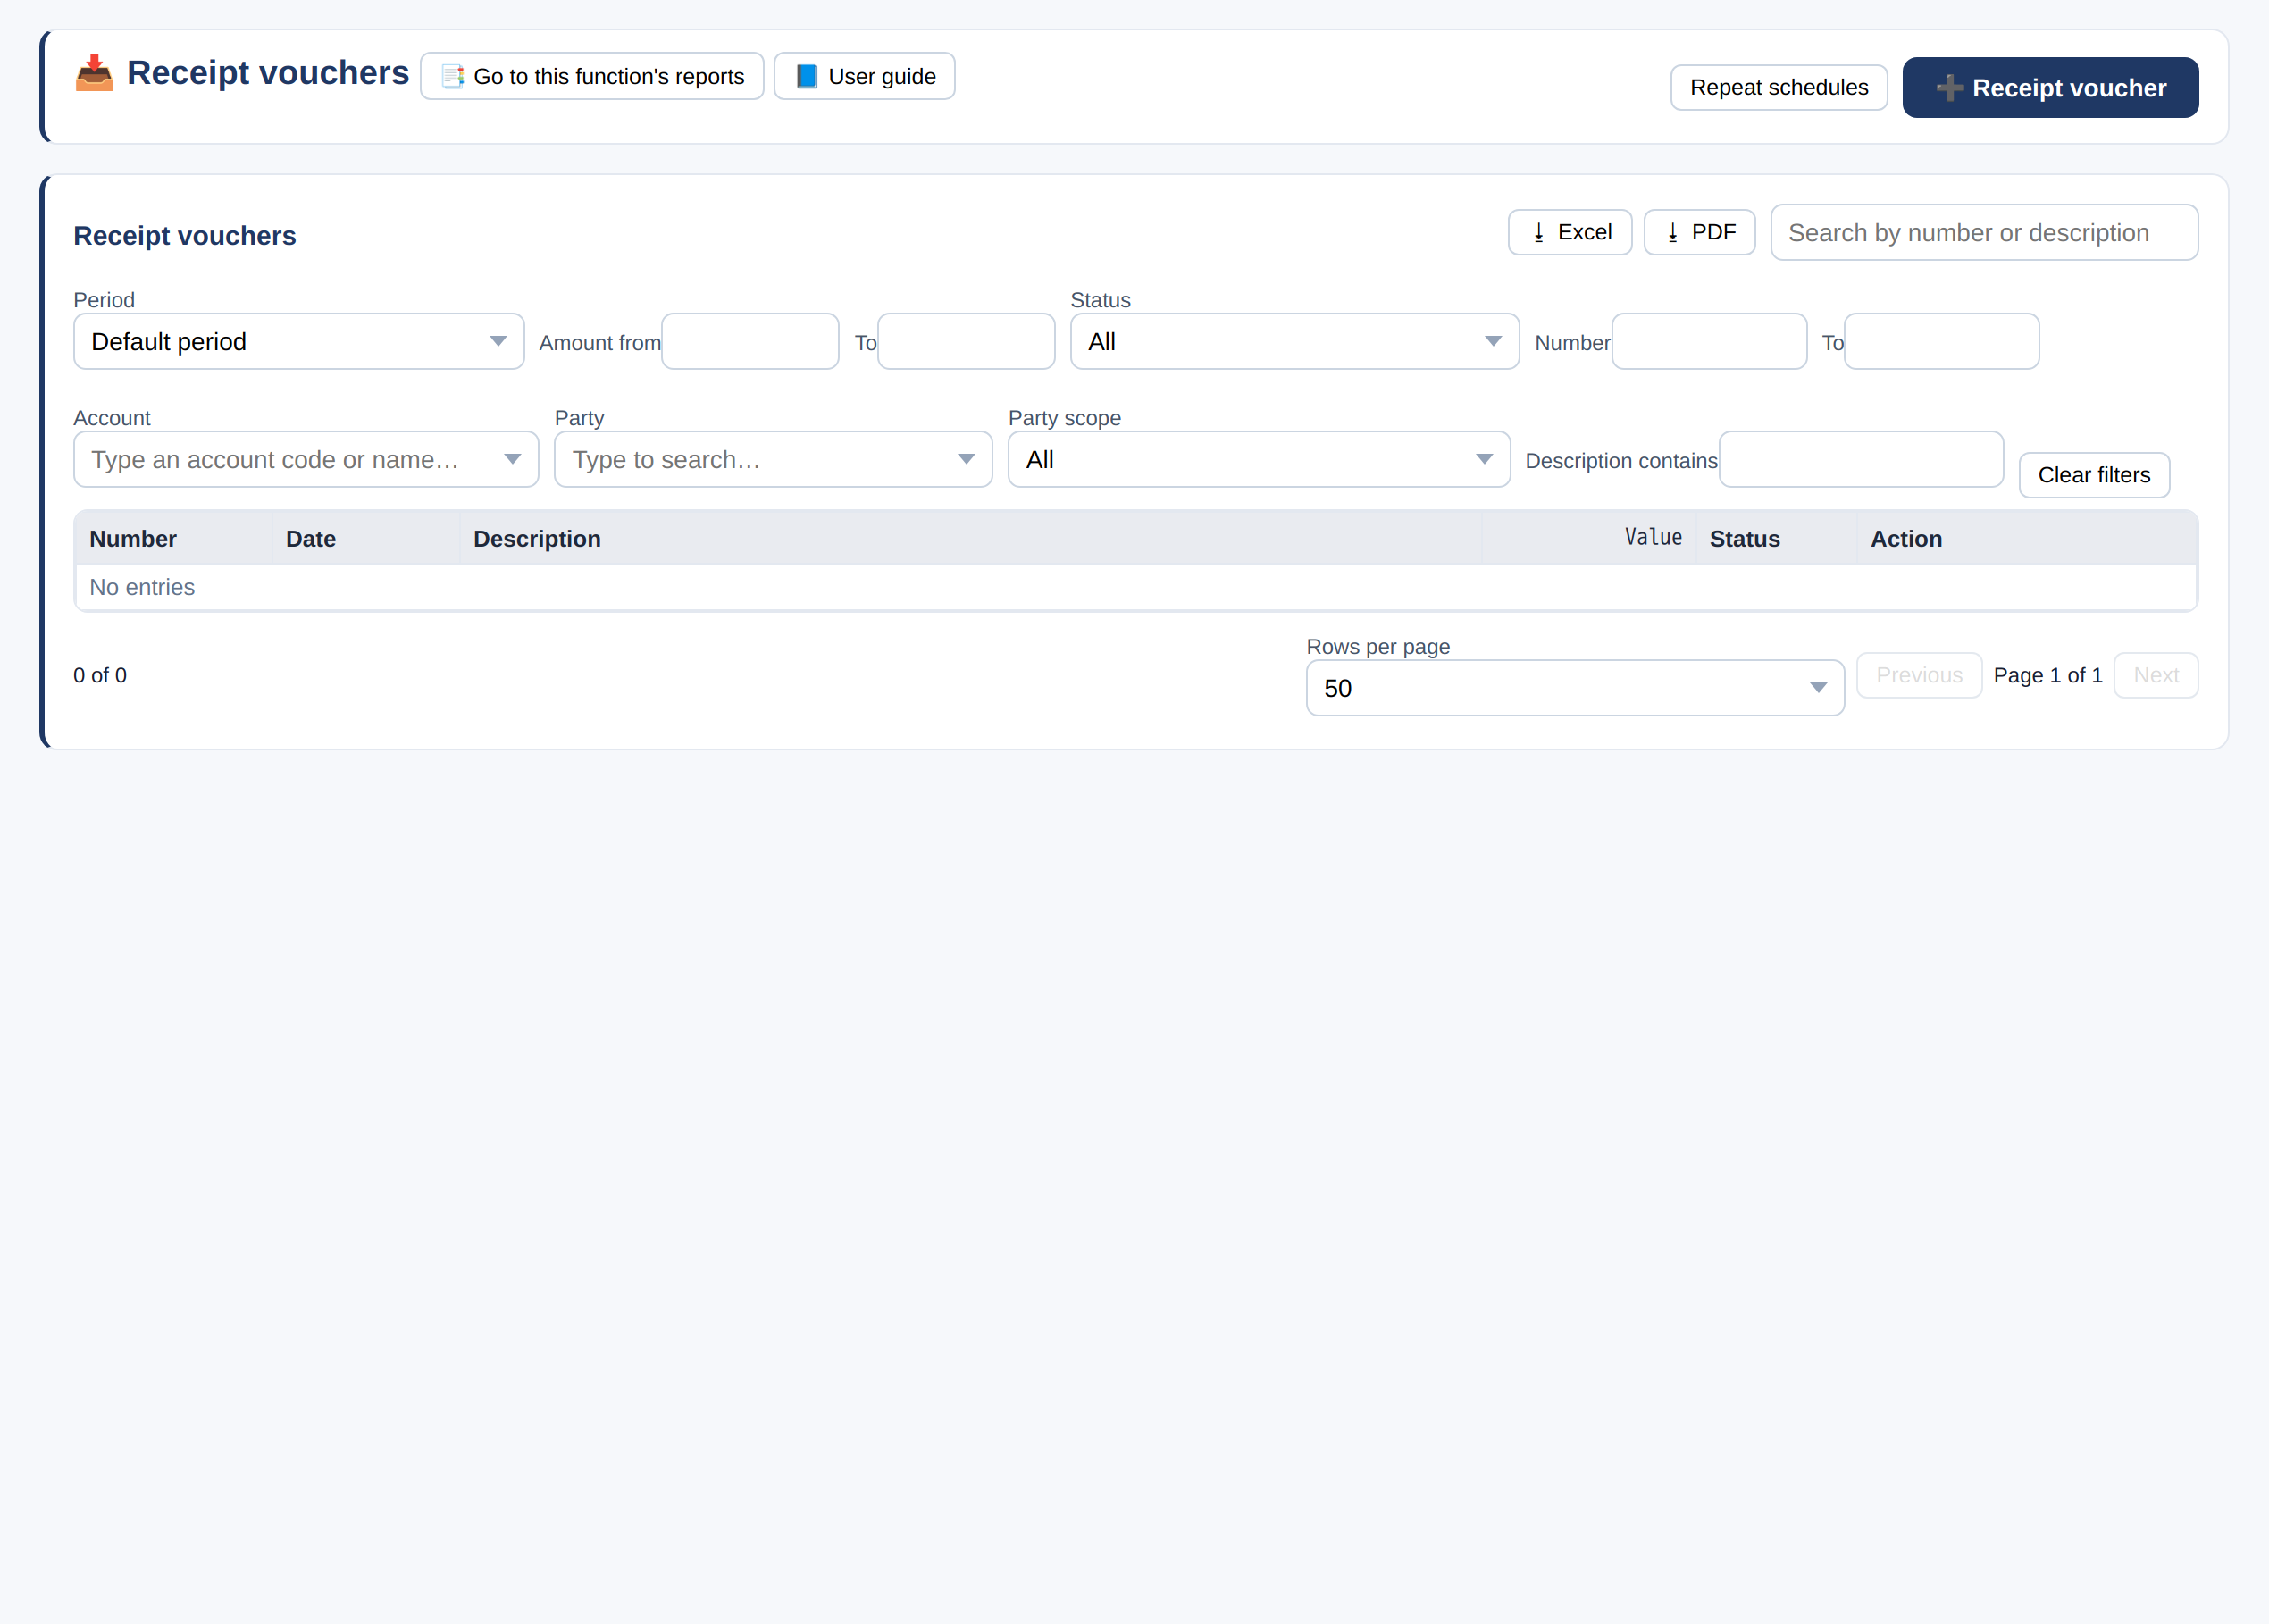
- Choose where it was received (cash/bank), who paid, and the reference.
- In the lines: the accounts the money is for and the amounts. The entry is: Dr cash, Cr the accounts.
- «Save and post», and «Print voucher» for a paper copy.
Payment voucher
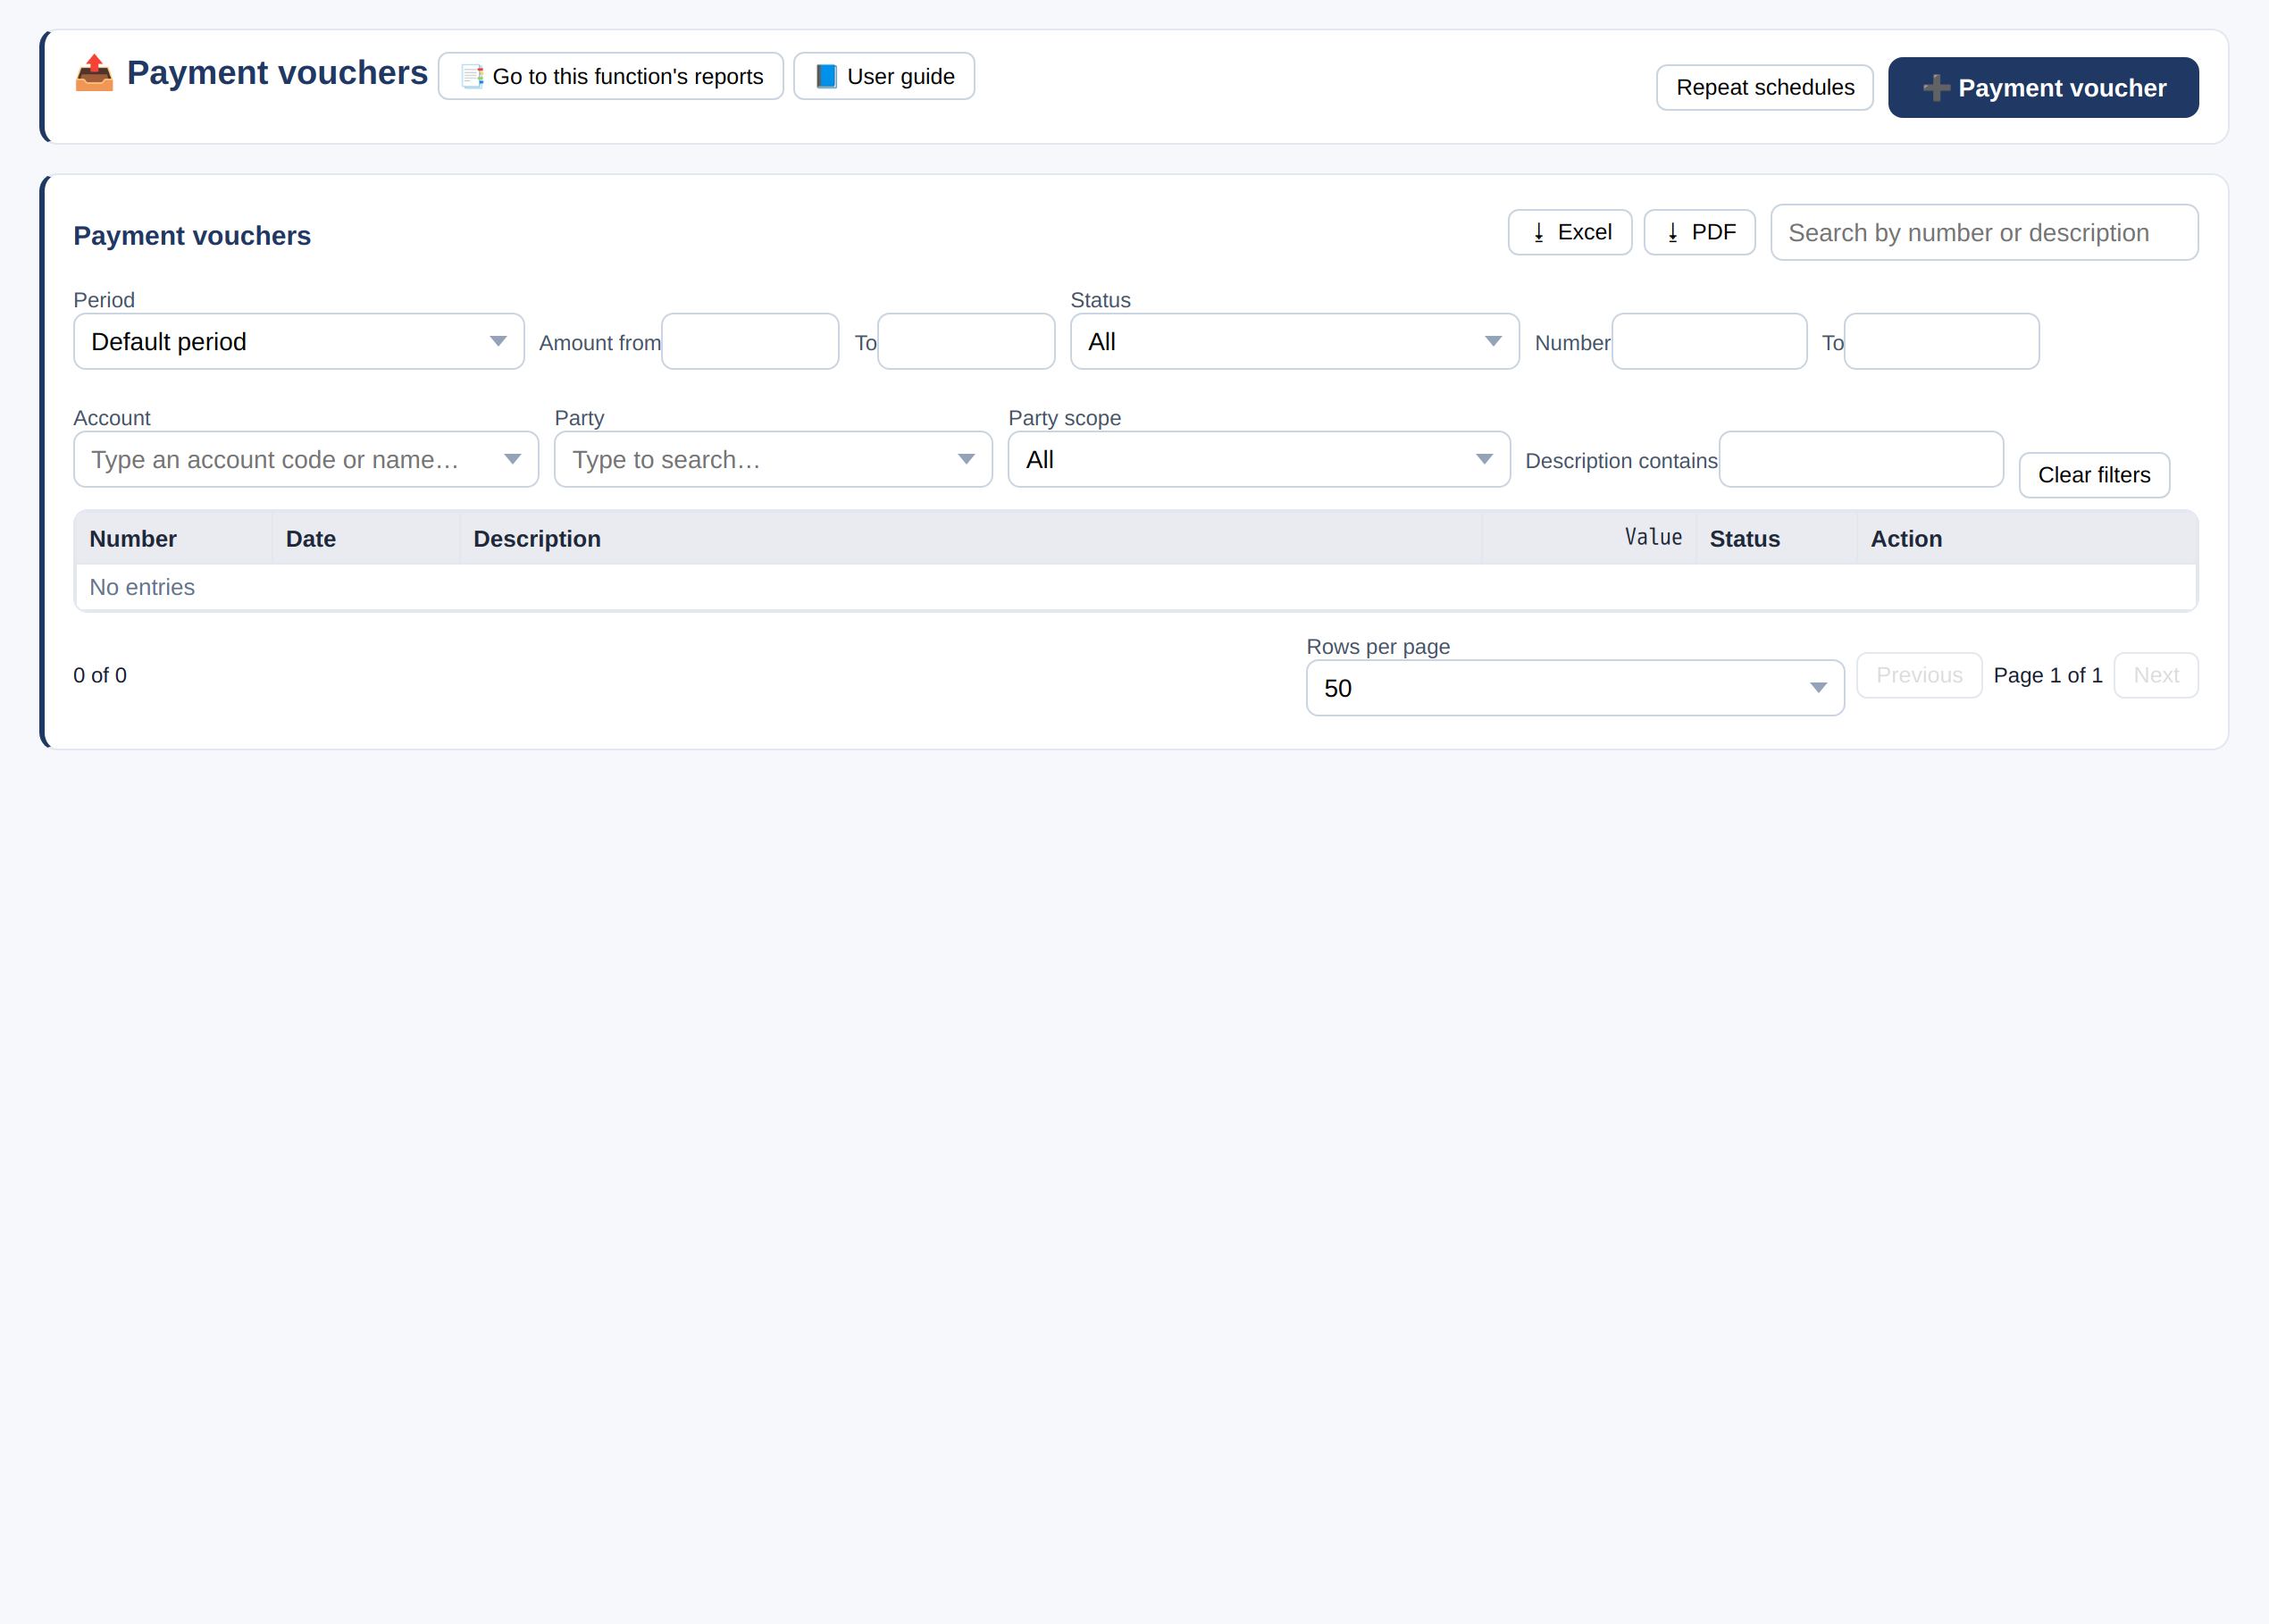
- Choose the cash/bank it was paid from and the beneficiary.
- In the lines: the expense accounts and amounts. The entry is: Dr the accounts, Cr cash.
Bank reconciliation
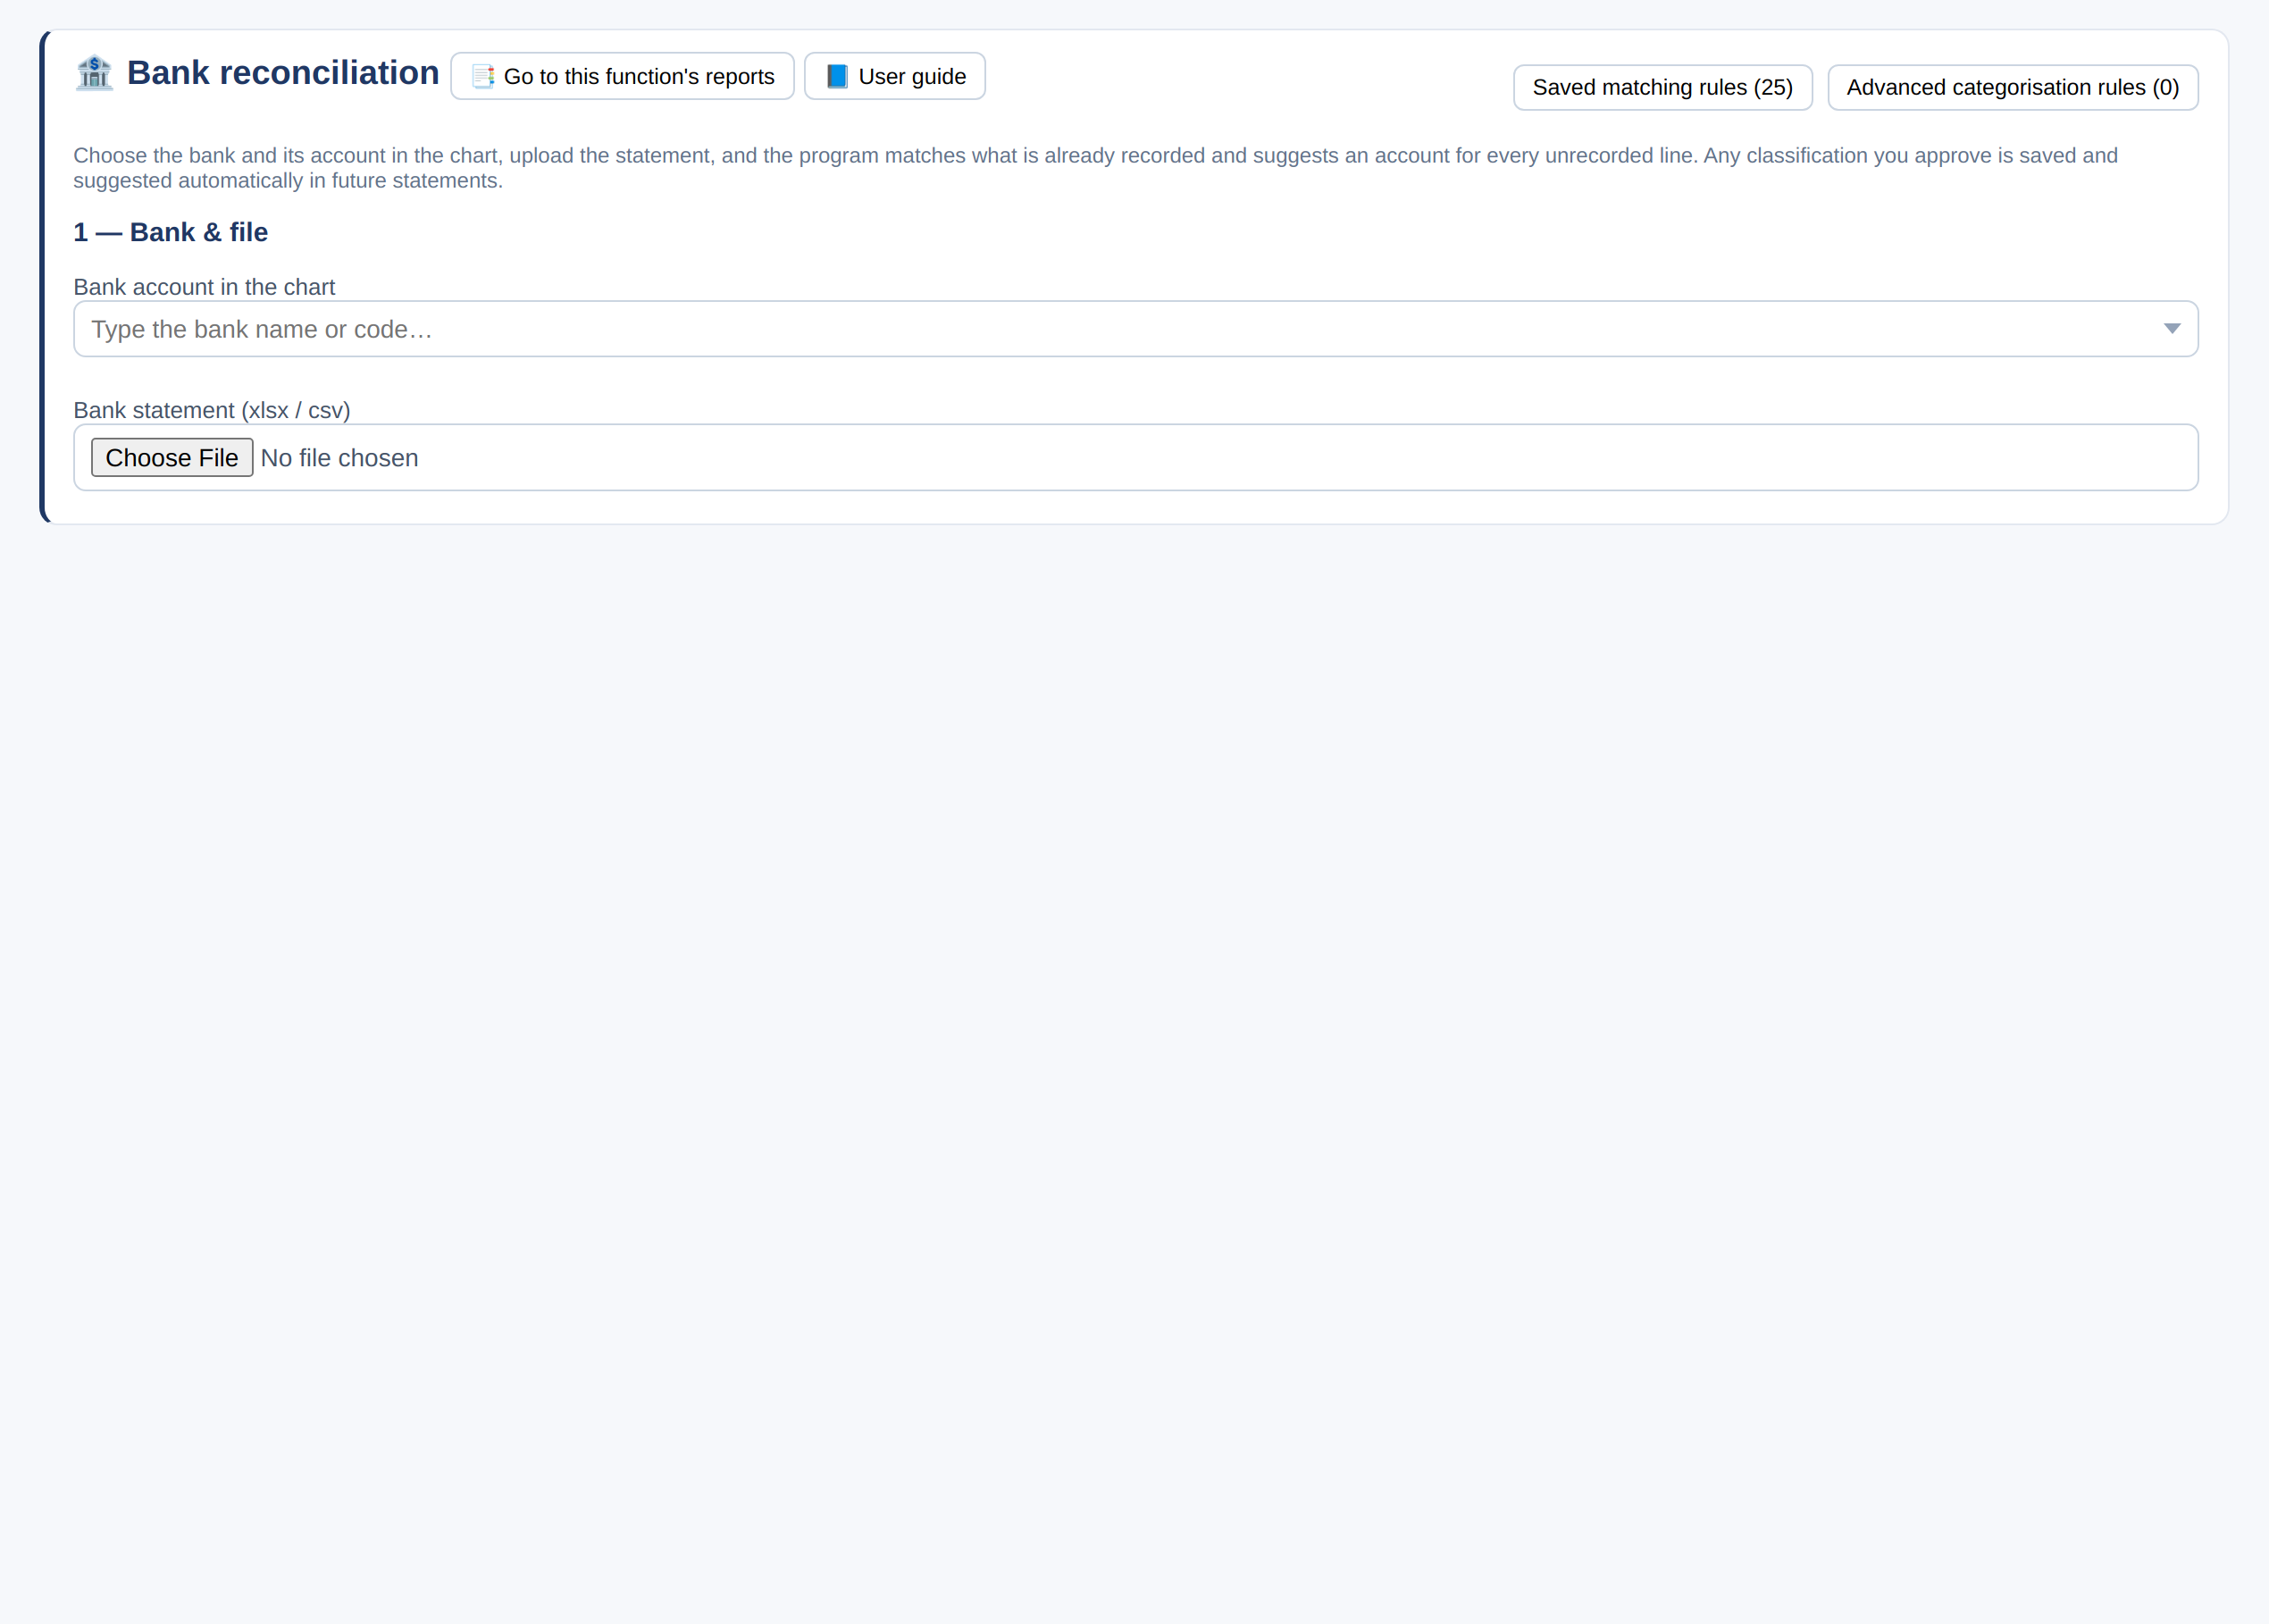
- Choose the bank account in the chart and upload the statement (xlsx or csv).
- Set the sheet, header row and amount format, then «Read and match».
- The program matches what is recorded and suggests an account for each missing line — any classification you approve is remembered for future statements.
Day book
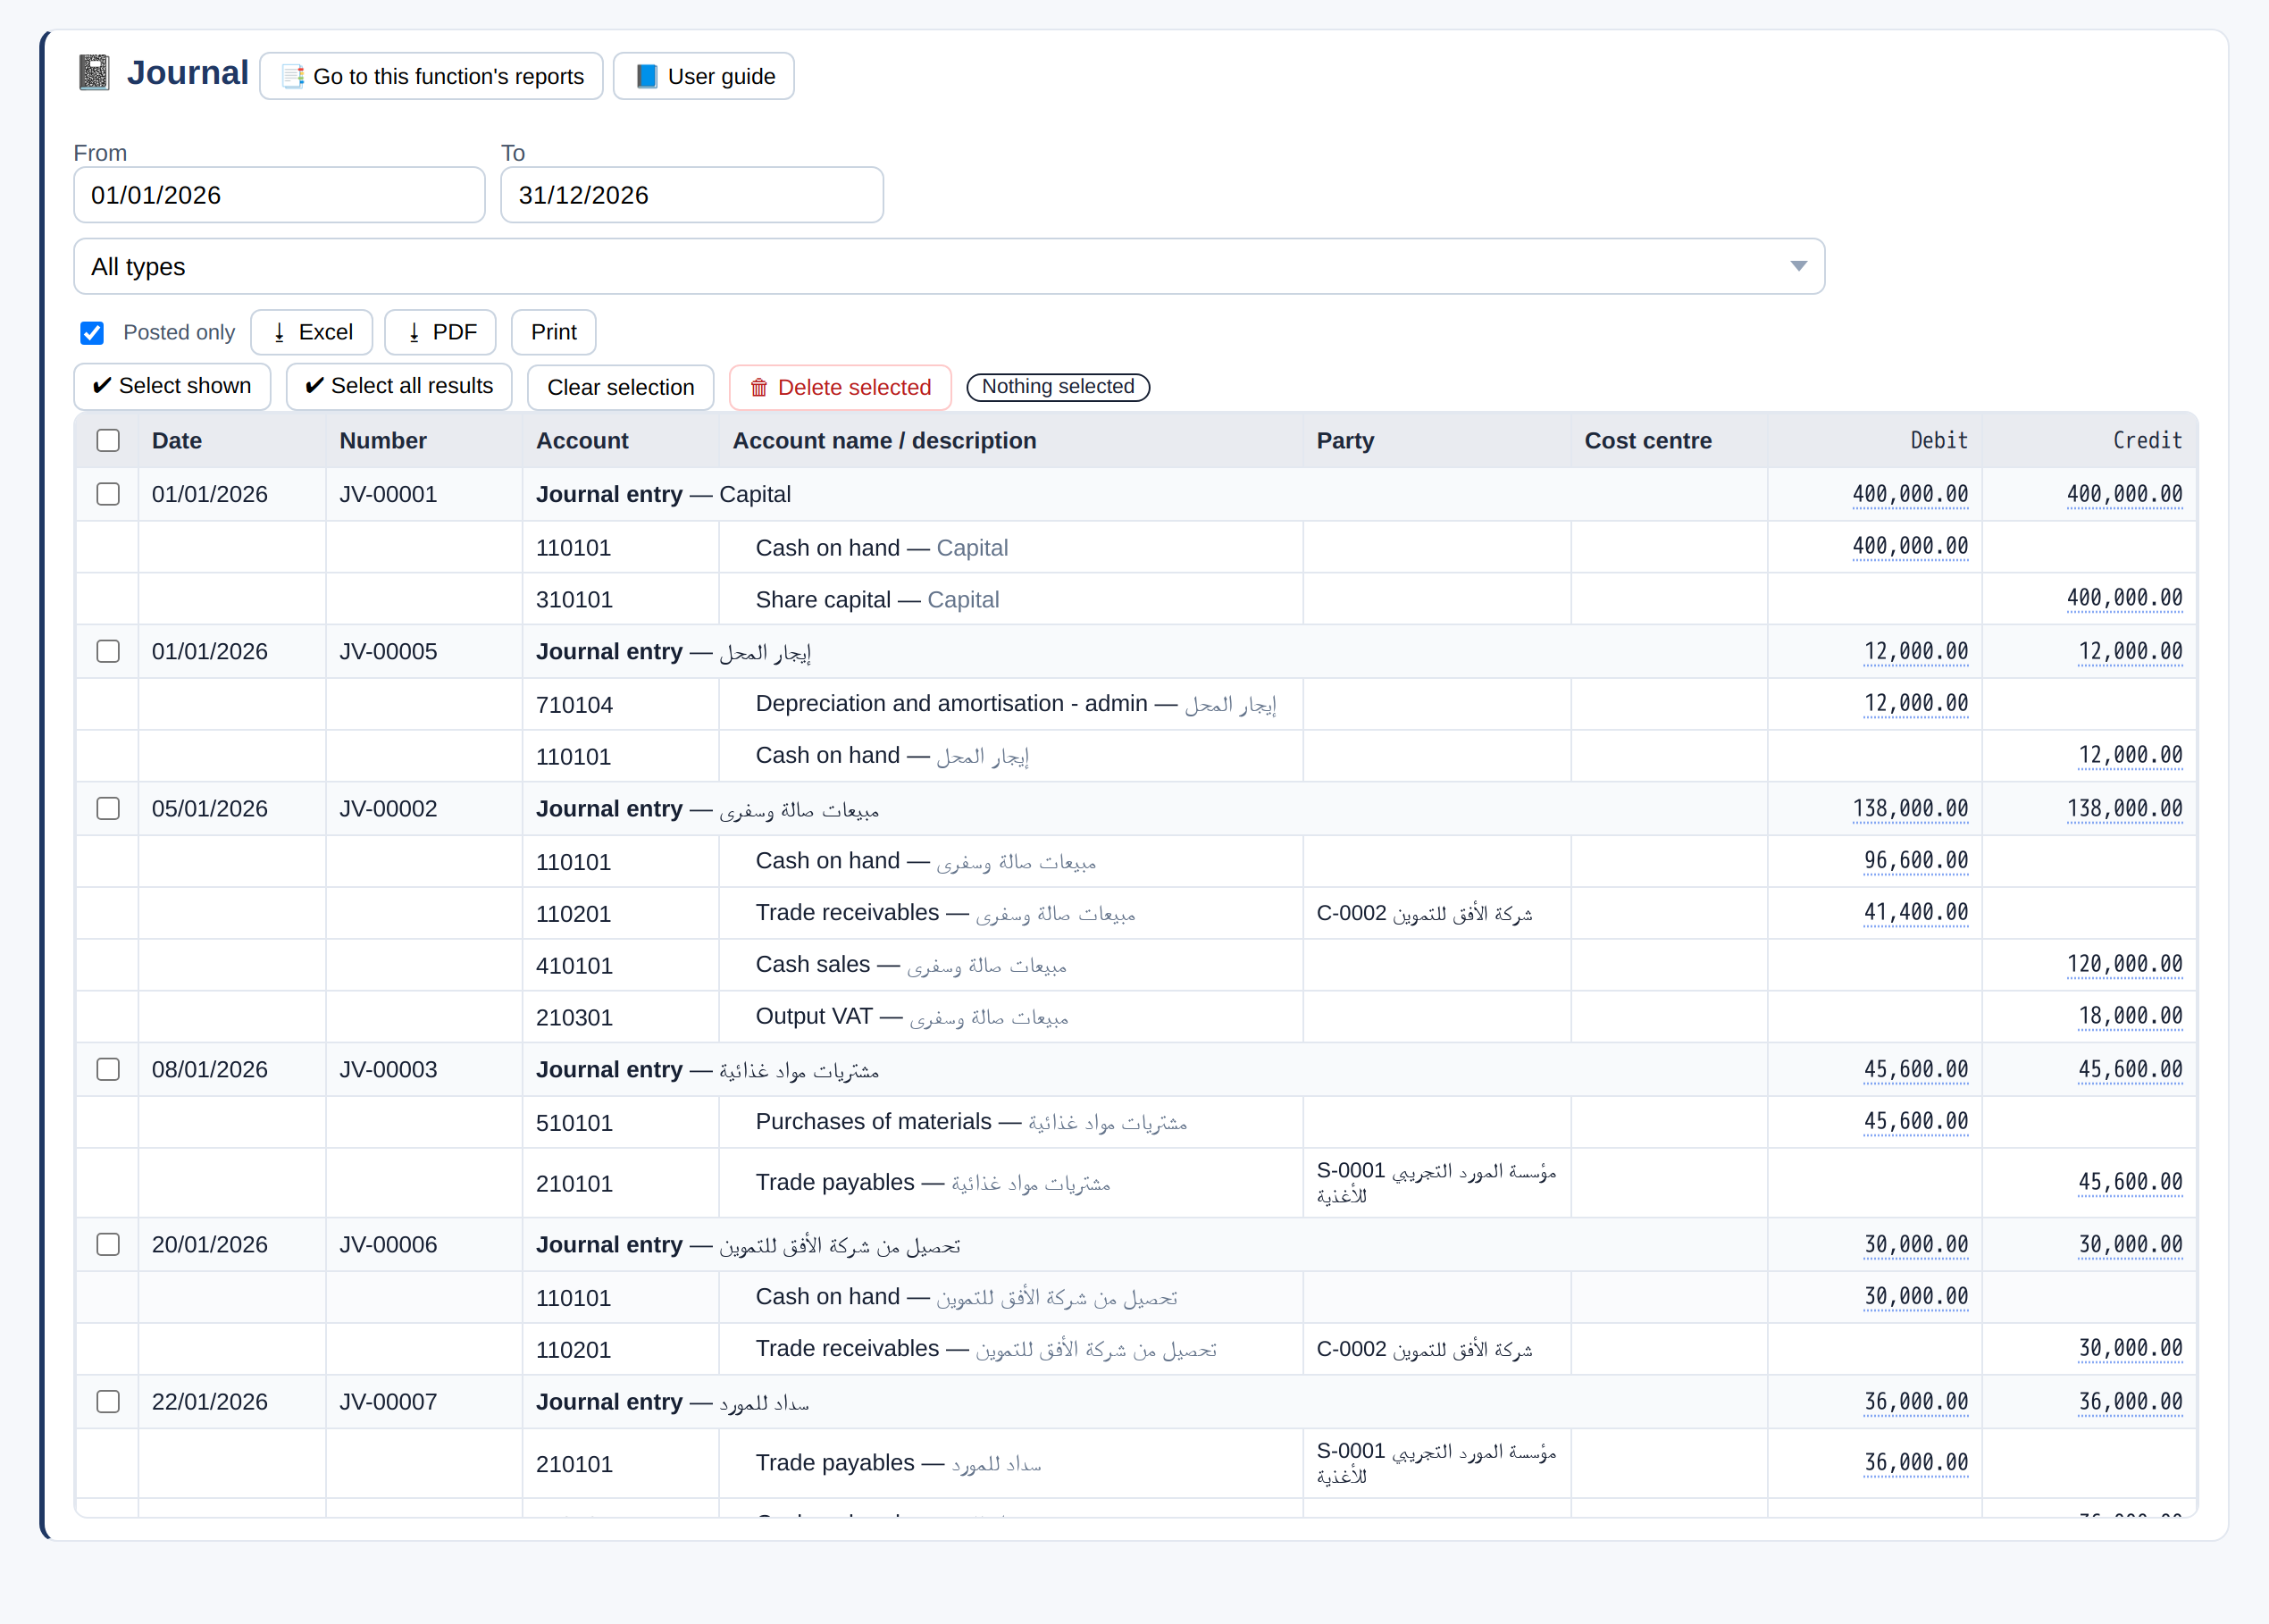
- Every entry by date for any period, with account, party and cost center.
- Export to Excel or PDF, or print it.
Bulk journal upload and account matching
Upload many entries from an Excel file at once; for each account in the file a match in your chart is suggested — you review and approve.
Where to start
- From the side menu «Accounting», choose «Bulk journal upload».
- In «1 — Sheet and columns» choose the file and the sheet, and set the column for each item (date, account, debit, credit…).
- In «2 — Grouping and numbering» set how lines are grouped into entries and how they are numbered.
- Then «3 — Match file accounts to the chart»: each account in the file shows its status and the suggested account from your chart.
Each account’s status
- «🧠 From memory», «✅ Matched by code» and «✅ Matched by name»: the account was found in your chart.
- «🔎 Suggested — review it»: the closest account in your chart — read it before approving.
- «❓ Not sure — more than one match»: more than one possible account; pick the right one from the list.
- «🆕 Not in your chart»: the account doesn’t exist in your chart, and a new-account suggestion appears (next section).
- «🔴 No suggestion»: no close account was found; choose the account yourself.
Matching in Arabic and English, and typing mistakes
- The suggestion understands an account name in Arabic or English and its common accounting synonyms, so a name like «Rent» is matched to your rent expense account.
- It tolerates common spelling mistakes in English names, and differences in hamza and taa marbuta in Arabic.
- When choosing an account during matching you can search by the Arabic or the English name.
An account that isn’t in your chart
- Next to «🆕 Not in your chart», «Suggested: a new account under» the proposed group «with code» a proposed code appears, with the reason: «Shared words», «Same code prefix» or «All matches are under the same group».
- If you are allowed to add accounts, an «Open a new account» button appears so you can open it in place and continue matching.
- If the button doesn’t appear, open the account from the chart of accounts, then return to the matching.
Matching memory
- The matches you approve are saved in «🧠 Account matching memory», so they appear in the next file with the status «🧠 From memory».
- If you approved a wrong match, delete it from «🧠 Account matching memory», then choose the right account in the next file and it is saved.
Employees and payroll
A card for each employee and a monthly payroll run that creates its entry and the bank file.
Employees
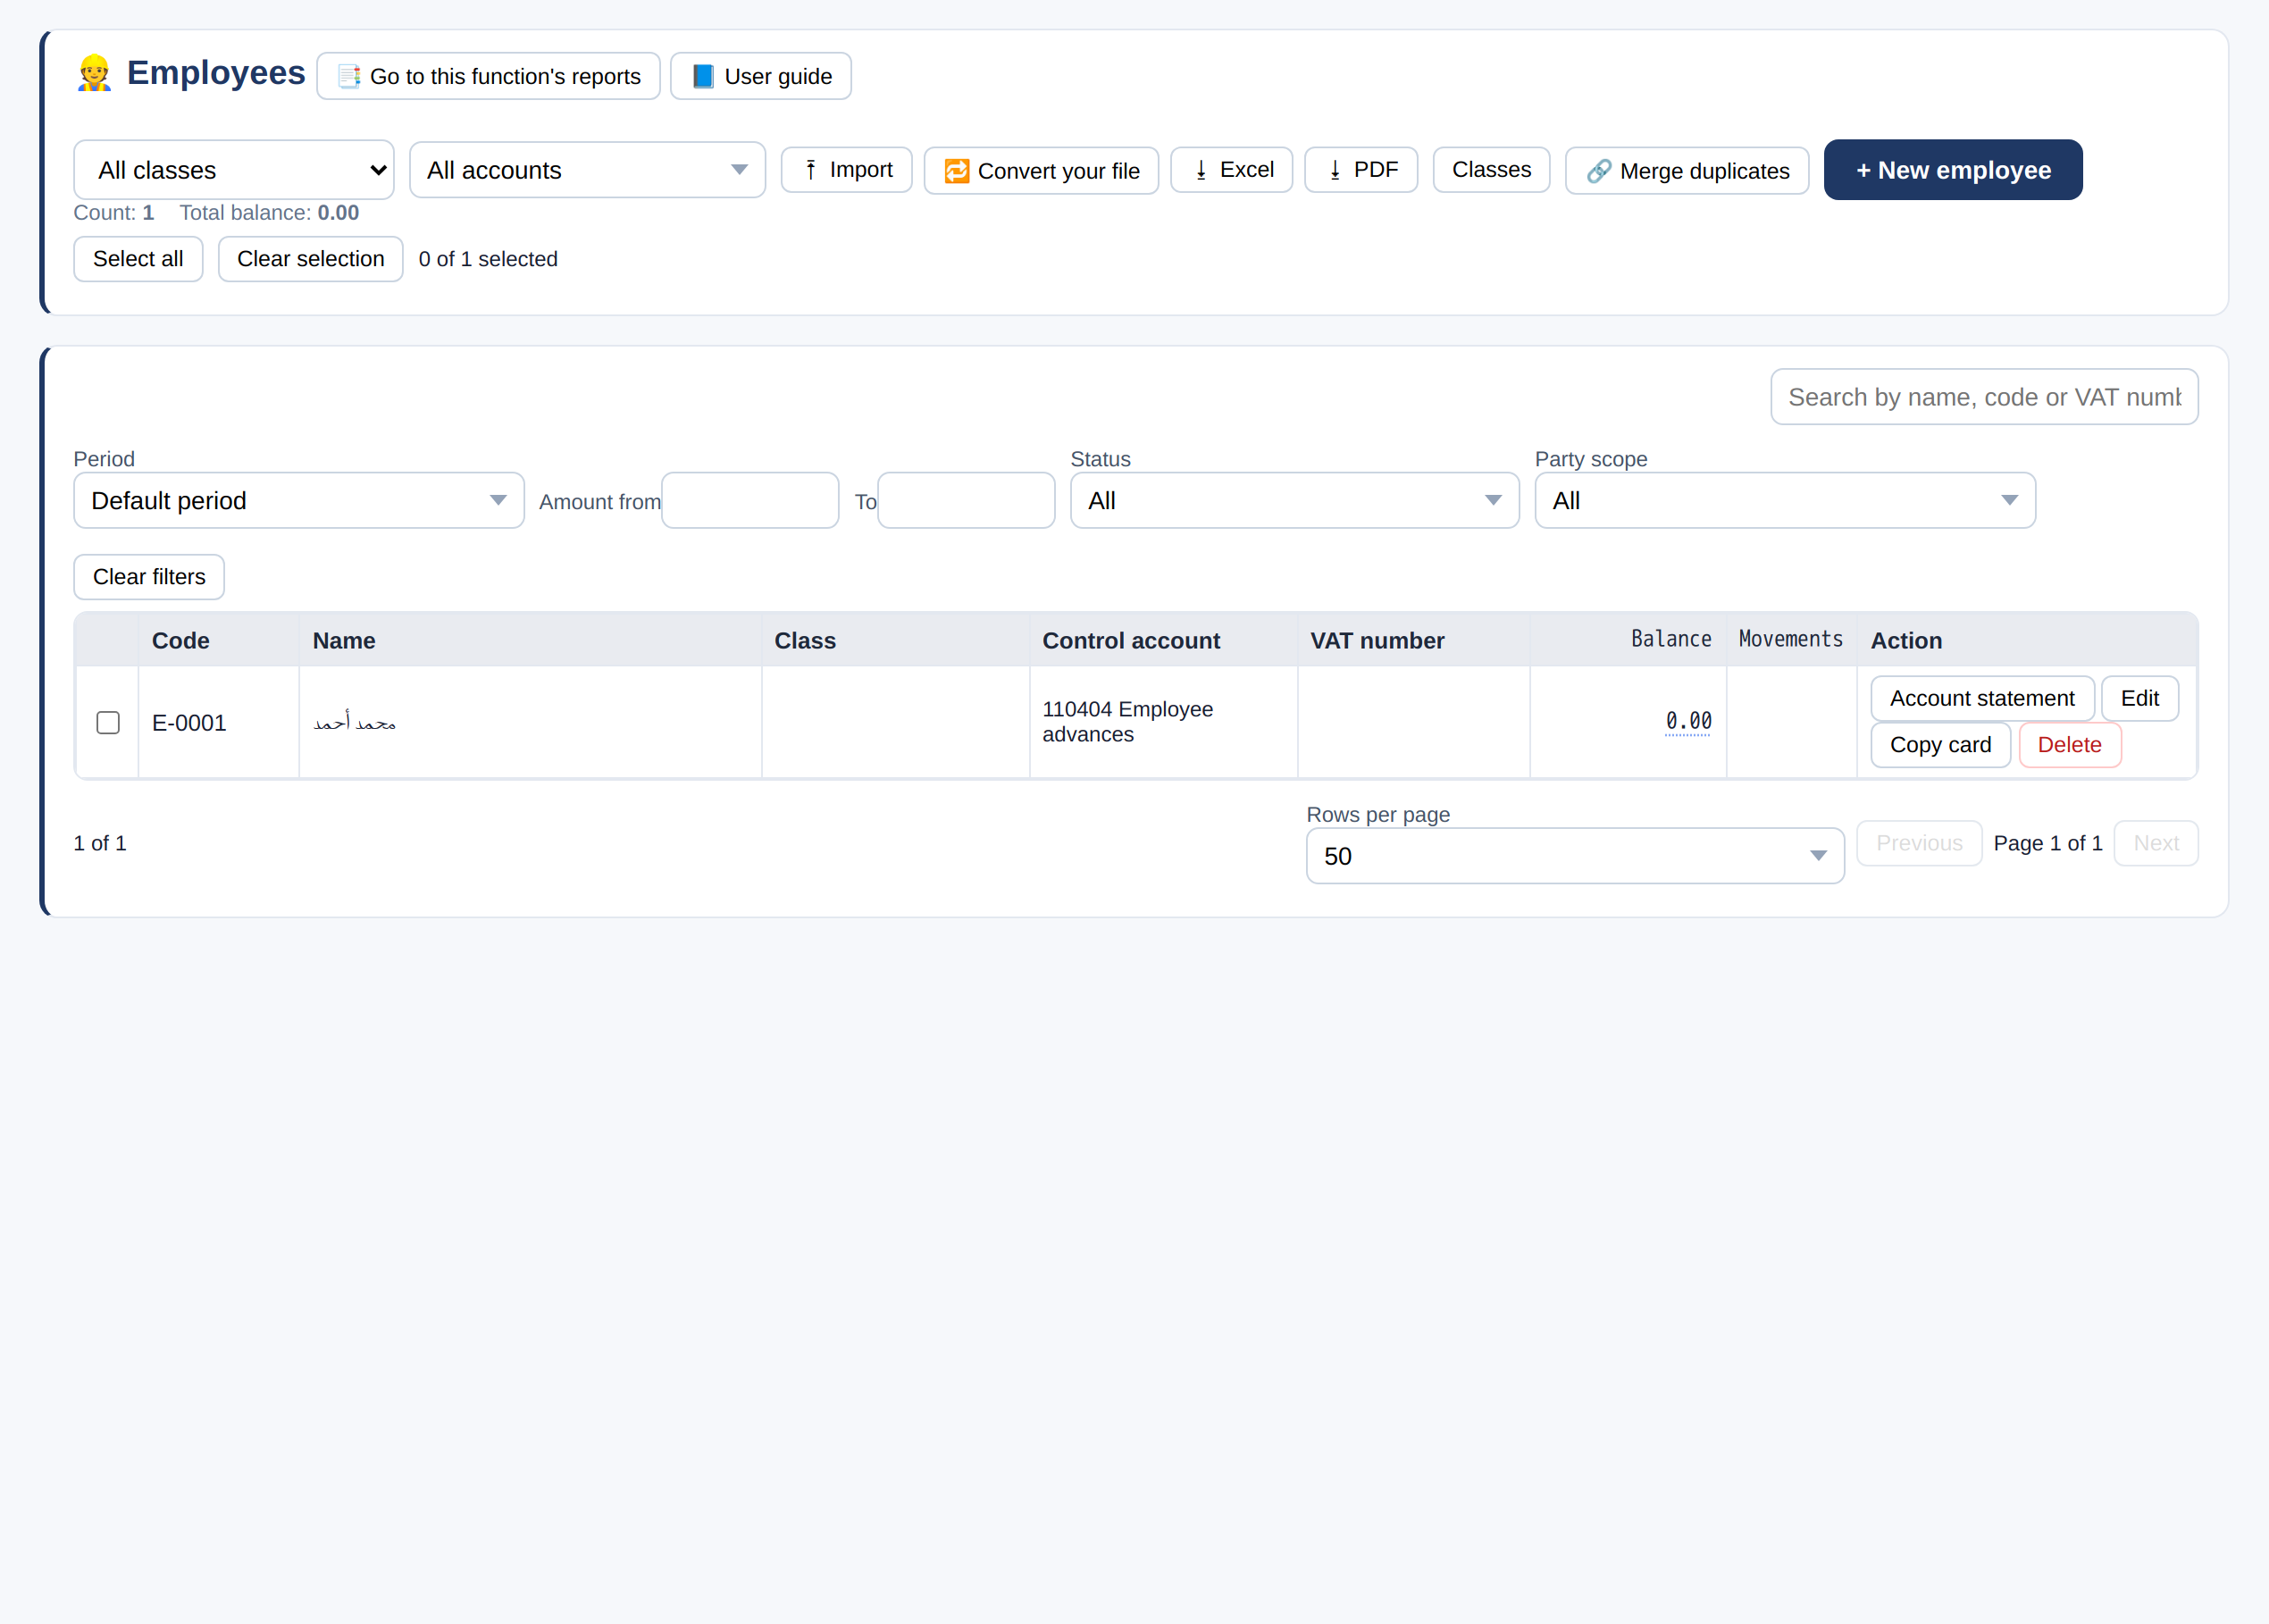
- «+ New employee»: details, hire date, salary and its components (basic · housing · transport), social insurance and IBAN.
- «Statement» shows advances and custody and their movements.
Payroll run
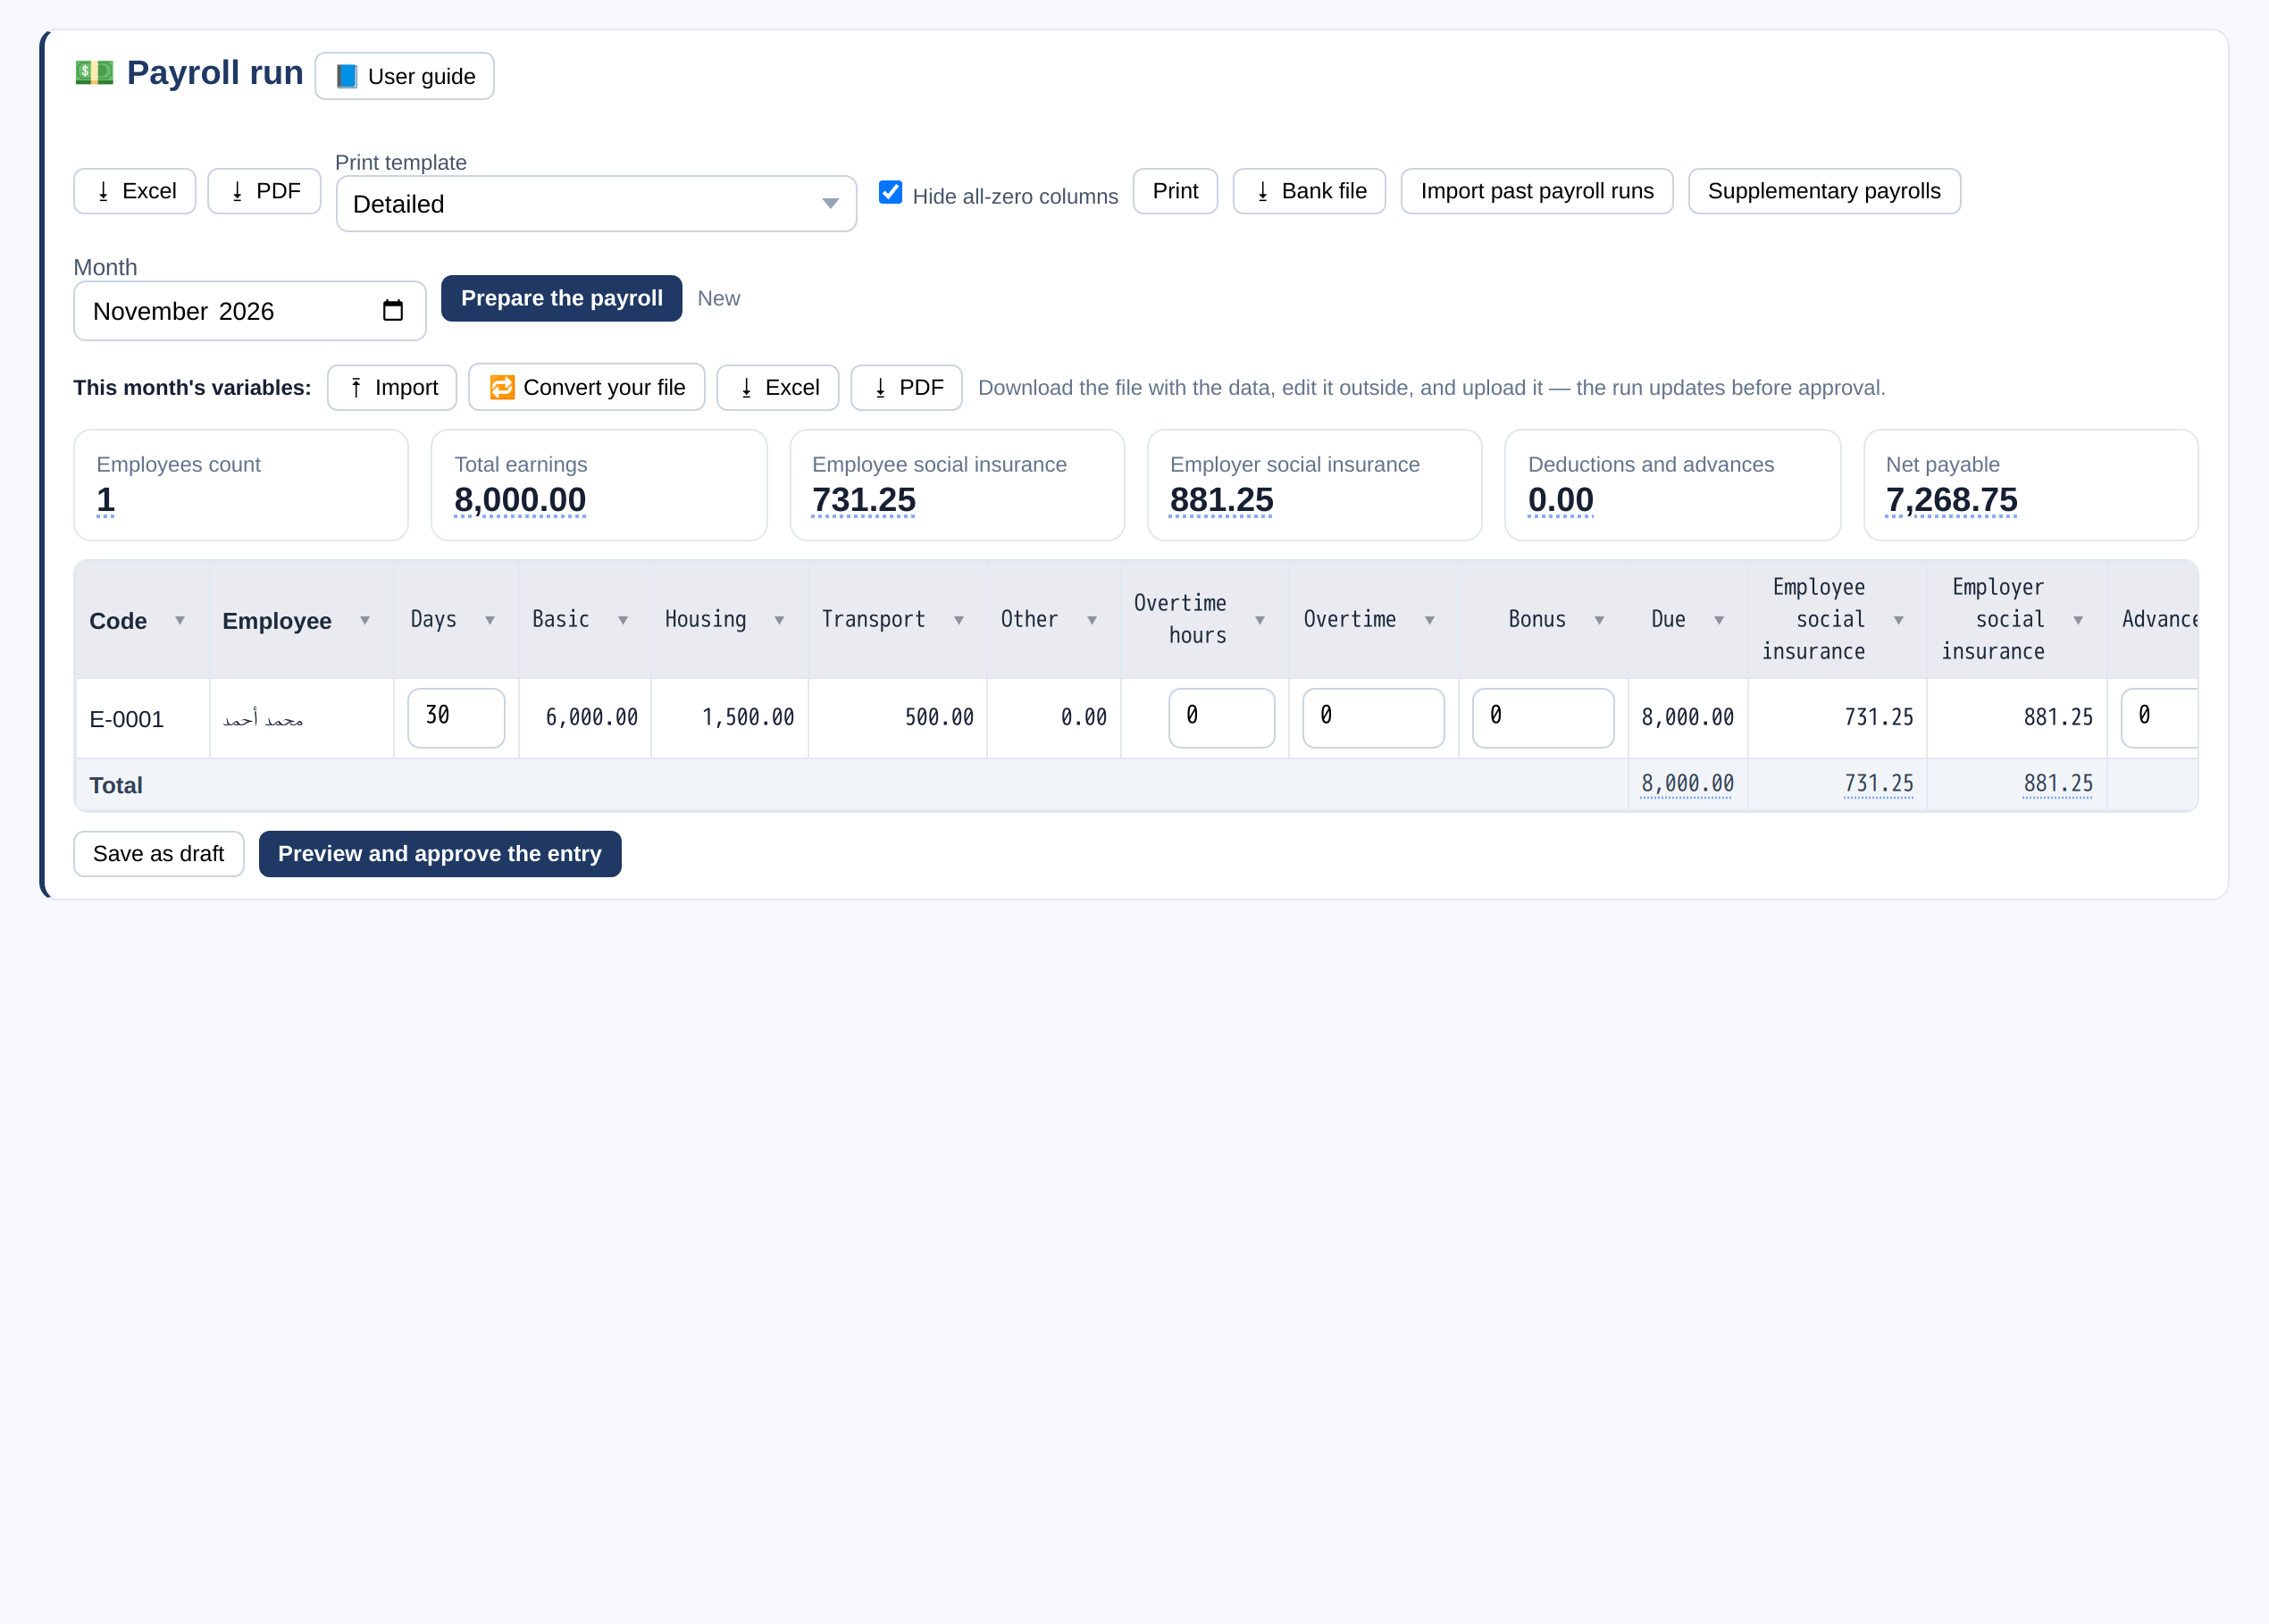
- Choose the month and click «Prepare payroll» — it loads every employee with their entitlements.
- Adjust days, overtime, bonuses and deductions if needed.
- «Preview and approve entry» records payroll; «⭳ Bank file» for the transfer (WPS).
Fixed assets
A register of every asset with its cost, depreciation and net book value.
Asset register
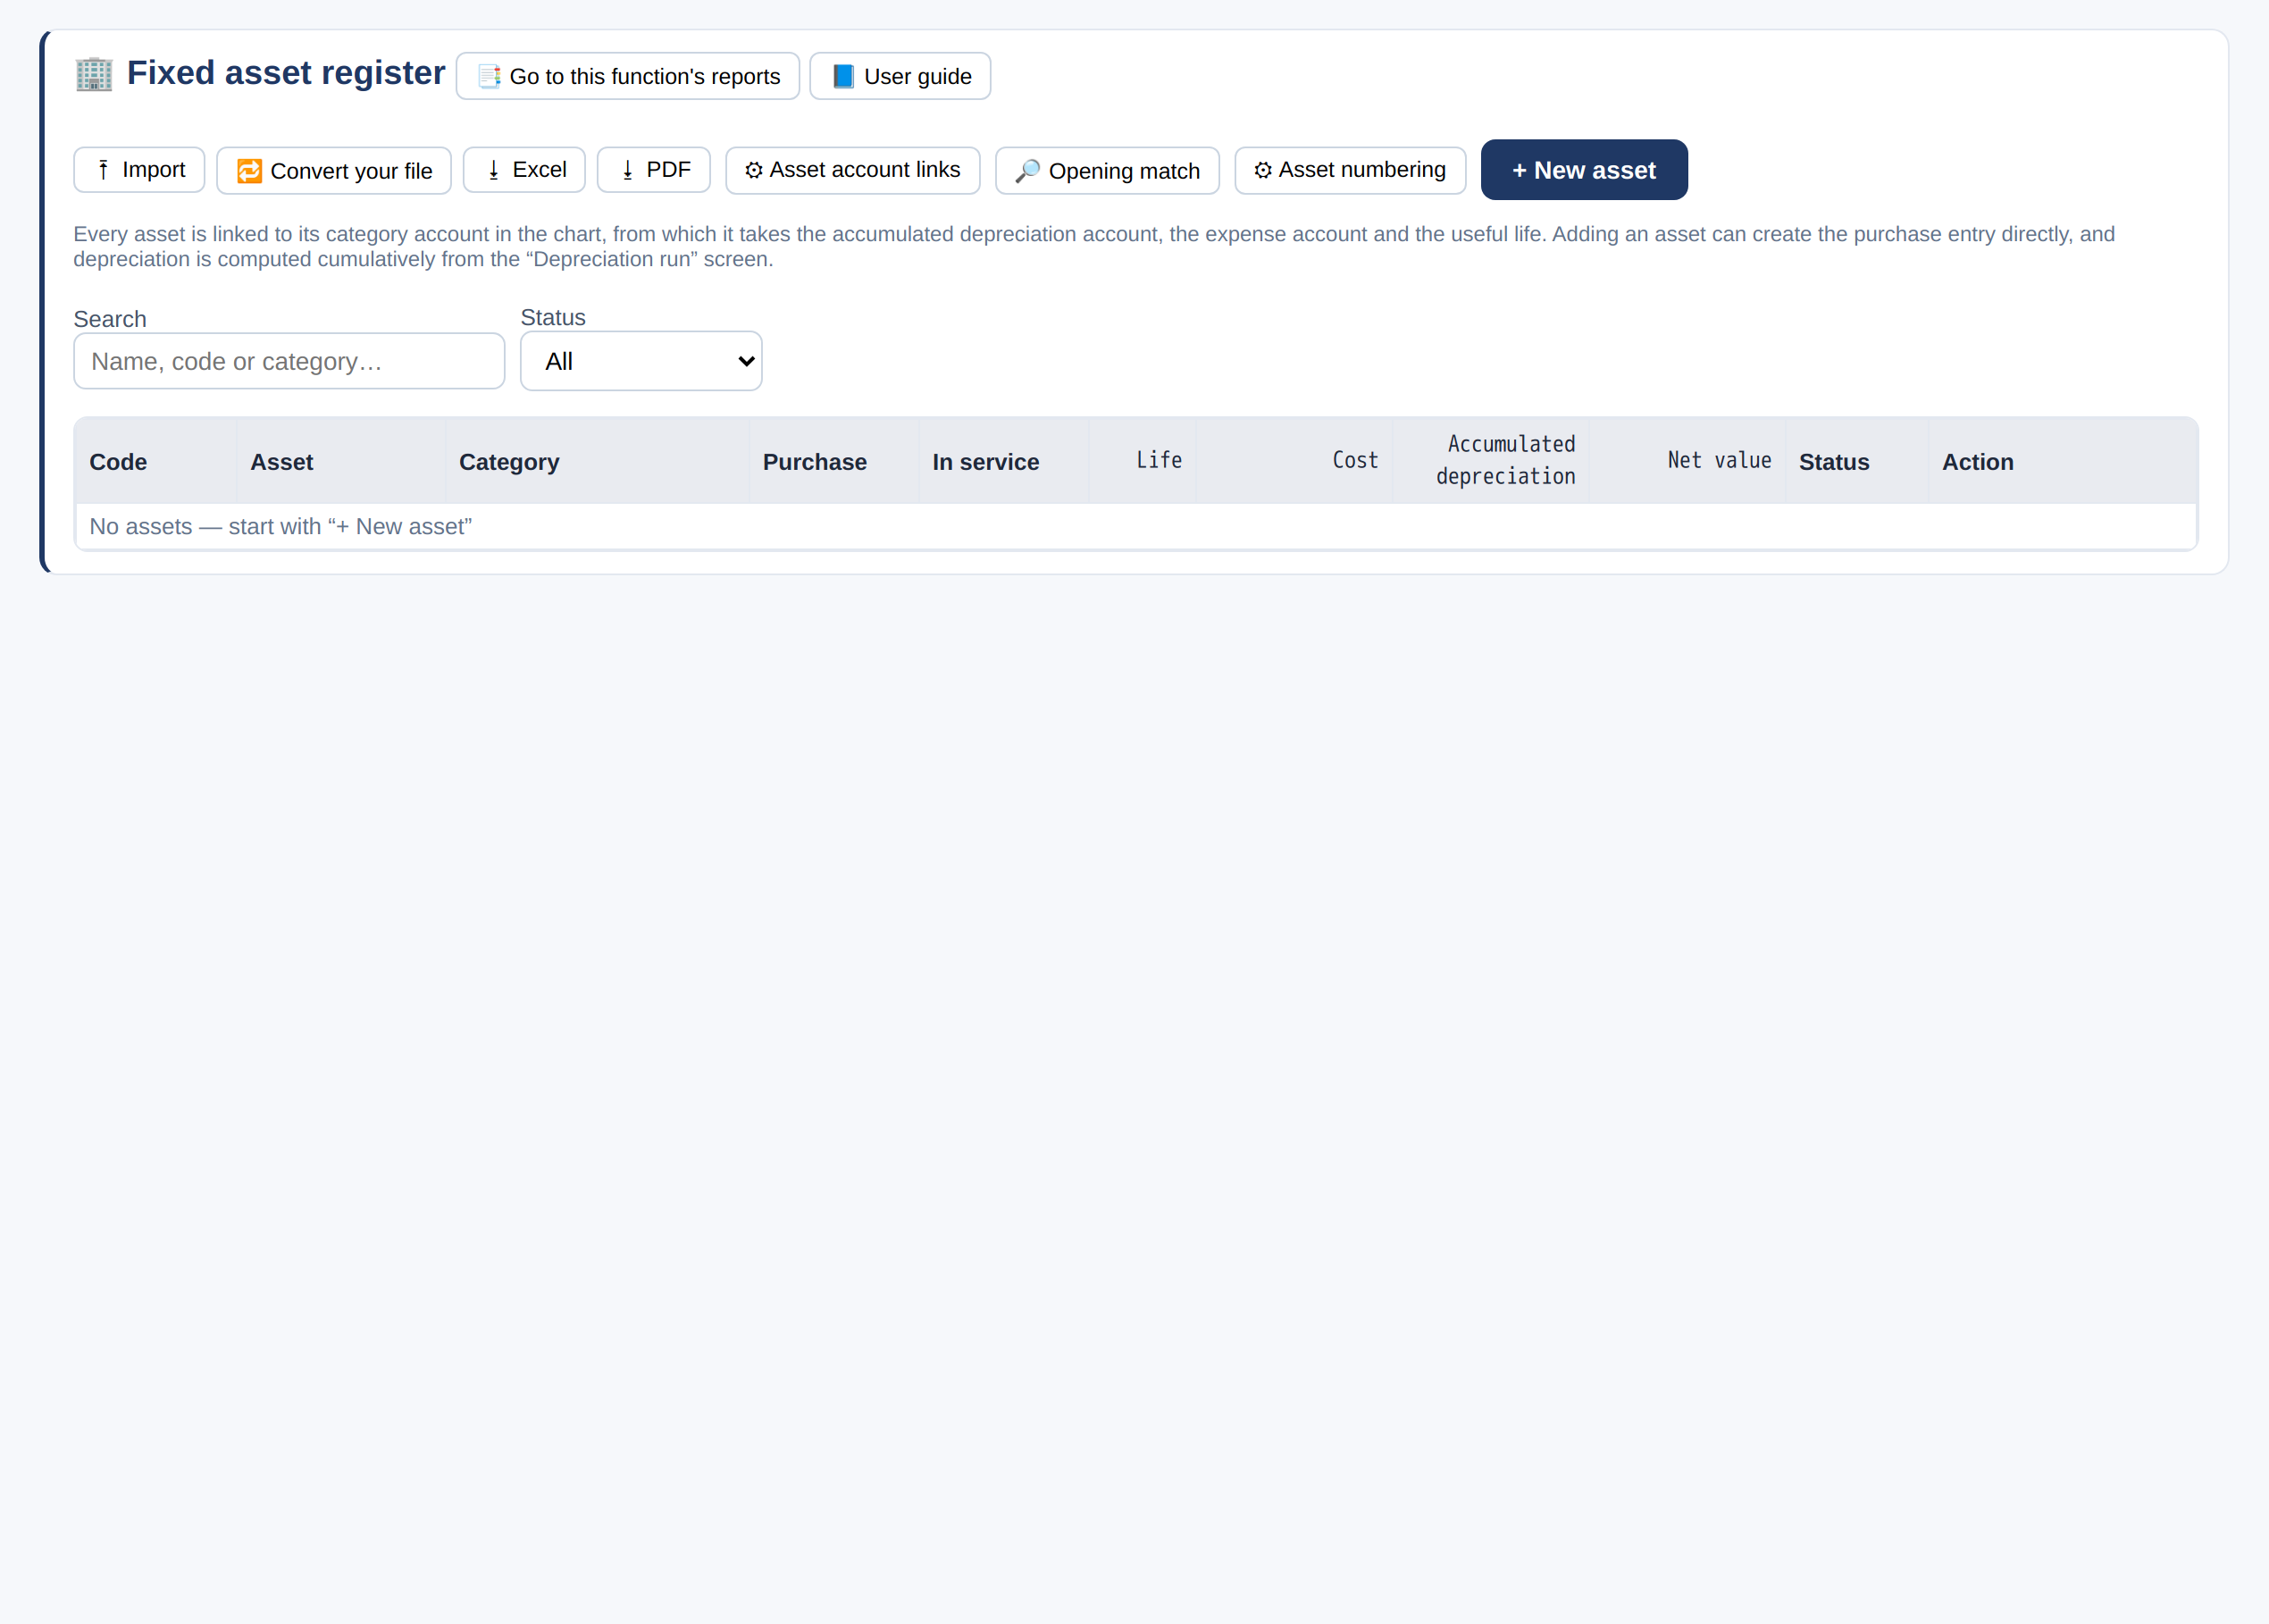
- «+ New asset»: the category (sets the accounts and useful life), purchase and in-service dates, and cost.
- Adding an asset can create the purchase entry directly.
- «↗ Calculate depreciation» computes accumulated depreciation and posts its entry.
Taxes
VAT is calculated from the entries themselves — not from a side file.
VAT report
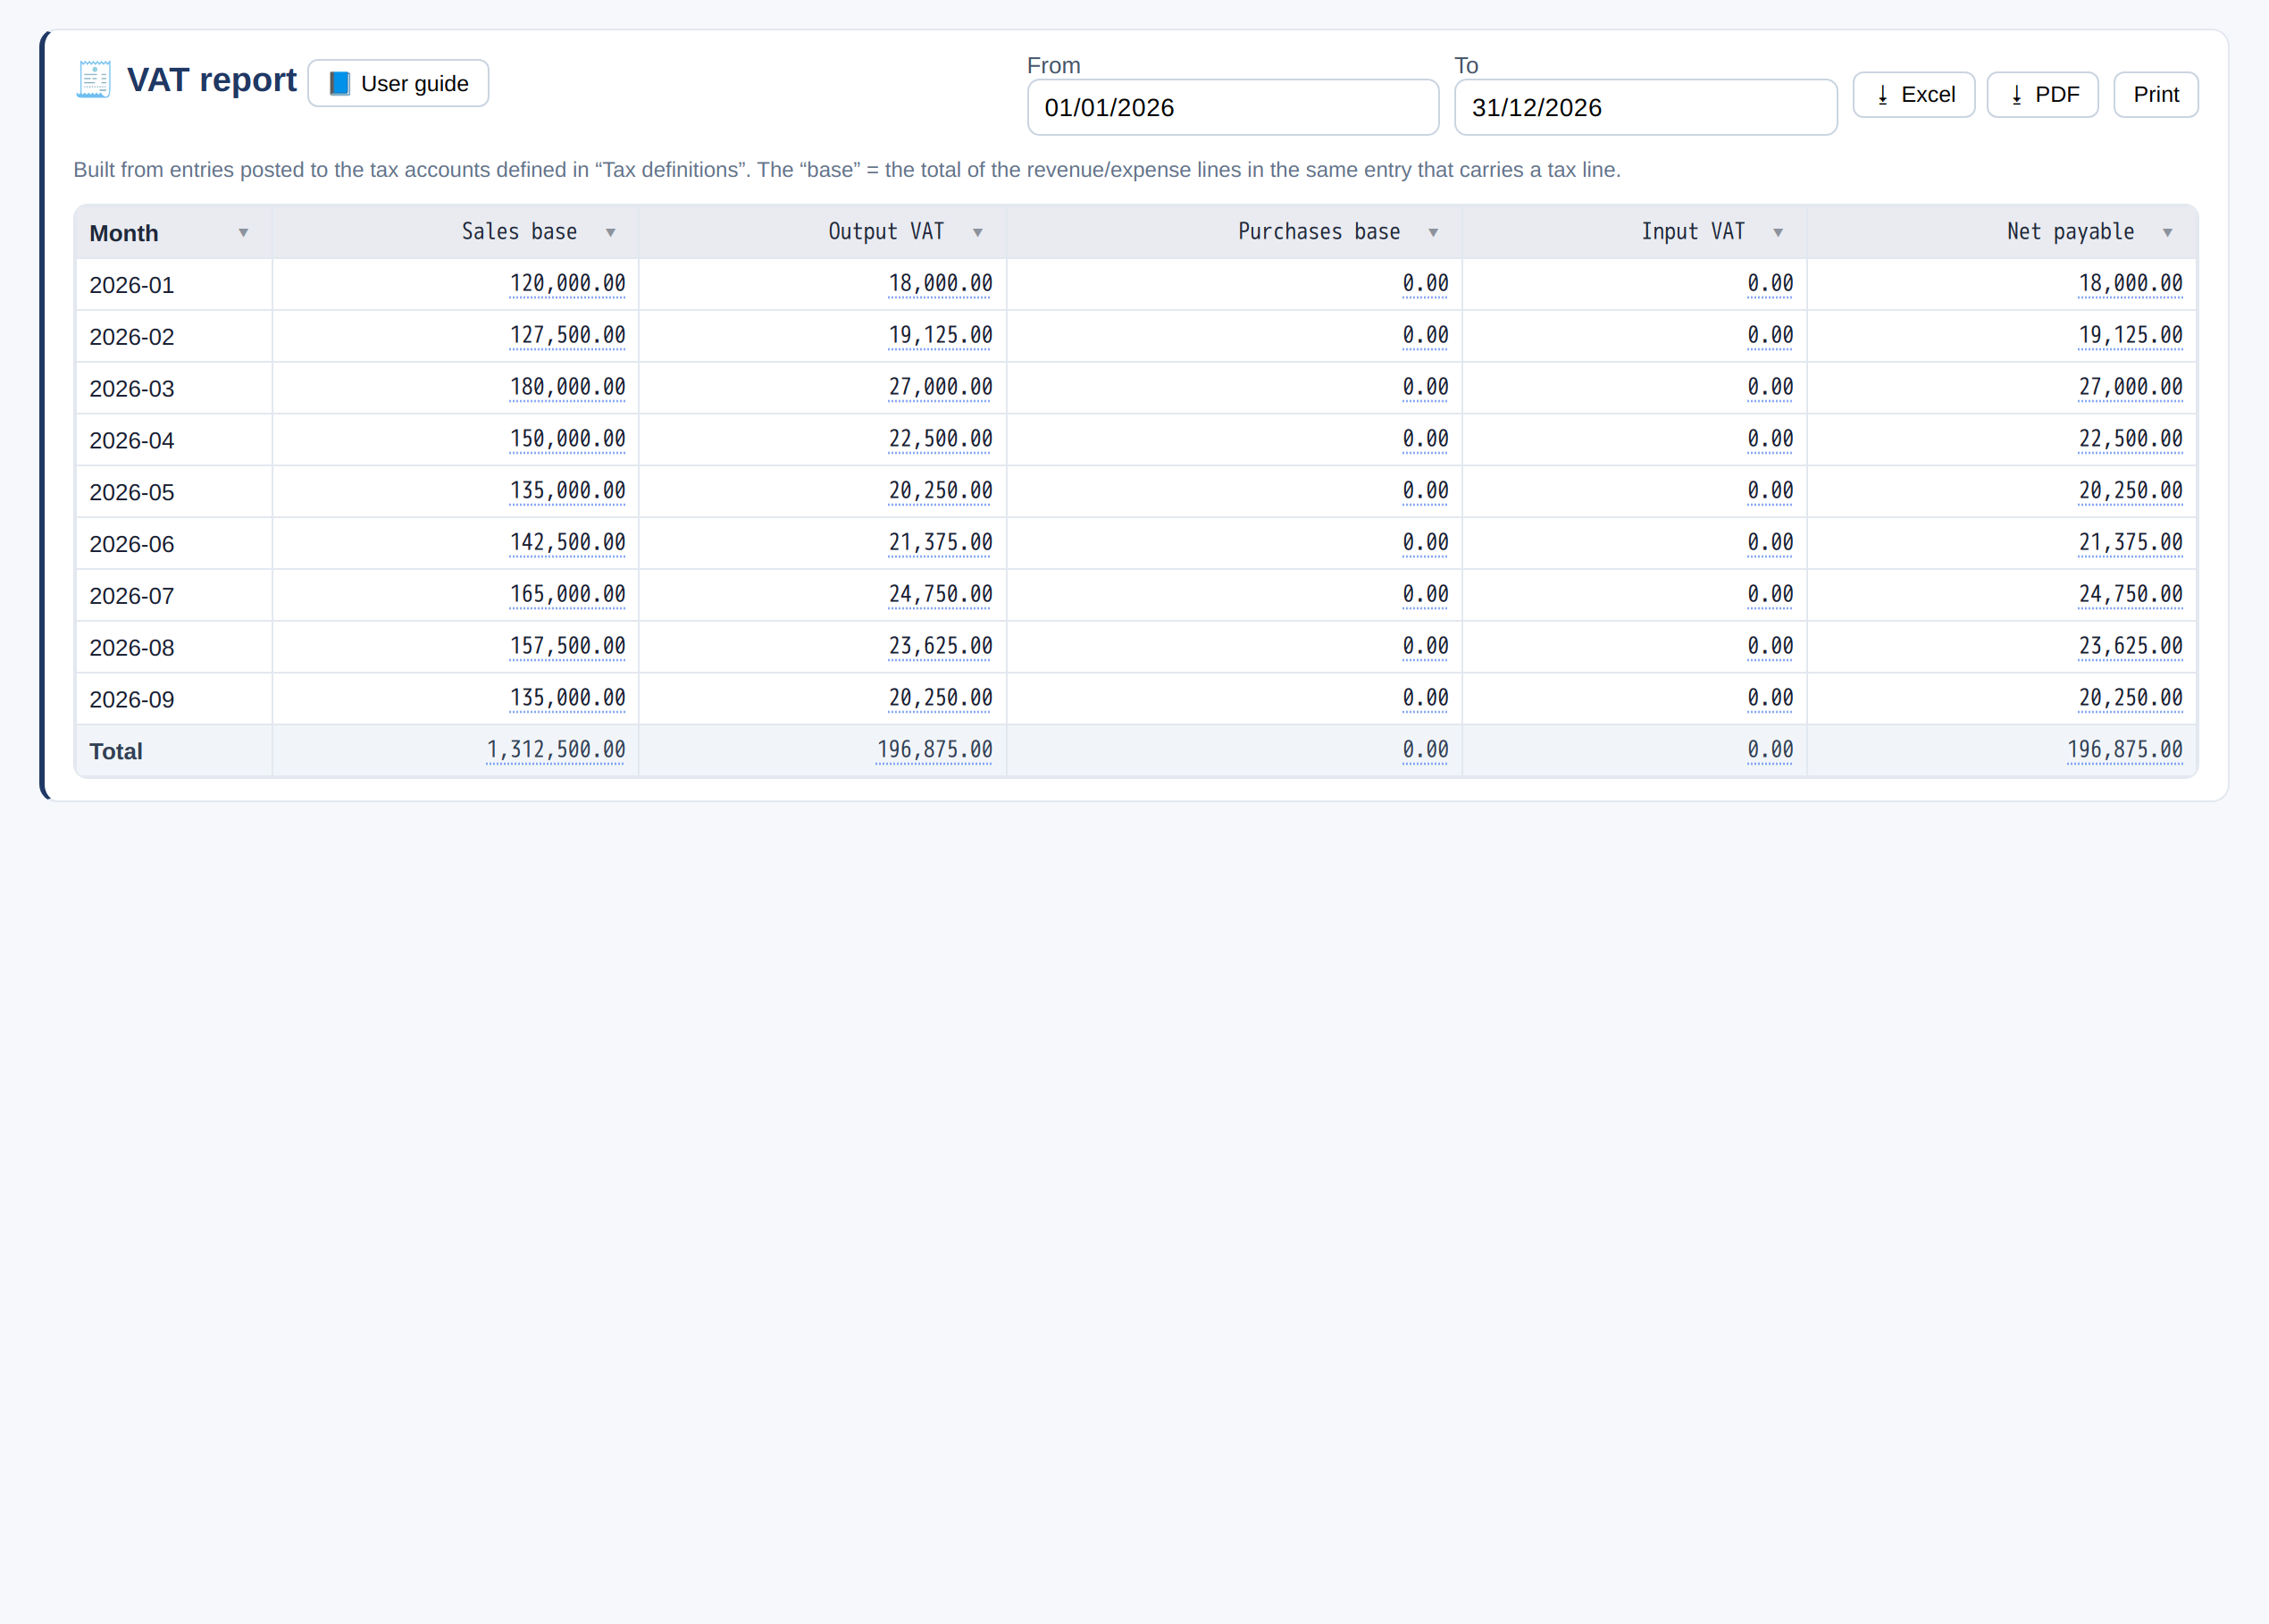
- Choose the period: month by month sales base and output VAT, purchases base and input VAT, and the net due.
- «↗ Tax definitions» to change rates or accounts.
VAT returns
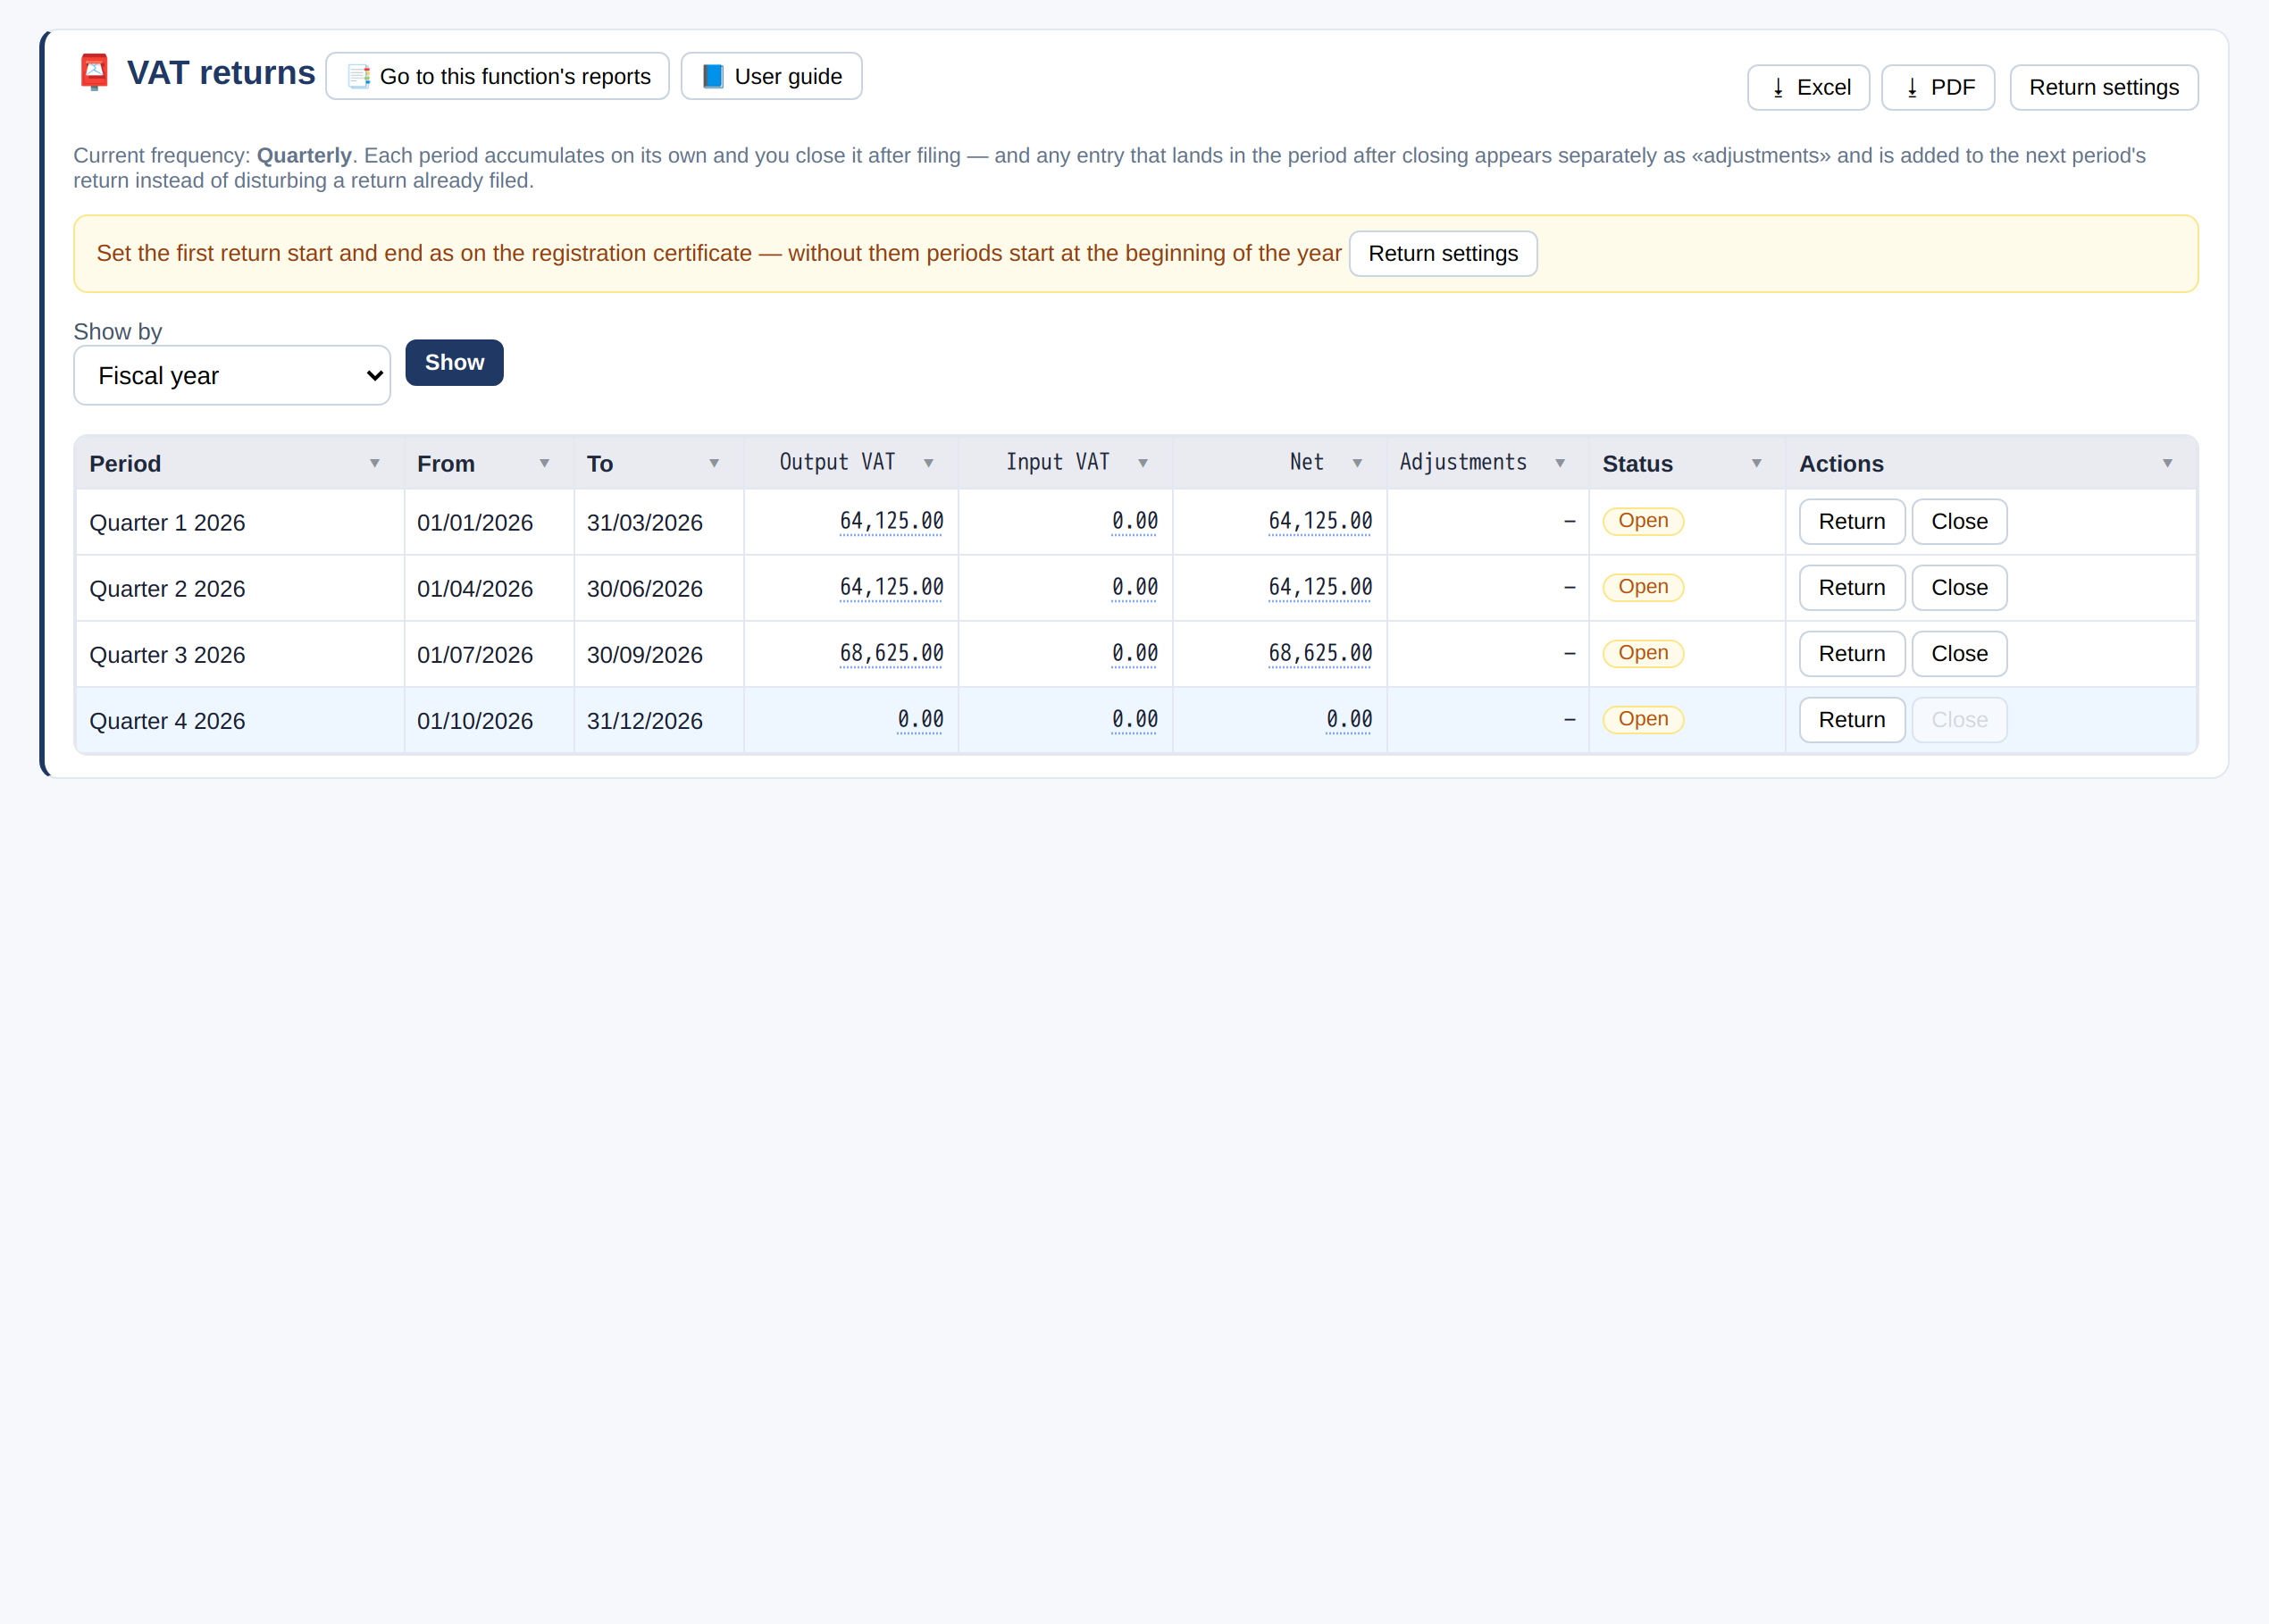
- Each return period (e.g. quarterly) is gathered on its own, in the authority's format.
- «Return» to view it, and «Close» after filing.
- Any entry that lands in a closed period shows as an «Adjustment» and moves to the next return instead of changing the filed one.
Deposits and e-invoicing
A deposit that carries VAT gets its own e-invoice when it is received, and the final invoice it is deducted from then refers to it.
The principle
- An advance payment for a supply carries VAT on the day it is received, so a «Prepayment invoice» is issued for it and sent to the Authority with the deposit’s base and VAT.
- When the deposit is deducted from the final invoice, the invoice is sent with its full VAT, plus a line referring to the prepayment invoice, and the amount due is the total minus the prepaid amount.
- A refund of the deposit gets a «Prepayment credit note» against the prepayment invoice.
- A refundable security deposit is not a supply, so no invoice is issued for it.
When the final invoice stops
- The final invoice stops with the status «Missing data» in the «ZATCA log» until the cause is fixed, if one of these messages appears:
- «The prepayment invoice is not in the ZATCA chain»: the deposit’s own invoice hasn’t been sent yet.
- «The amount deducted exceeds the deposit balance» or «Prepayments exceed the invoice total»: the amount deducted exceeds what remains of the deposit or the invoice itself.
- «Deposit not found»: the deducted deposit doesn’t exist.
The invoice at receipt, with and without the integration
- For a VAT-registered company, a «Prepayment invoice» is issued when the deposit is received, even if the integration with the Authority is off. It takes a number from the same sequence, a date and a time, and is printed with a QR code.
- The invoice is signed and sent to the Authority only if the integration is on when it is issued. An invoice issued before the integration was enabled is not sent to the Authority later, and the final invoice refers to it by its original number, date and time.
- To print it later: from «Deposits», press «Print the prepayment invoice». On a refund, a «Credit note — Prepayment refund» is printed.
- Deposits received before this feature have no invoice. For those only, «Issue the prepayment invoice» appears.
- A company not registered for VAT gets no prepayment invoice.
- A manual deduction from «Deposits» against an invoice already sent to the Authority shows a warning: «The invoice was sent to ZATCA without the deposit deduction — settling it with ZATCA will need a note». The warning doesn’t block saving.
A prepayment invoice can’t be edited or cancelled
- Once issued, a prepayment invoice can’t be edited or cancelled, even if it was issued before the integration with the Authority was enabled. A correction is made with a credit note.
- Trying to edit it shows «The prepayment invoice was issued and cannot be edited: … — the correction is a credit note», and trying to cancel it shows «The prepayment invoice was issued and cannot be cancelled: … — issue a credit note instead».
- A deposit that has a prepayment invoice isn’t cancelled but refunded: «Cancel» doesn’t appear for it, and «This deposit has a prepayment invoice — refund it (credit note) instead of cancelling» appears.
- In the «ZATCA log», an invoice issued before the integration shows «Issued before the ZATCA integration and is not sent».
The e-invoice total and the invoice total
The e-invoice sent to the Authority must match the invoice you issued and posted, to the halala.
The principle
- The e-invoice is the invoice’s record with the Authority. So its total and its VAT must equal what was given to the customer and what was posted in the books.
- Differences usually come from rounding: the unit price is written with two decimals, and the quantity may have three (weighed items), so their product can differ from the line’s net amount by a few halalas.
What the file sent contains
- The net amount of each line in the e-invoice equals the line’s net amount in the entry.
- If a line needs rounding, the halalas appear in the file as a small discount on the line with the reason «Rounding adjustment», not as a trade discount.
- The printed invoice and the entry don’t change, and the total in the QR code equals the invoice total.
Earlier invoices
- Invoices issued before this update stay as they were sent.
- They may show, in the «ZATCA log», the warning «ZATCA total … differs from the document total …».
Documents after a VAT return is closed, and matching the filed return
If a document belonging to a period whose return you closed is added, changed or deleted, you see its effect on each box, and whether it is corrected in the next return or needs the previous return amended.
The principle
- The return filed with the Authority represents the period as it stood on the day it was filed. So any document belonging to the period that is recorded or changed after that needs a correction.
- An error that understated net VAT, if below SAR 15,000, is corrected in the next return, in the prior-period corrections box (item 14).
- An error that overstated net VAT (in your favour) is deducted in any later return with no amount limit, within five years from the end of the period’s calendar year.
- An error in the bases without the tax, or an understatement of SAR 15,000 or more, is corrected by amending the previous return itself on the Authority’s portal.
Documents after close
- From the side menu «Taxes & zakat», choose «VAT returns».
- If there are documents belonging to closed periods, a warning starting with «There are documents belonging to closed periods» appears above the list, with their effect on sales, purchases and net VAT.
- Press «After close» next to the period, with the count in brackets. «Documents after close» then lists them one by one: «Added after close», «Changed after close» or «Deleted/cancelled after close», with the number, type, date, who recorded it, and its effect on each box.
- You can export the list with «⭳ Export».
Reconciliation with the return actually filed
- Press «Return actually filed» next to the period, and enter the return’s figures as filed on the Authority’s portal, after any amendment to them, for each box. Then press «Save». Nothing is saved before that, and each save is recorded in the «Save log».
- «Reconciliation with the return actually filed» shows three figures for each box: «Return actually filed», «Closed by the program» and «Correct now», with the reason: «Amended on the portal» or documents after close.
- Then the action: «The VAT difference is under the limit ⇒ item 14 in the first open return», or «The previous return needs amending (the «Amend VAT return» service)».
- If you saved the actually filed figures, the correction is calculated against them, not against what the program closed. If the two differ, a yellow line appears in the return: «The base is what was actually filed (…), while the program had closed (…) — the difference: amended on the portal».
E-invoicing per branch and device
Every device that signs invoices is linked to the Authority on its own, has a branch profile with its address and registration, and you choose the points of sale that sign with it.
The principle
- Every device that issues e-invoices is registered with the Authority on its own, with a code requested from the Fatoora portal for each device.
- An invoice is signed by the device of the point of sale that issued it, and carries the address and commercial registration of that device’s branch.
- A company that sets none of this up carries on exactly as it does today.
Registering the device
- On the machine that will sign, open «ZATCA integration».
- Sign in to the Fatoora portal with the business account, choose to onboard a new unit or device, and request the code.
- Enter the code in «OTP code» and press «Register device». The code is valid for one hour.
- Repeat this on every machine, with a new code for each device.
The branch profile and points of sale
- In the devices table each device shows its «Branch and points». Press «Branch profile» next to the device.
- Enter the «Branch name» and the «Branch commercial registration (if different from the company)».
- In «Branch national address» enter the full address, or leave it empty so invoices carry the company address.
- In «Points of sale signing with this device» tick the points of sale that sign with this device, then press «Save».
- A point of sale is linked to one device only. Selecting it for another device moves it there.
An invoice from a point linked to another device
- A point of sale linked to a device that isn’t on the selling machine doesn’t have its invoices signed here, and they aren’t signed by another device.
- The invoice shows in the ZATCA log with the status «Device not registered».
- Open it from the point’s machine and press «Retry», or change the point’s link from «Branch profile».
Deposits and VAT
A deposit paid for an upcoming supply carries VAT on the day it is received, while a refundable security deposit is outside VAT. That is why every deposit has a type.
The principle
- VAT becomes due when the consideration, or part of it, is received — even before the invoice is issued.
- So a deposit a customer pays for an upcoming service or goods (a hall booking, an appointment, an order) carries VAT on the day it is received.
- A security amount that is refunded to the customer and is not paid for a supply carries no VAT.
Each deposit’s type
- From «Deposits», press «➕ New deposit».
- Choose the «Deposit type»: «Advance payment for a supply (VAT due)» or «Refundable security deposit (outside VAT)».
- If your entity is registered for VAT, a deposit of the first type is recorded VAT-inclusive: part to customer advances and part to output VAT.
- When the deposit is applied to an invoice or refunded to the customer, its VAT is reversed, so the VAT is not counted twice. A refund is recorded as a credit note, so that is how you will find it when reviewing the return.
Your entity’s default type
- In the company settings you will find «Default deposit type: advance for a supply (VAT due on receipt)».
- Choose «Yes» if most of your deposits are advances for a supply, or «No — refundable security deposit» if most are guarantees that are refunded.
- The default type is preselected on every new deposit, and you can change it for that deposit.
Matching the VAT return
- The VAT on deposits received goes into the output VAT of the period of receipt, not the period of the invoice.
- When the deposit is applied to an invoice in a later period, the invoice carries its full VAT and the VAT of the deducted deposit is reversed, so the net entering that period is the VAT on the remainder only.
Correcting prior-period errors in the VAT return
A filed return does not change once it is filed. If you find an error in a previous period, the authority's rules decide how it is corrected: some corrections go into the next return, others require amending the previous return itself.
The rule: what goes into the next return and what does not
- The «corrections from previous periods» field (item 14) takes the VAT amount only, not the base.
- A correction that increases the tax (an understatement in a previous return) goes into this field if its net amount is below SAR 15,000.
- If it is SAR 15,000 or more, amend the previous return or make a voluntary disclosure through the «Amend VAT return» e-service on the Zakat, Tax and Customs Authority portal.
- A correction in your favour (an overstatement in a previous return) is deducted in any later return with no amount limit, within five years from the end of the calendar year in which that period falls (article 63, paragraphs 2 and 4).
- An error in zero-rated, exempt or other bases with no tax effect is not put into the new return's boxes; it is corrected by amending the previous return.
A closed period shows what was filed
- From «Taxes & zakat», choose «VAT returns». Once a period's return is filed, press «Close» next to it.
- A closed period shows the figures as filed. Any entry that lands in it after closing shows in the «Adjustments» column, together with the difference between what was filed and the correct figure.
- That difference moves to the first open return after it, according to the «Entries posted after closing» setting in «Return settings».
- The year-close entry is left out of the return, because it zeroes revenue without tax and is neither a sale nor a return.
A tax correction below the limit: item 14
- Open the «Return» for the open period. If a previous closed period has a tax difference, a «Box 14 — corrections from a prior period» line appears with the period's name.
- Below it, the «Box 14 corrections — where they came from» table lists the entries that created the difference, so you can review them one by one.
- If the open period has more than one closed period before it, all their differences are gathered in this return, and whatever was carried into a return that has since been closed is not carried again.
- The limit in «Return settings» («Box 14 limit — prior-period corrections (tax, SAR)») can be lowered if you want to be cautious, but not raised above the legal limit.
Above the limit, or a difference in the bases: amend the previous return
- If the net tax correction reaches or exceeds the limit, the alert «Correction above the Box 14 limit — voluntary disclosure required» appears with the «Original period», «Net correction» and «Box 14 limit», and the amount is not added to the return.
- If the difference is in the bases (standard-rated, zero-rated or exempt sales, or purchases), the alert «A previous period needs its return amended (the «Amend VAT return» service)» appears.
- With the alert comes a table for each period and item: «Filed», «Correct» and «Difference». The new return's boxes stay for its own period only.
- Use that table to amend the previous return on the authority's portal, item by item.
The return matches the books
- Before filing any return, compare each item in it with the general ledger: the sales base and its tax, zero-rated, exempt, and purchases and their tax.
- Output VAT on the return must equal the movement on the output VAT account for the period, and the same for input VAT.
- Any difference you cannot explain through «Adjustments» or item 14 — find its source before filing.
Month-end and year-end close
A checklist calculated from your data that tells you what is missing before you close.
Closing
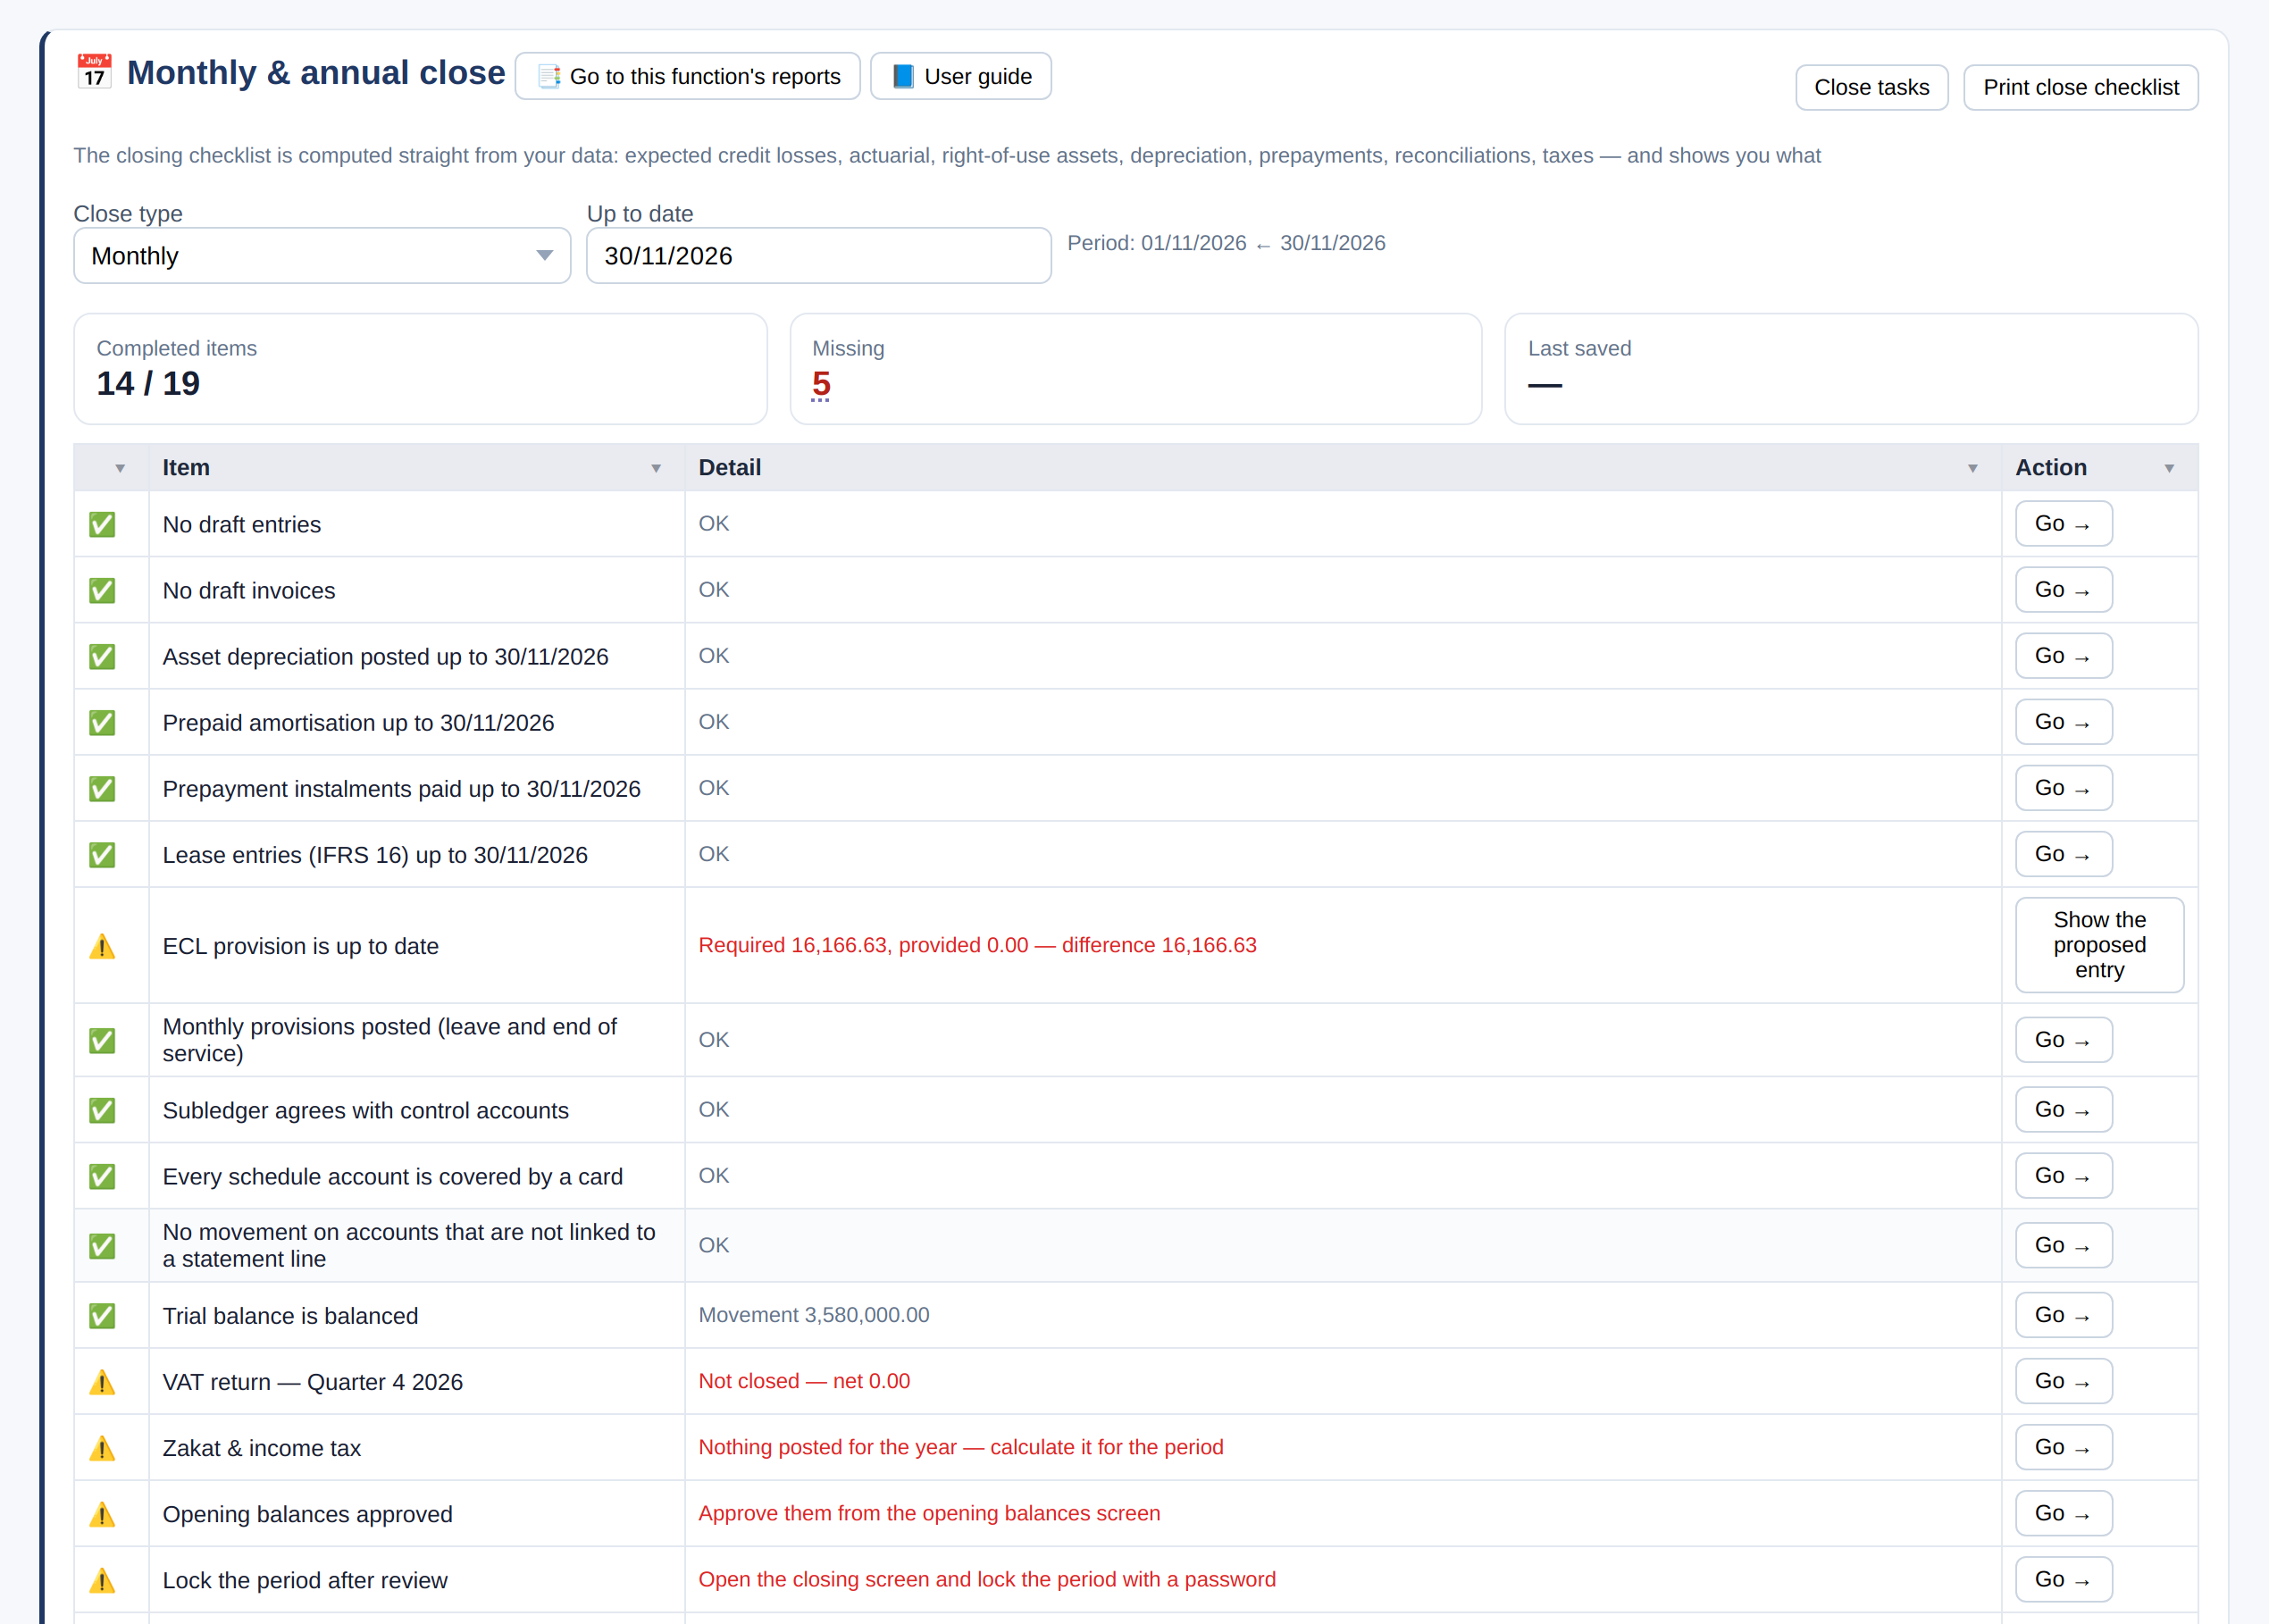
- Choose the close type (monthly · quarterly · annual) and the «up to» date.
- The list shows each item: depreciation, prepayments, provisions, reconciliations, taxes — every missing item has «Go ←».
- When done: «Save close status» — the period is locked against new entries.
Reports and financial statements
Every report grouped by function, and all of them export to Excel and PDF.
All reports
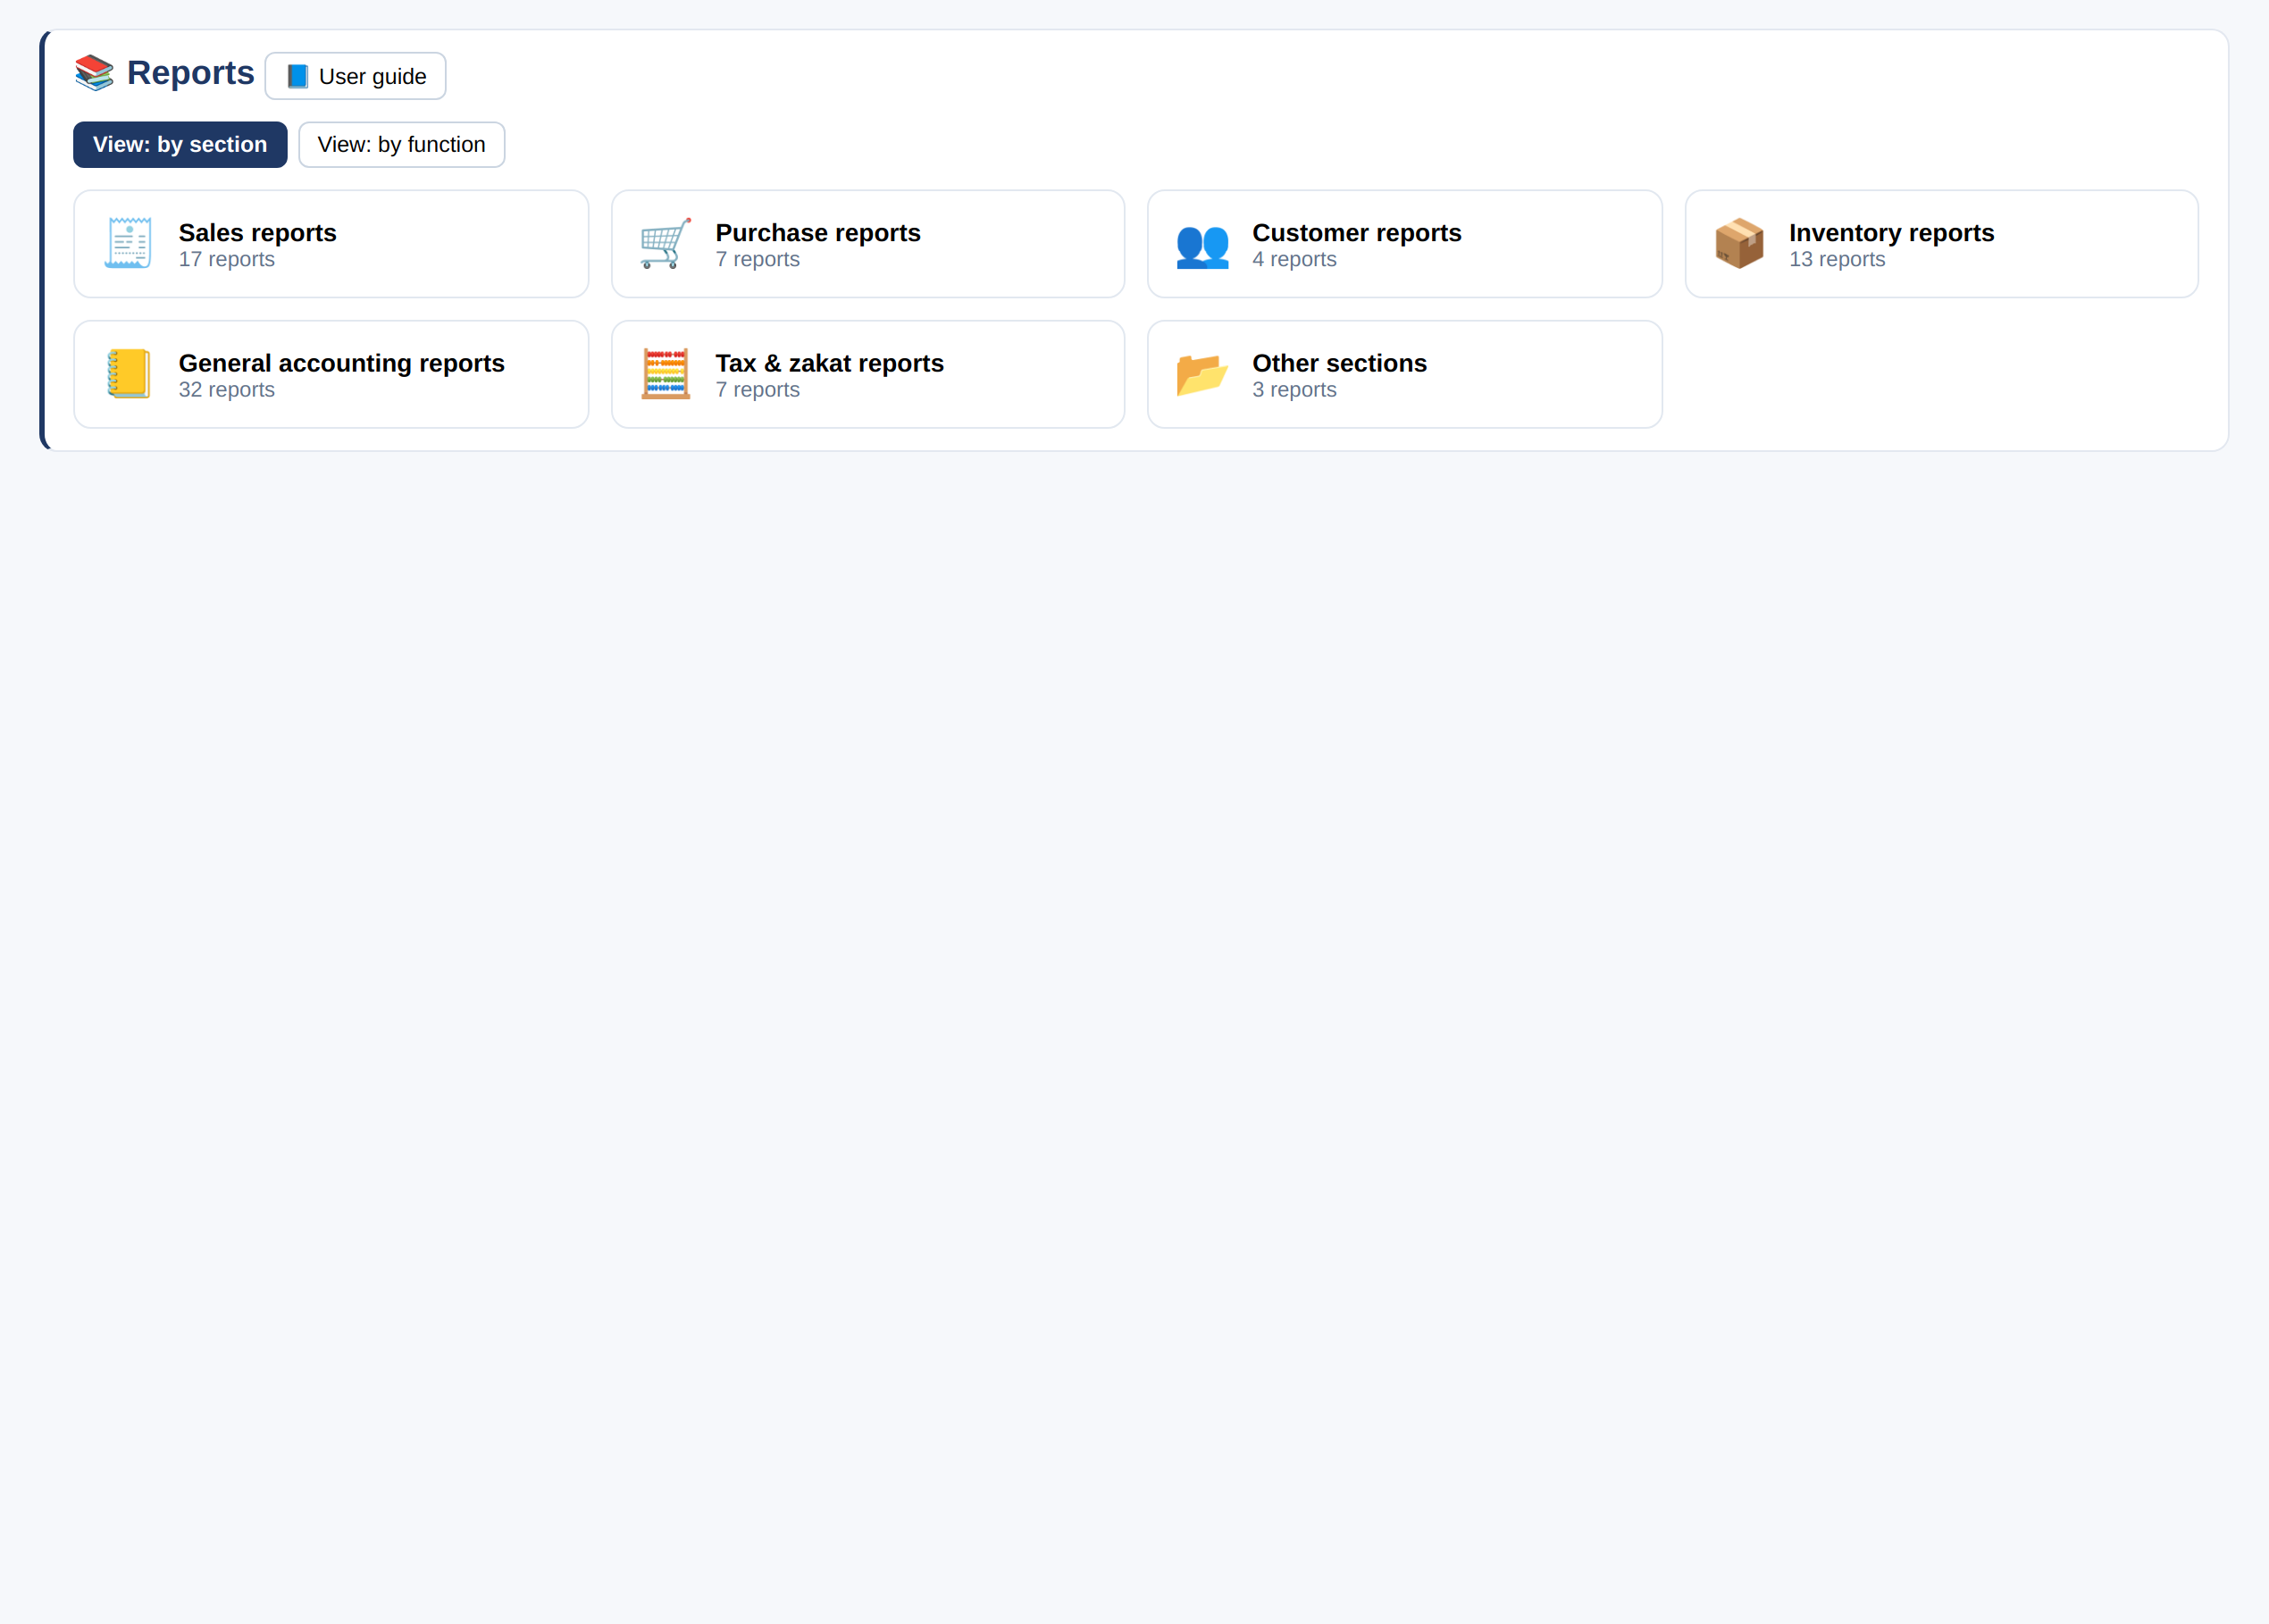
- In the menu: «Reports» ← a category (accounts · financial statements · customers and sales …) ← the report.
- Or «All reports» to see every category as tiles.
Income statement
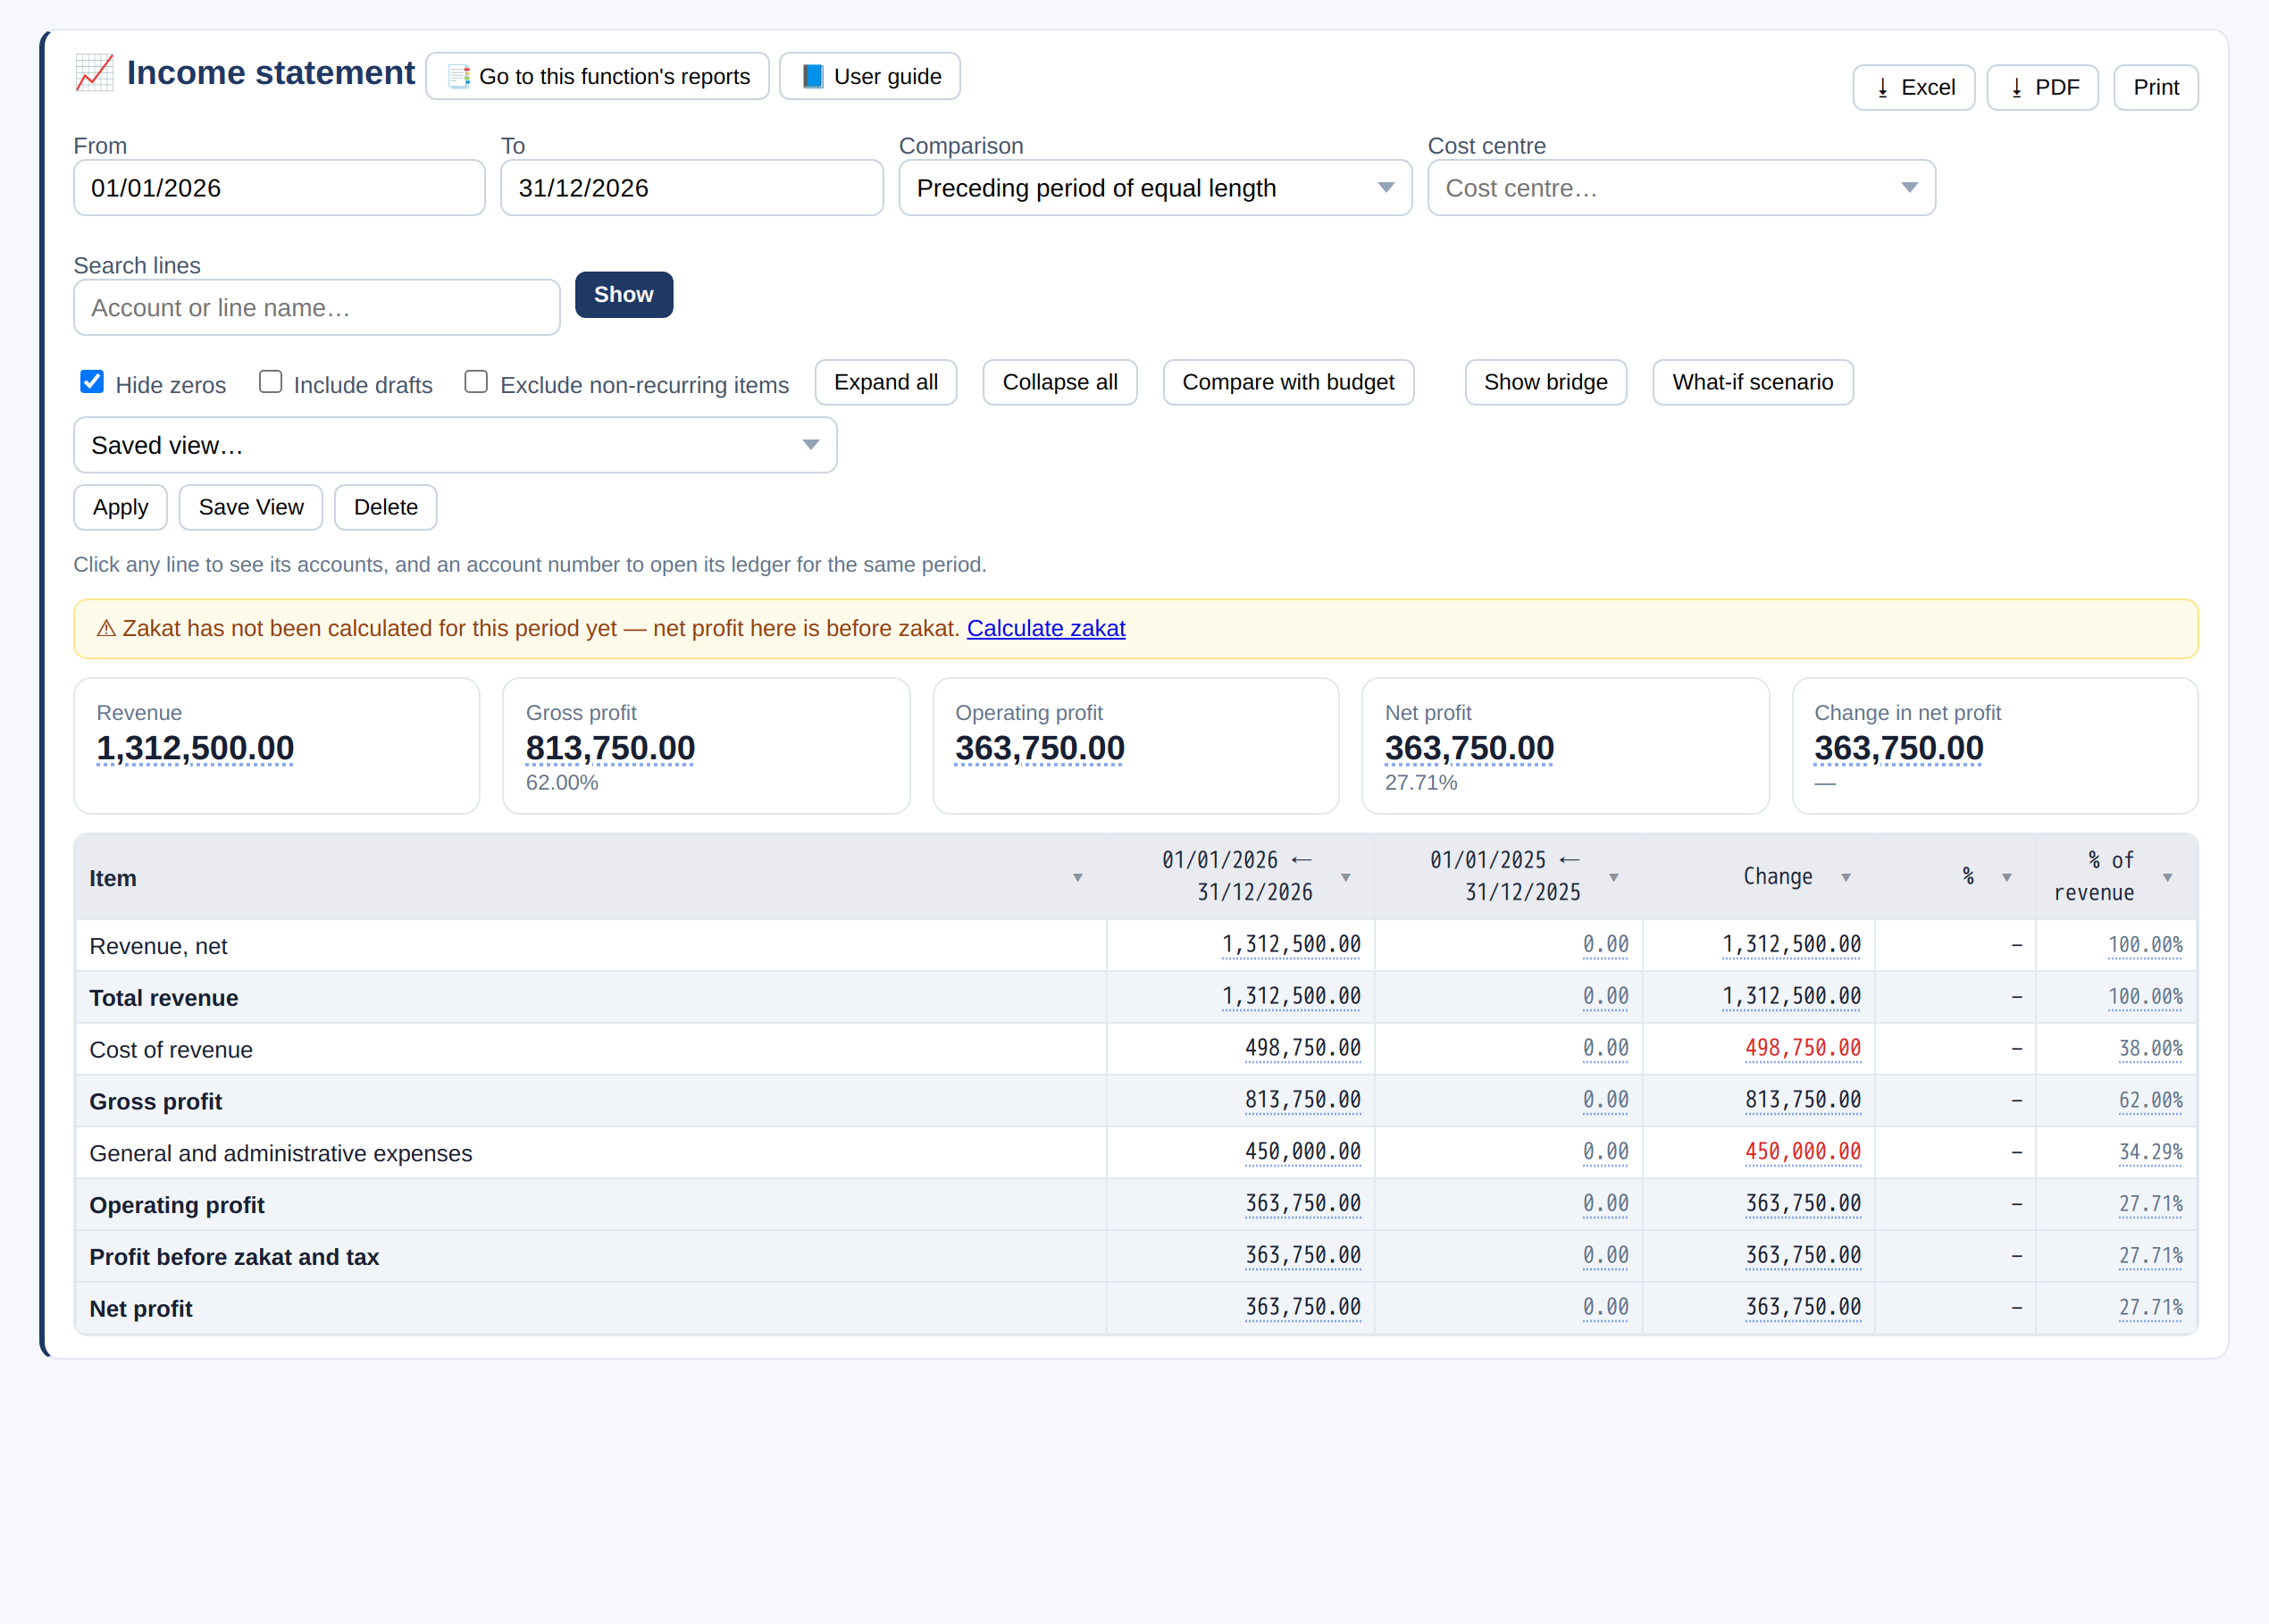
- Choose the period and the comparison (previous period of the same length, or the same period last year).
- Each line with its % of revenue; the cards on top show revenue, gross profit, operating profit and net profit.
- Click any number to see the entries behind it.
Balance sheet
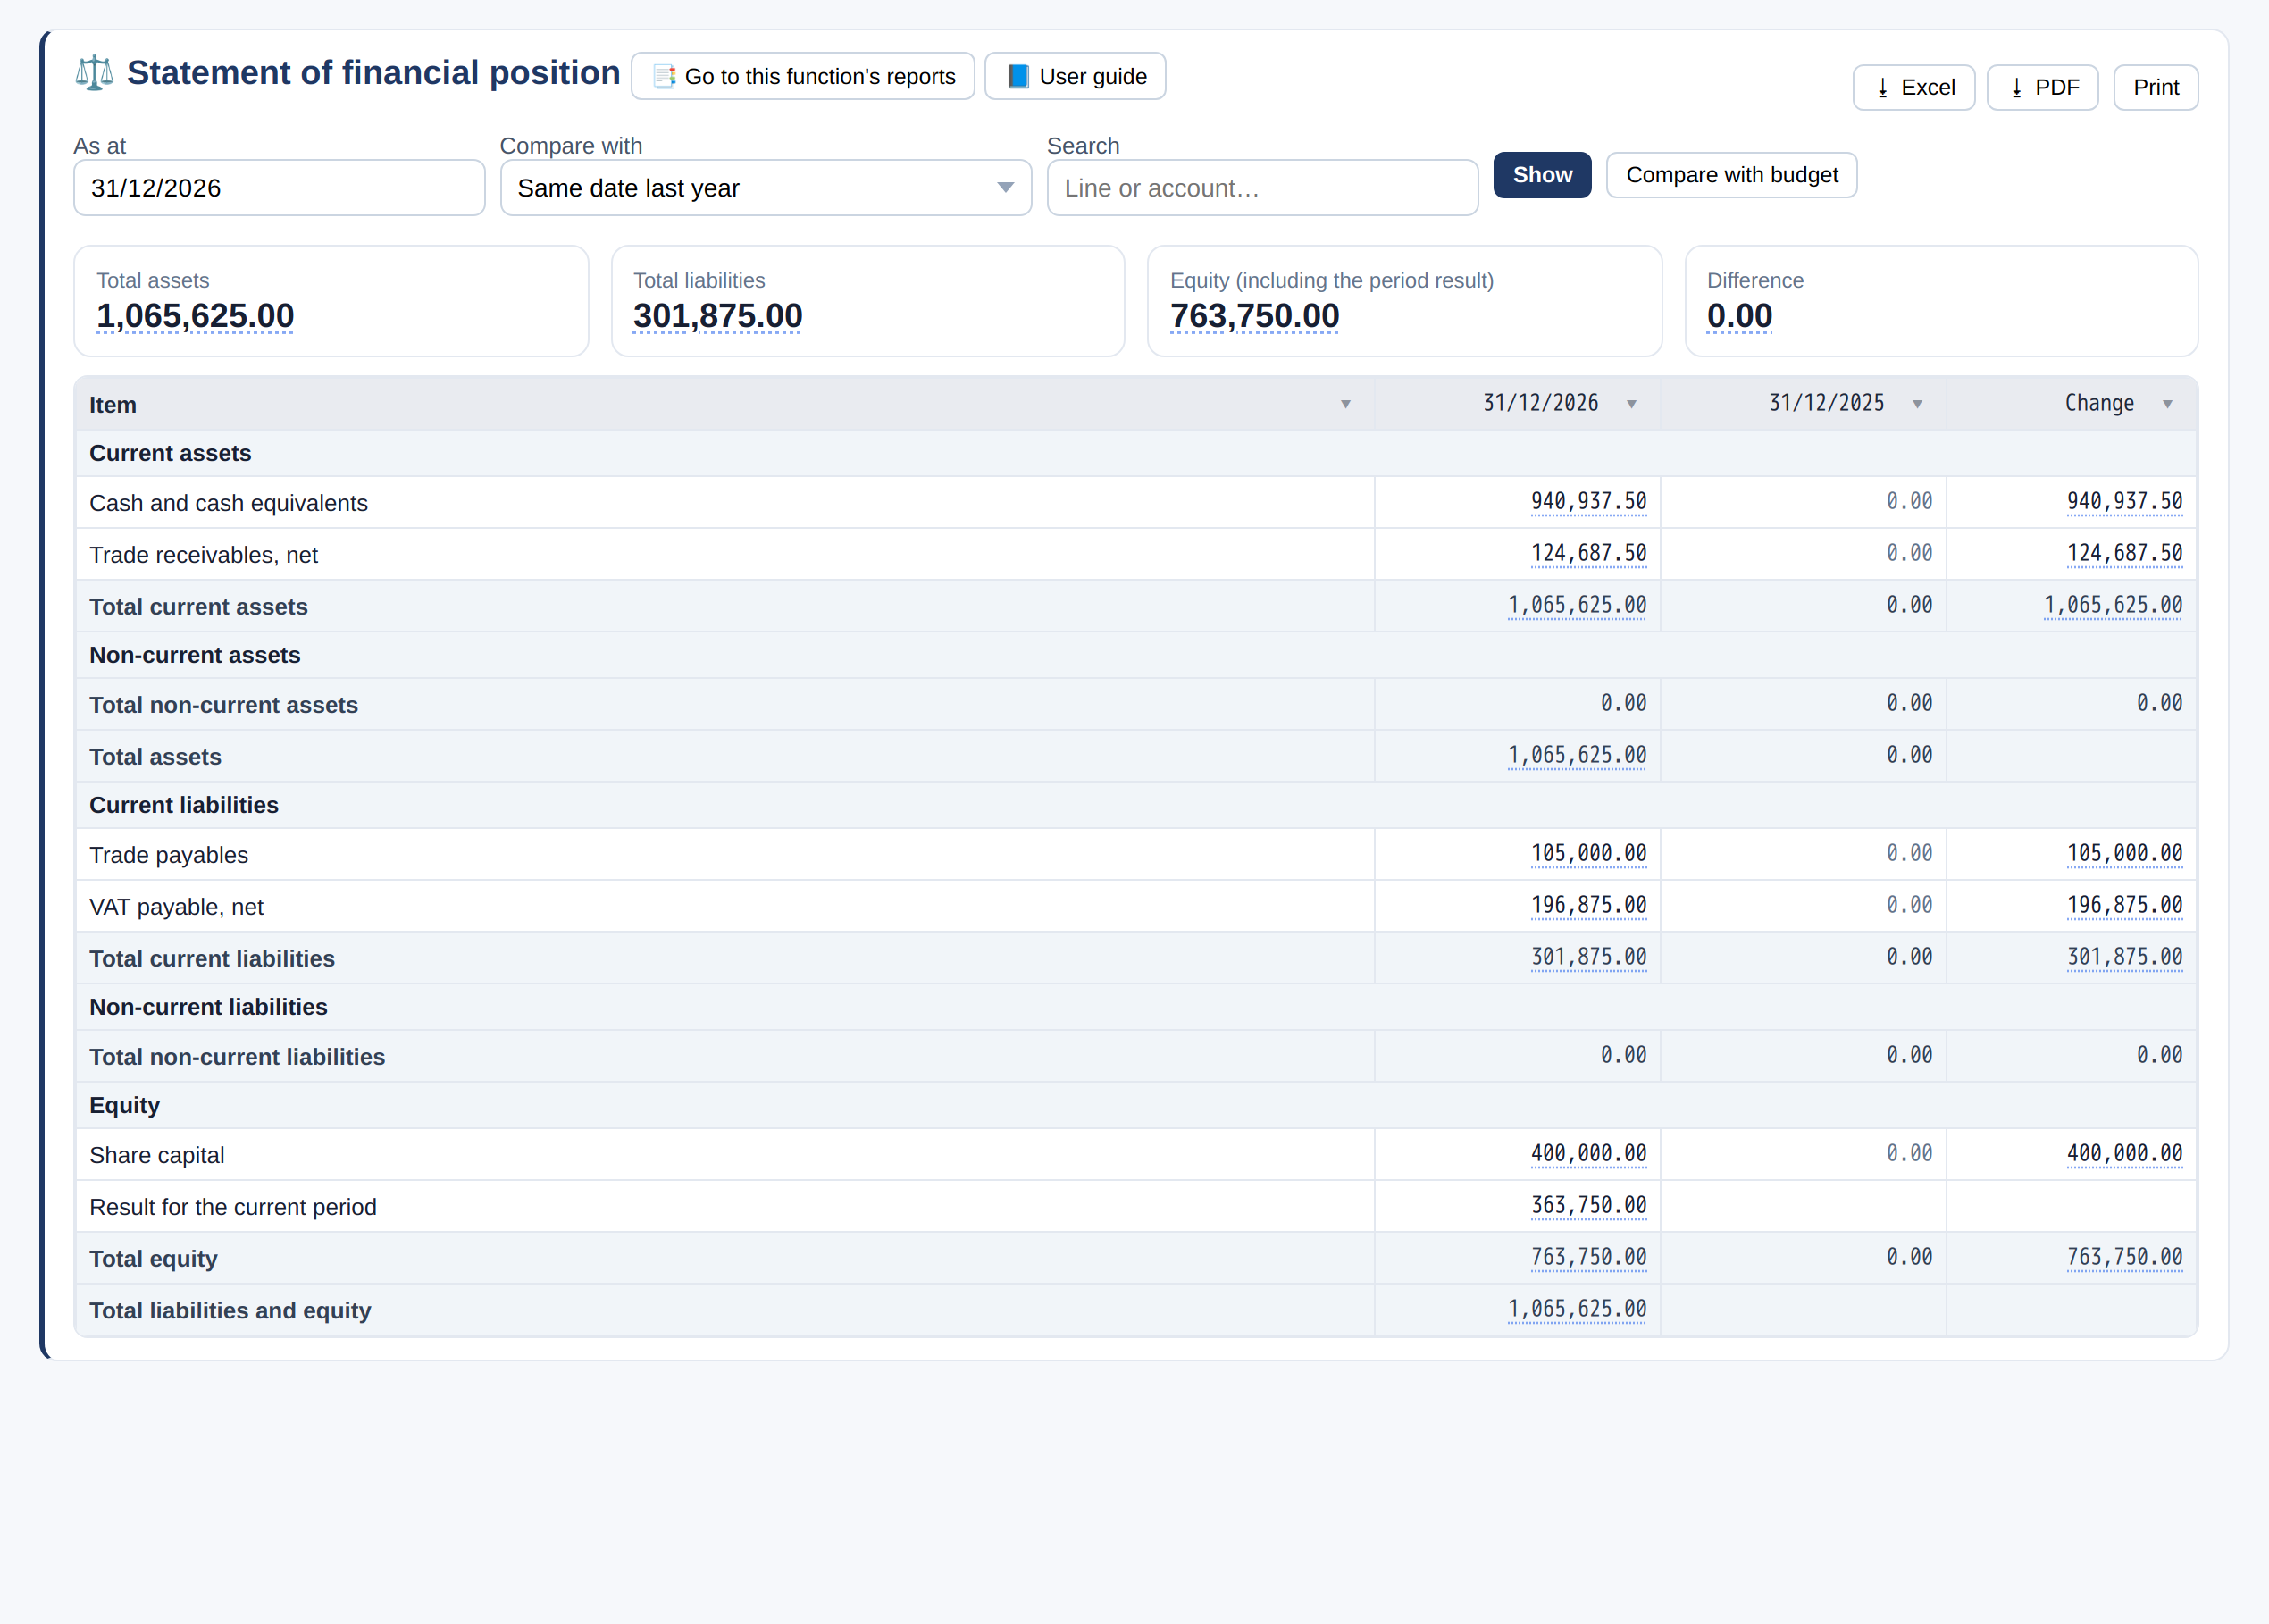
- Choose the «as at» date and the comparison: current and non-current assets, liabilities and equity.
Trial balance
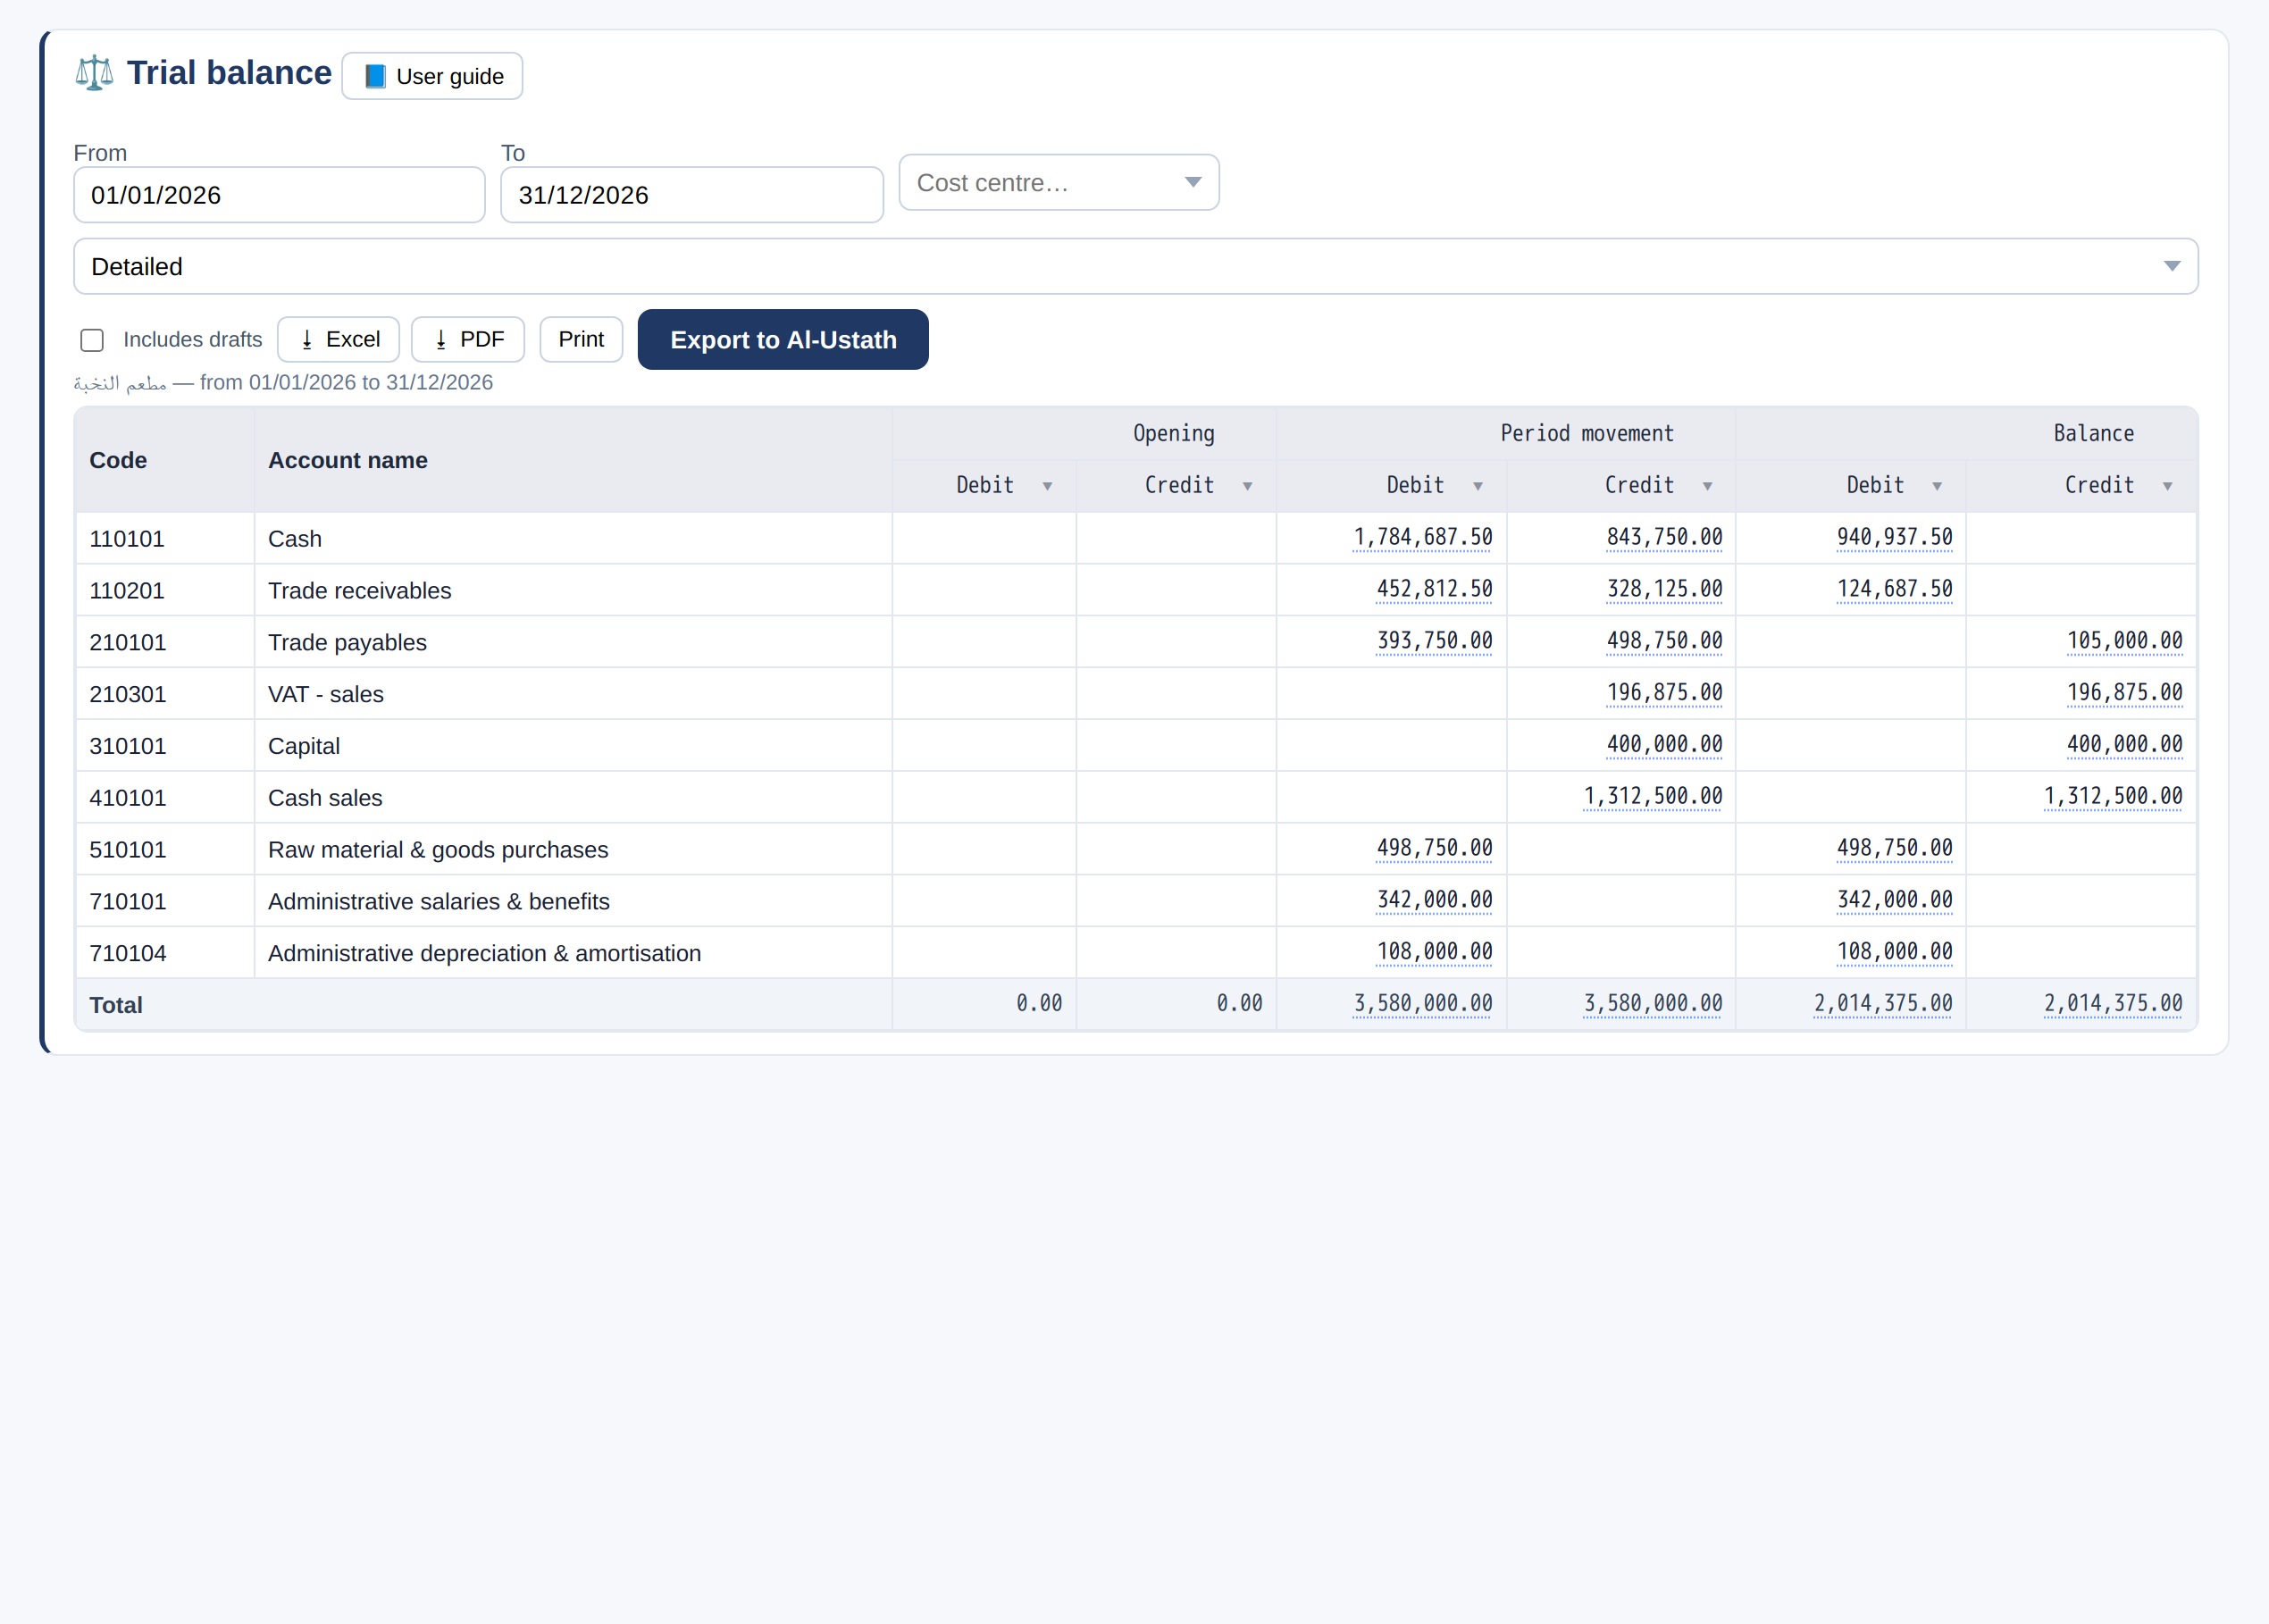
- Opening, period movement and closing balance — debit and credit for each account.
- «Export for auditor» prepares it for your auditor.
Receivables ageing
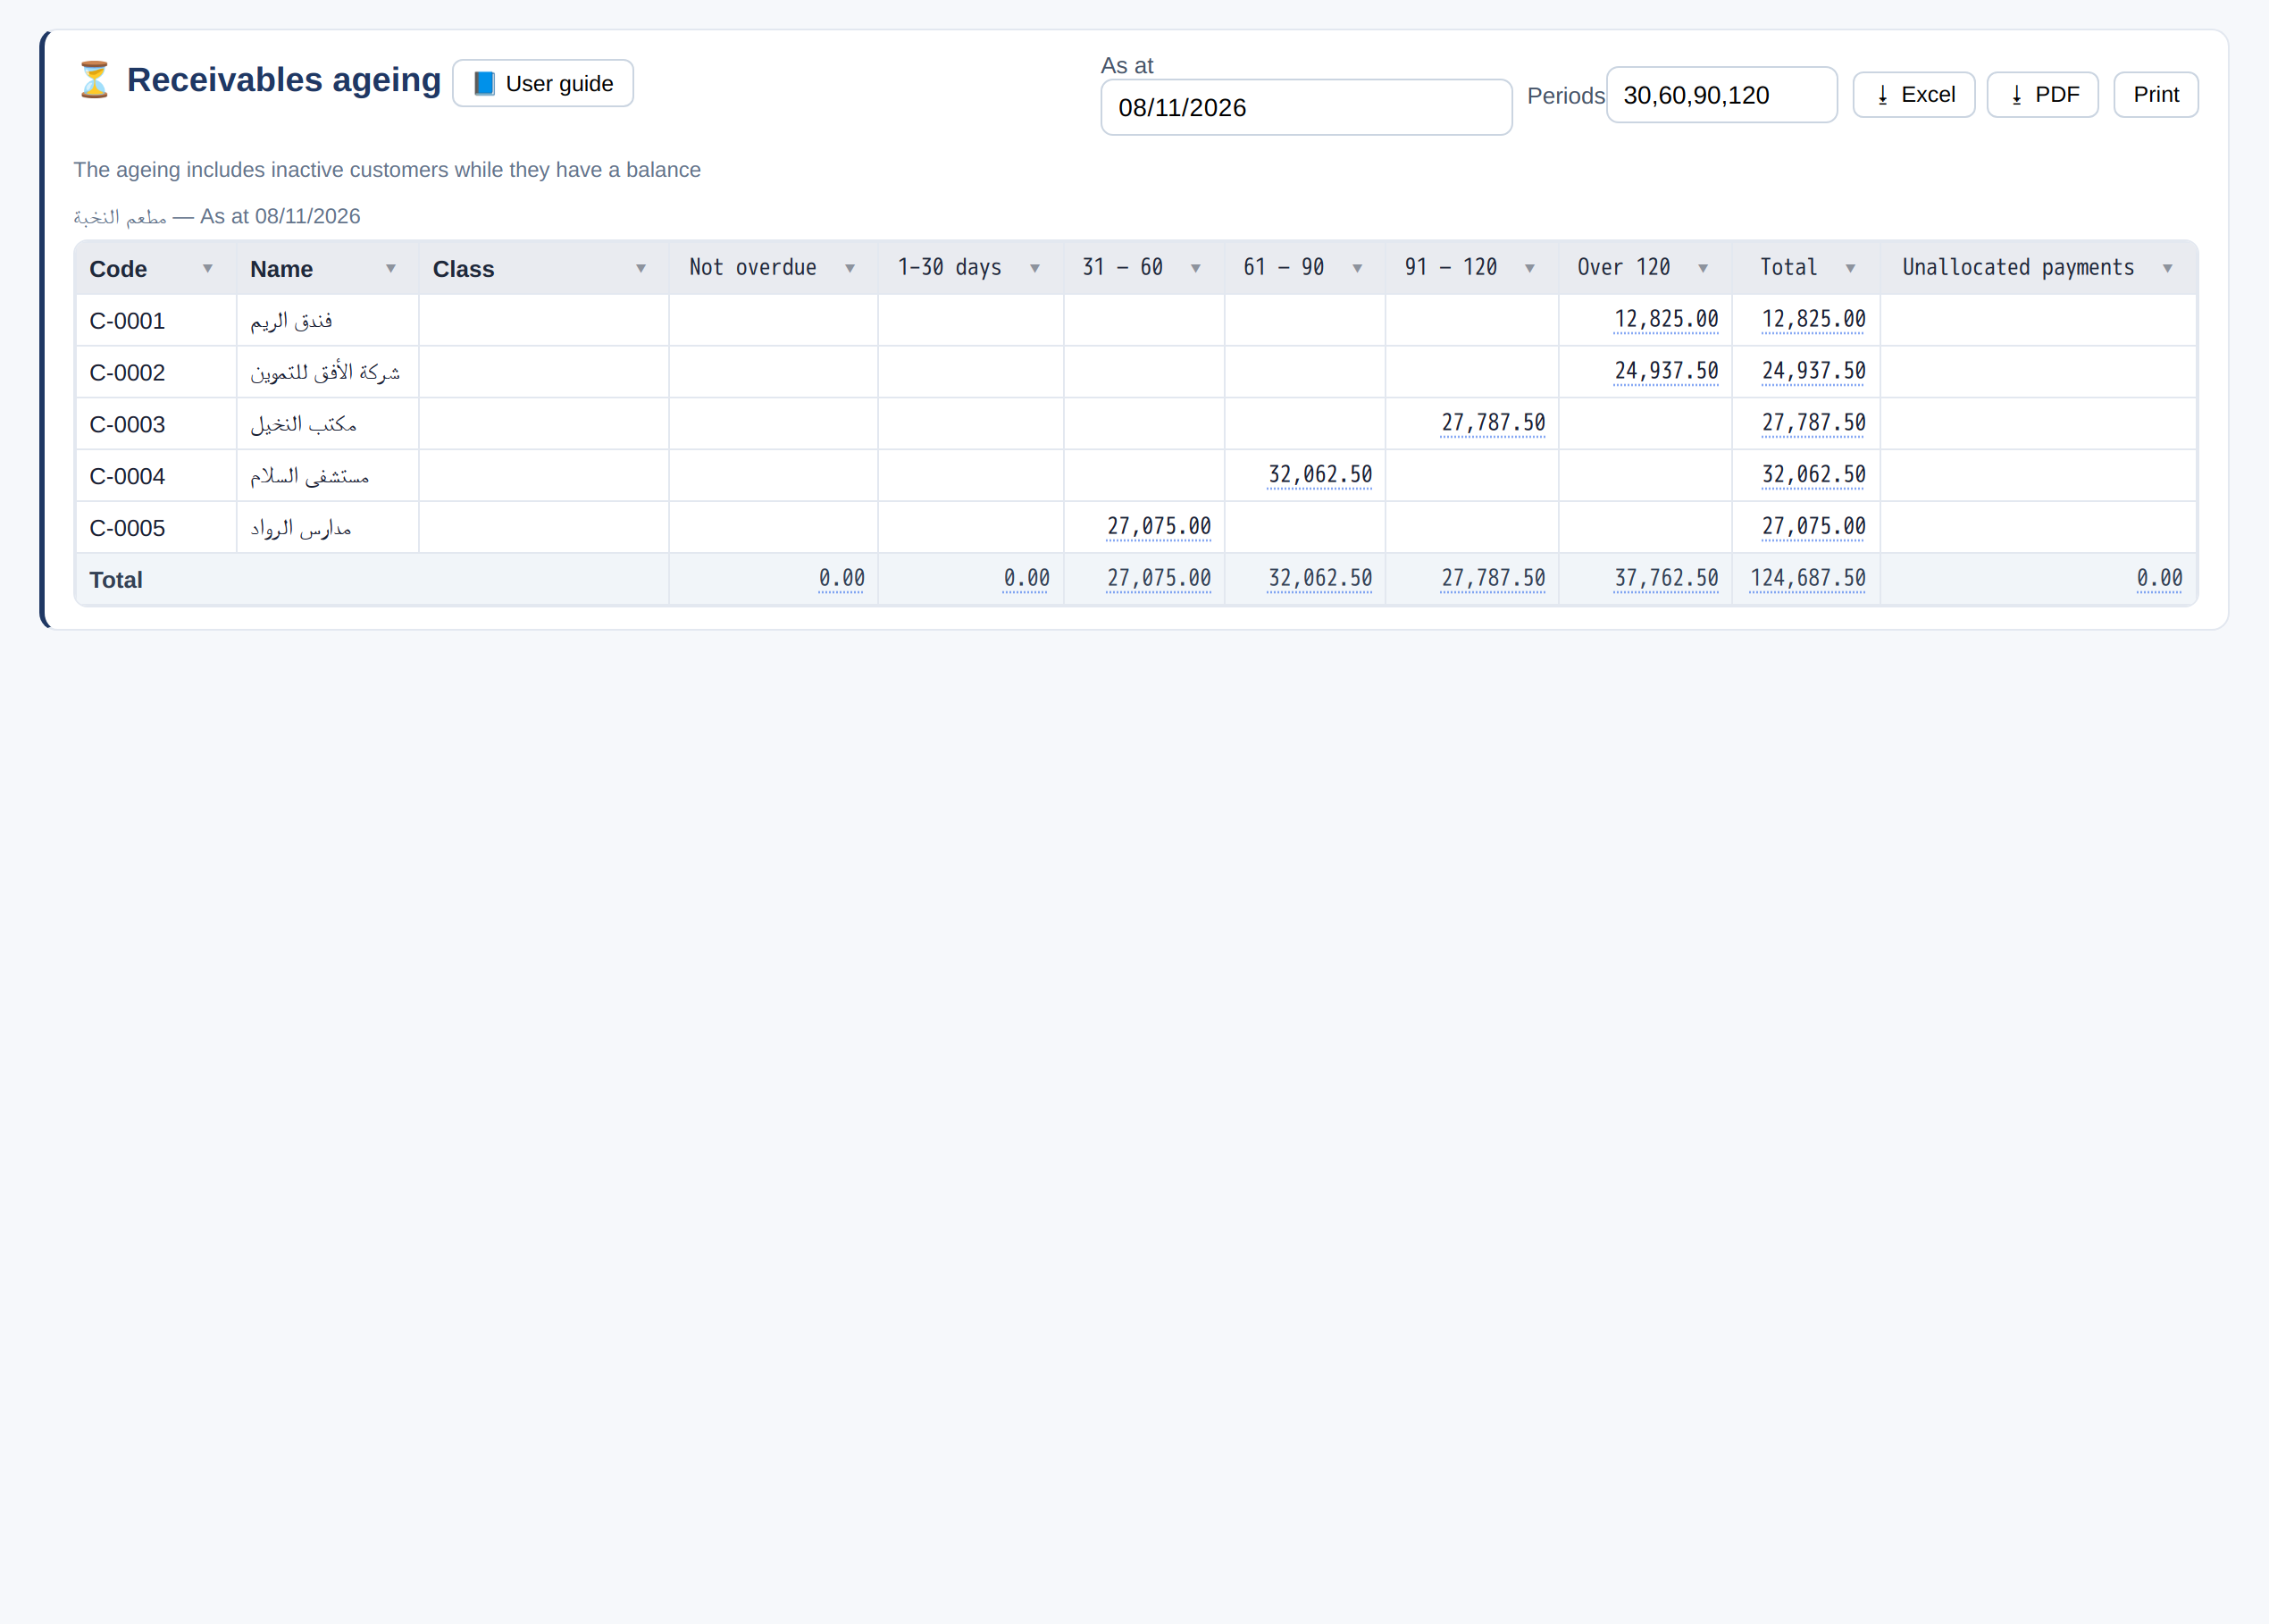
- Each customer's balance by days overdue: 1–30 · 31–60 · 61–90 · 91–120 · over 120.
The smart assistant
It reviews your data continuously and tells you what is wrong and how to fix it.
Continuous review
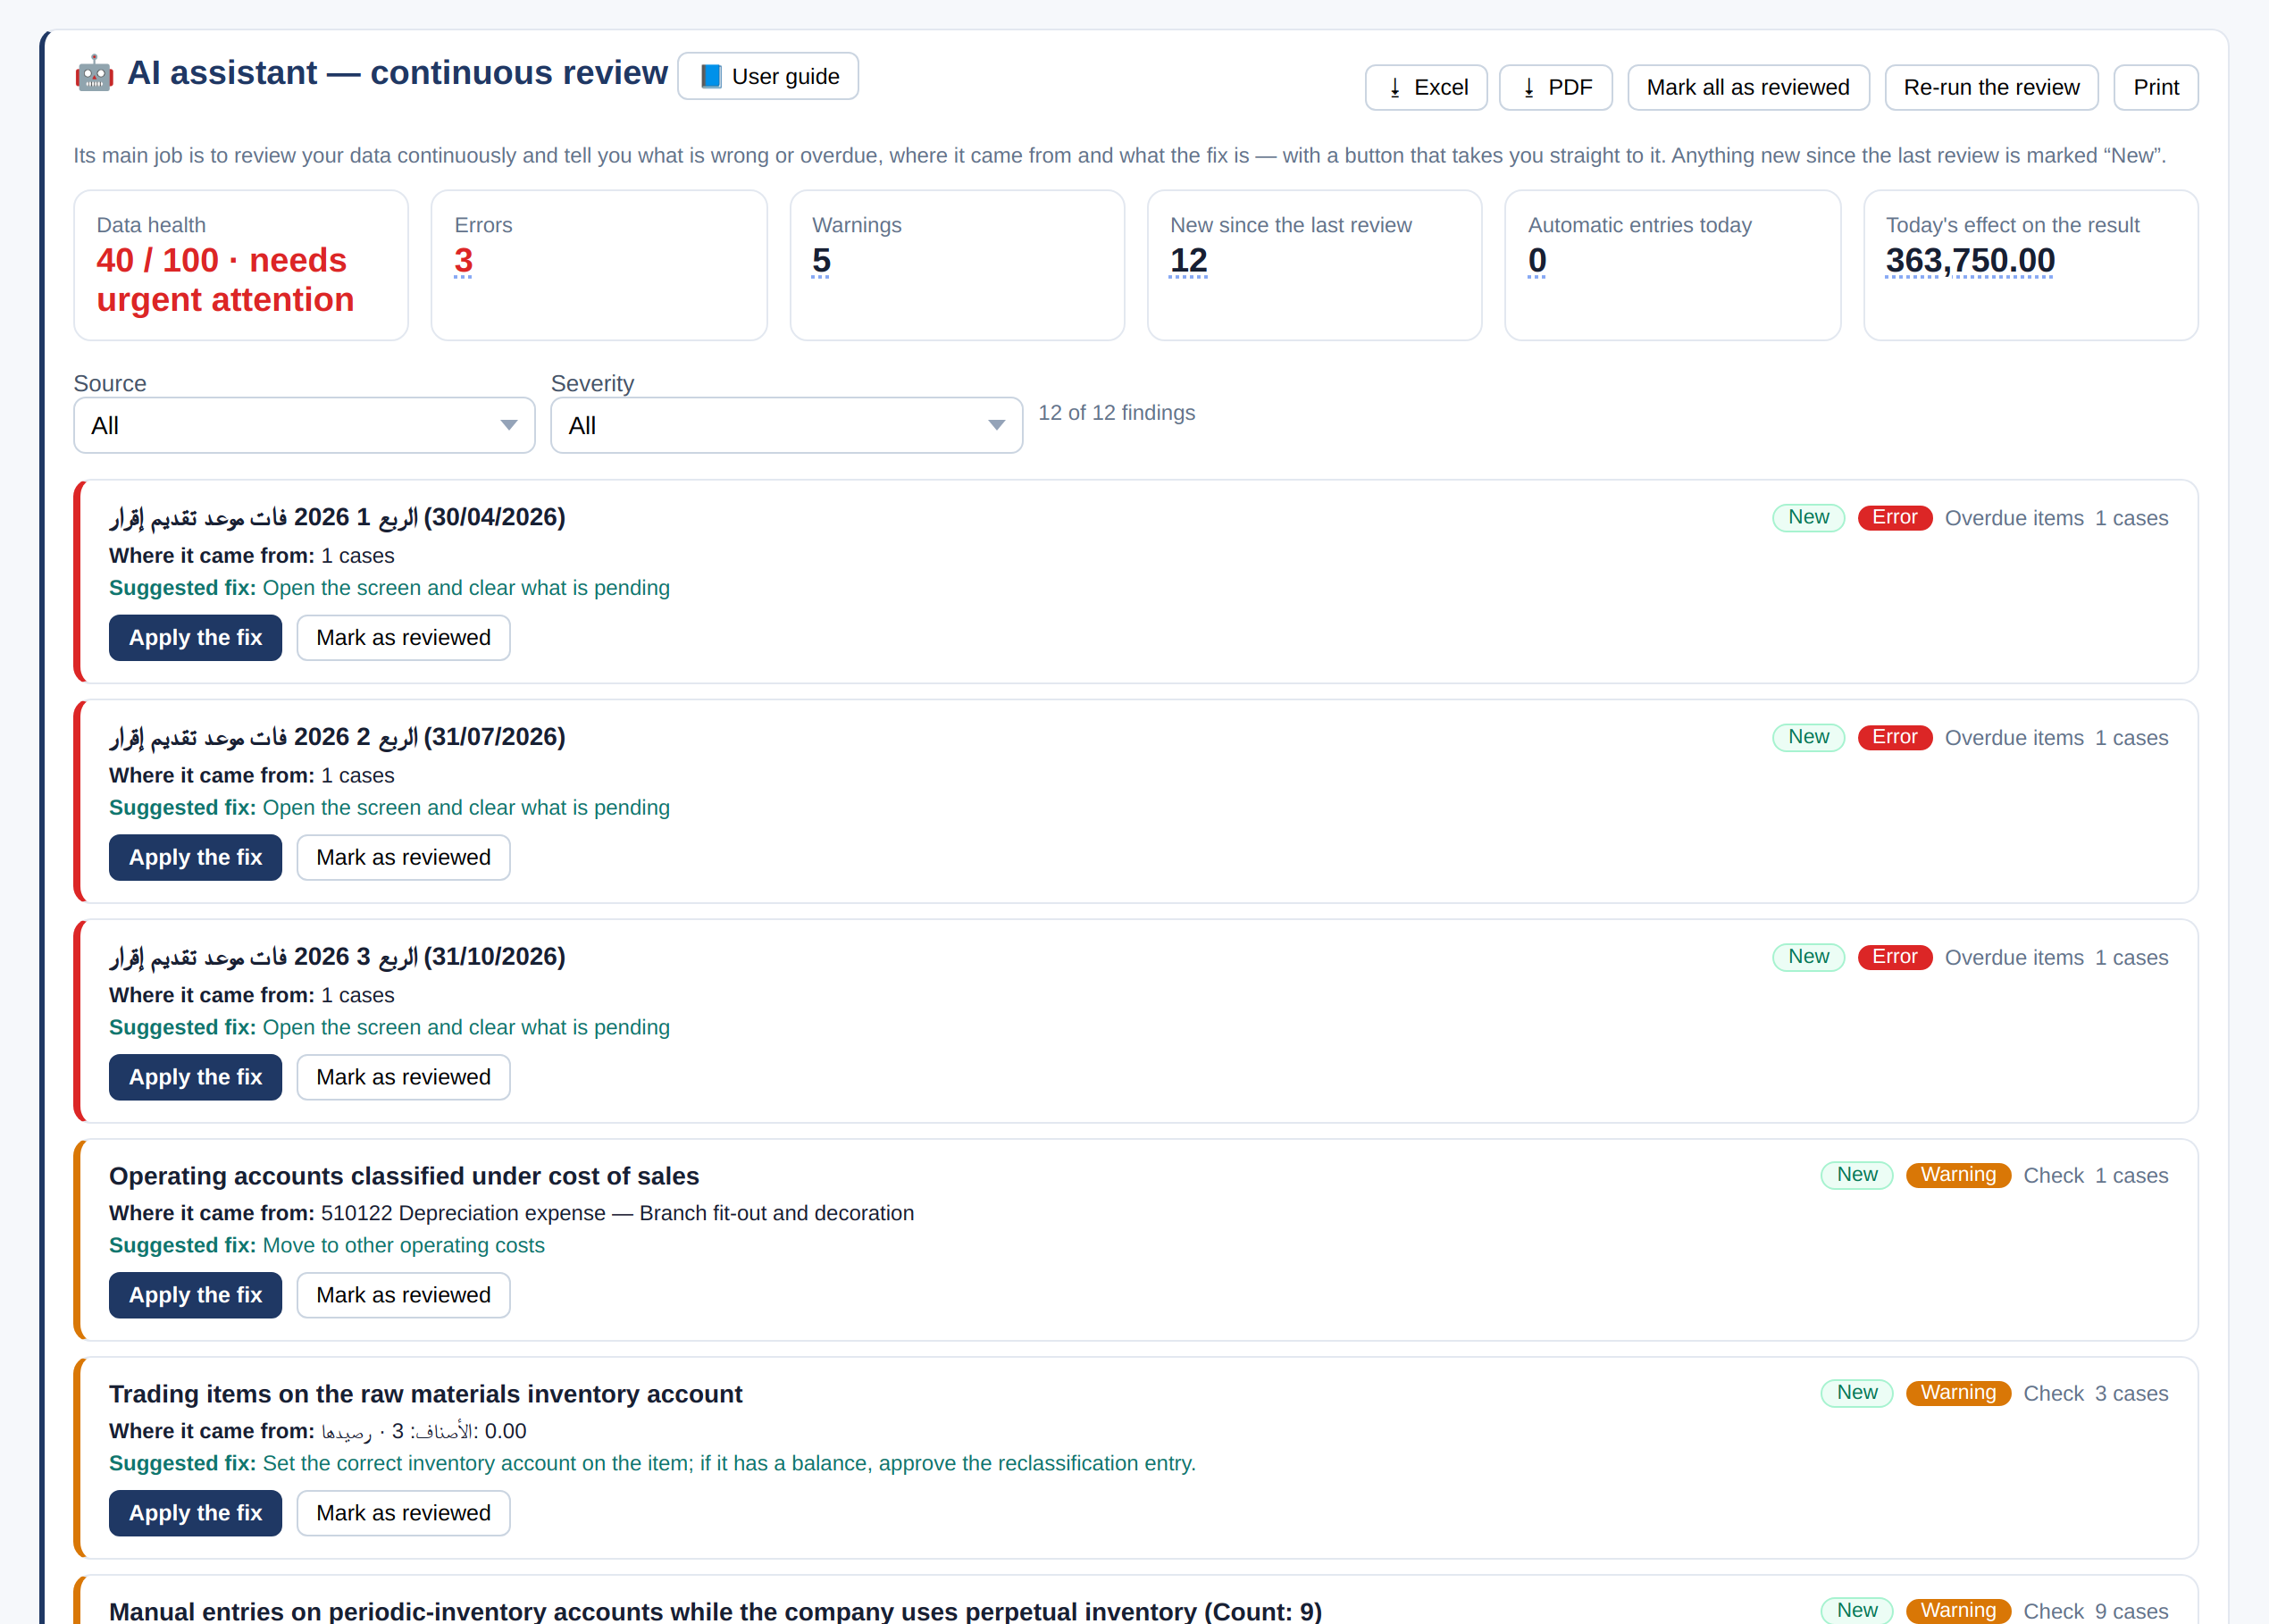
- At the top: the data health score out of 100, errors, warnings and what is new since the last review.
- Each note says what the problem is, where it comes from, and the suggested fix.
- «Apply fix» opens the right screen on the problem; «Mark as reviewed» when you are done.
Full recalculation and repair tools
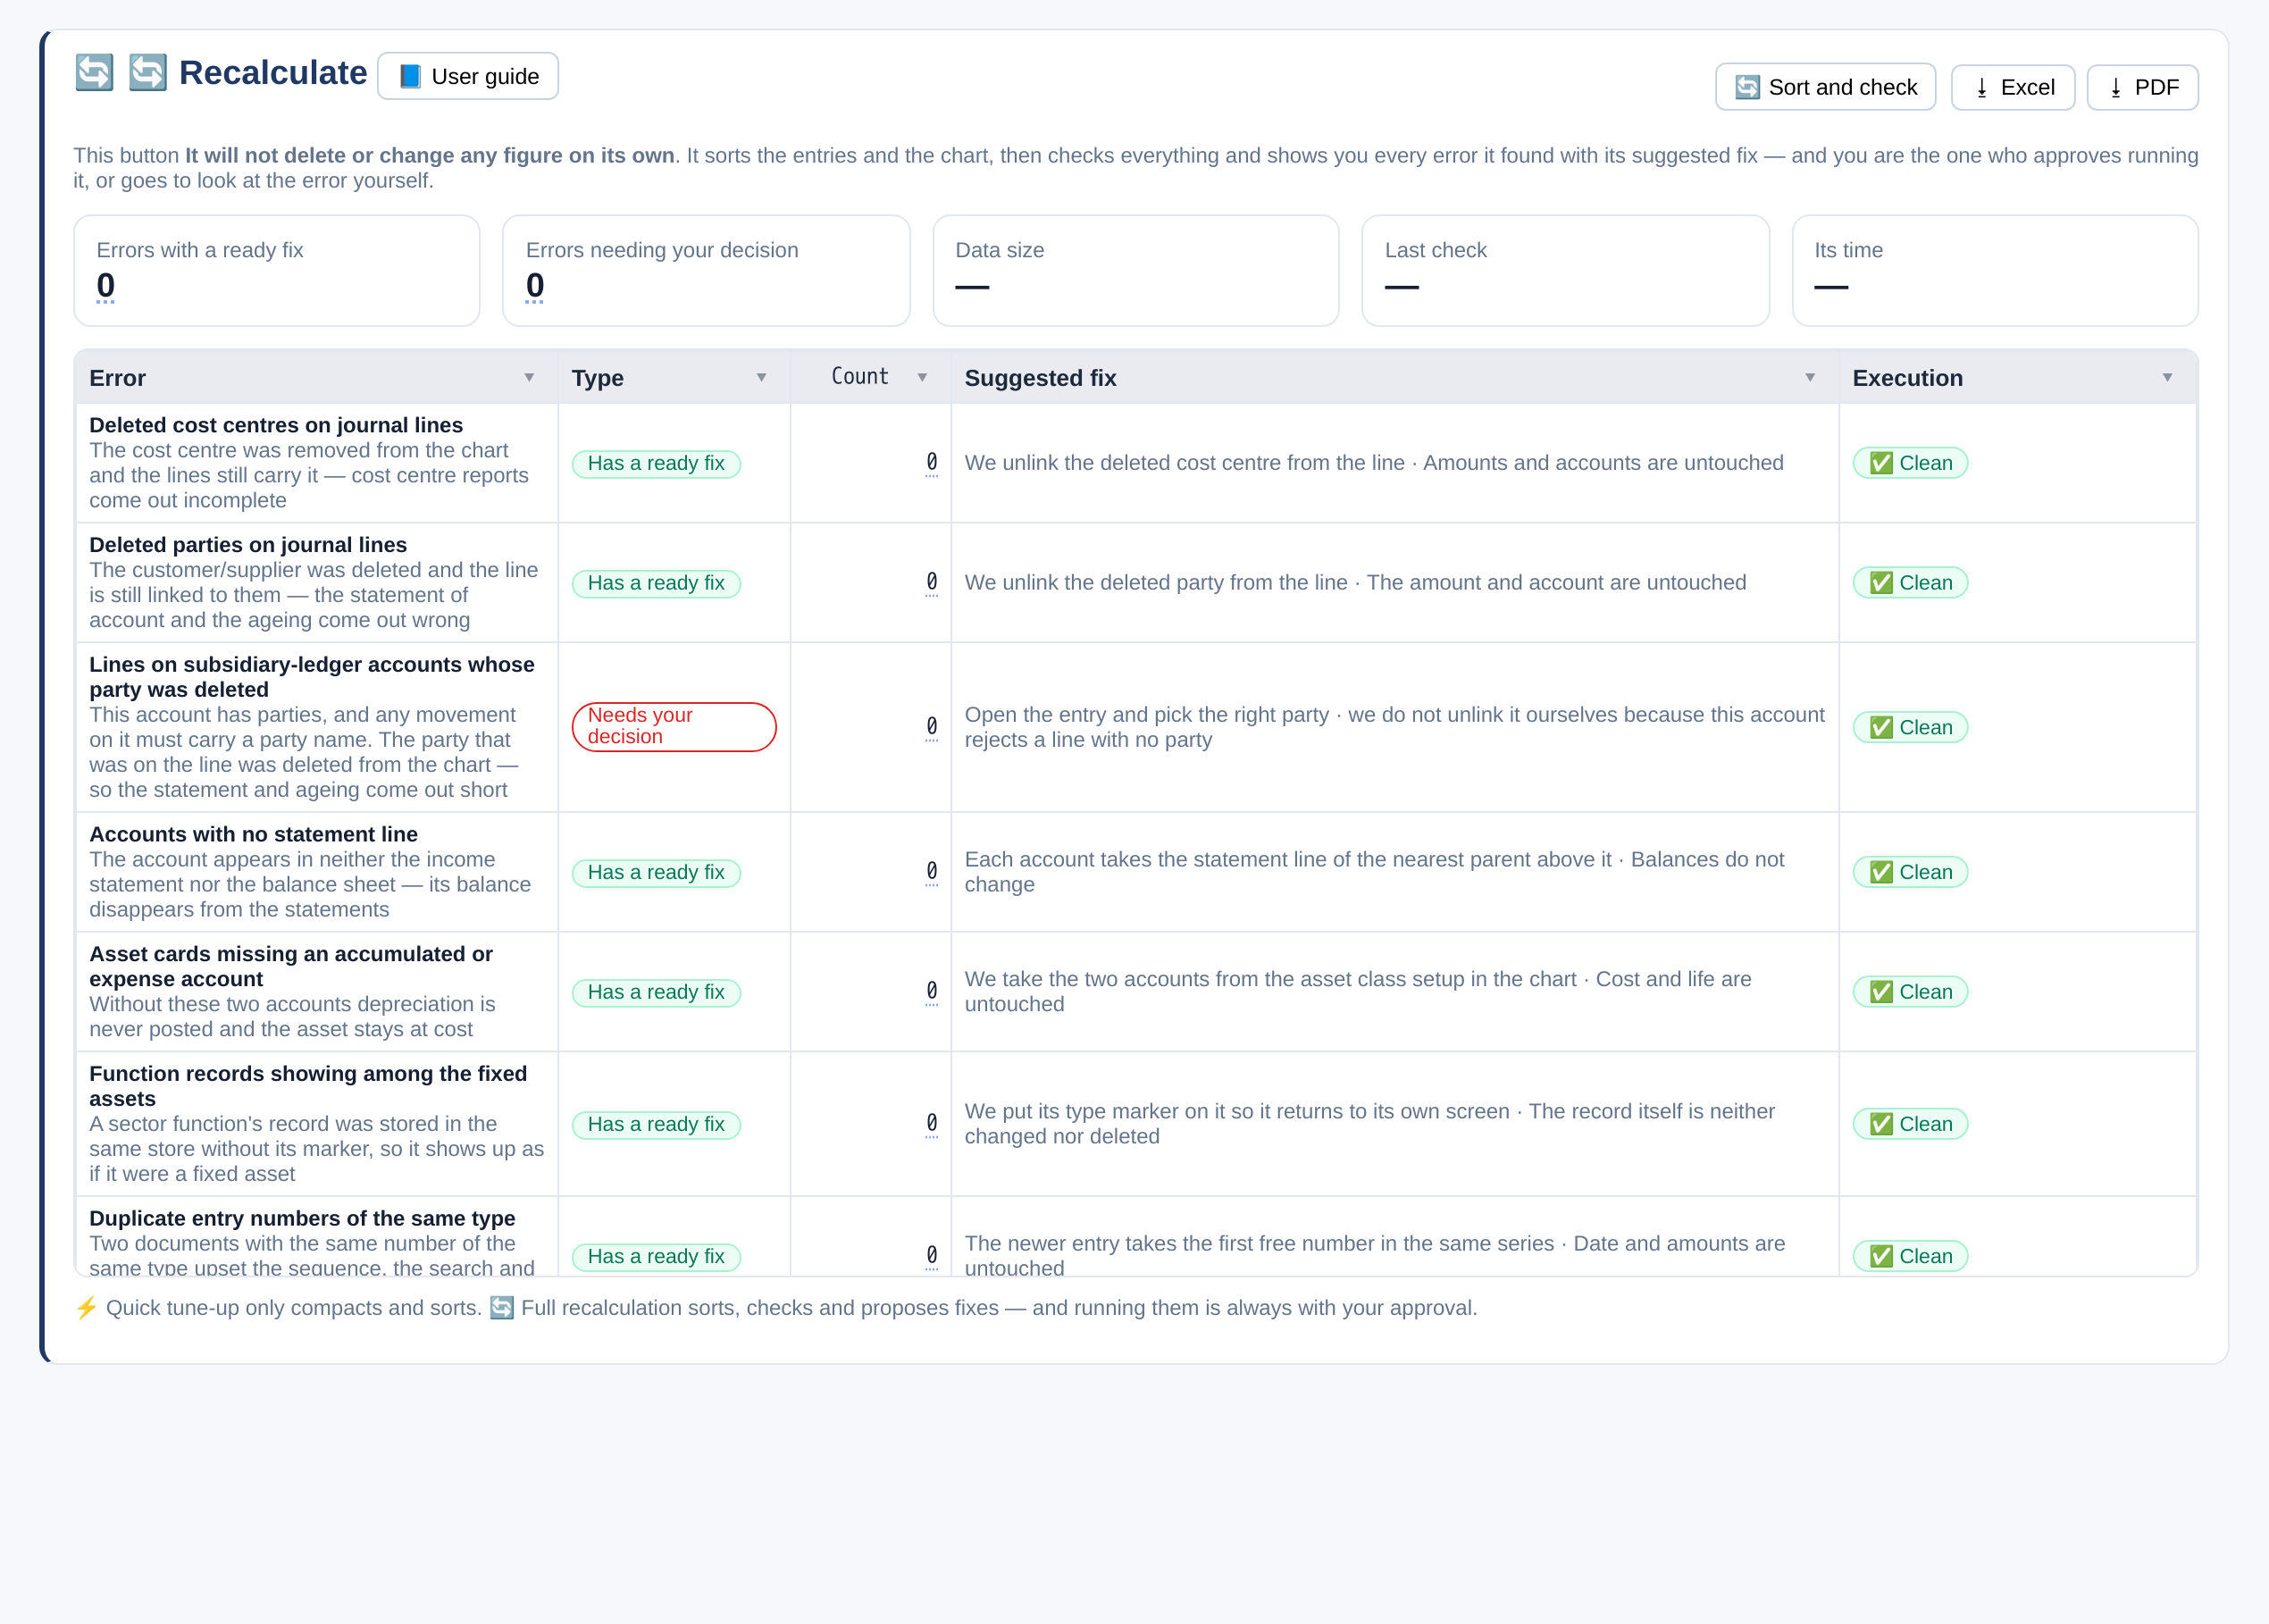
- From the menu «Full recalculation», then the tidy-and-check button: the program tidies entries and the chart, checks every record, and lists each problem with its cause and a suggested fix — without deleting or changing any figure on its own.
- Each finding has a button to apply its fix, or apply all ready fixes at once — you confirm first, and the confirmation says whether the fixes touch posted entries, closed periods or filed returns.
- If a correction cannot be saved, nothing changes and you are shown why.
Free AI with every subscription
- Every subscription includes 1,000 free AI points a month (about 150 typical requests).
- The assistant works with you automatically: it suggests how to arrange reports and new templates, helps you search, and organises your ideas.
- It changes nothing in your data without your approval — every suggestion is shown to you first.
- When the balance runs out, you can subscribe to the monthly AI assistant package.
Users, saving and backup
Who can access what — where your data is saved and how it stays safe.
Users
- «+ User»: name, username, email or mobile, company and role.
- Each user has a validity window (from · to) — they cannot post an entry dated outside it.
- «🔑 Reset password» if they forget it.
The folder: an optional extra copy
- Your data is saved on the Tasaheel server with every save; the folder is an optional extra copy you keep.
- In «Folder and restore» → «Choose / change», pick a main folder — the program creates a folder per company inside it and saves its files automatically after every change.
- Put the main folder inside Dropbox or OneDrive, so you have an extra copy off the device.
- On a new device, signing in is enough. To restore the folder copy when needed: «⭯ Restore a company from a folder» and pick the company folder.
Backup
- Your data is saved on the Tasaheel server with periodic backups. For your own copy: «⭳ Export current company».
- Keep the file off the device (Dropbox · OneDrive · USB).
- To create a company from a copy you exported: «⭱ Import backup».
Support and contact
- To reach the Tasaheel team: email [email protected], the website www.tasaheelerp.com, WhatsApp +966541174901.
- Inside the program: open «Ask me» and type what you are looking for — it takes you to the screen, and if you cannot find it, press «📝 Open a ticket».
- In the ticket, choose the request type (missing, change, error, idea), its priority and the screen you were on; it is recorded under your name and your company.
- For anything urgent, email us or message us on WhatsApp directly.
Permission role from the user screen
Choose a user’s permission role while you add or edit them, without going to the permissions screen.
Choosing the role
- In the «New user» form or when editing a user, a «Permission role» field appears when the user is a «Company user» and you have roles defined. The default is the role marked as default, or their current role in the company.
- The choice assigns the role in the user’s company only, and doesn’t change their assignments in other companies or on the entity. For advanced assignments (several companies, or the entity) use «User permissions».
- The users list has a «Permission role» column with the actual role in the current company. The owner has no role.
Signing out and the login session on a shared device
When a login session ends, what to do on a device used by more than one person, and the «admin / client» bar that the Tasaheel team sees.
The principle
- Permissions follow the person who signed in, not the device or the browser. So when a device passes to someone else, the first person’s session must end before the second one starts.
- That is why you should press «Sign out» before leaving a shared device, rather than just closing the page.
What ends the session
- «Sign out» from the top bar menu ends the login session on the device, and the server session if there is one, provided the device is connected to the internet. Without a connection it is cleared from the device and ends on the server when it expires, so sign out of a shared device while it is connected.
- Signing in with another account in the same browser ends the previous account’s session.
- At the POS terminal, «Switch cashier» is treated as a change of user: the previous cashier’s permissions do not carry over to the next one.
For the Tasaheel team: admin inside a client company
- An admin or developer sign-in is valid only for the tab you signed in from. Reloading the page keeps you signed in, but a new tab or closing the browser asks you to sign in again. The /admin/ console asks you to sign in in every new tab.
- Inside any company a small bar appears at the bottom of the screen: «In this company as Tasaheel admin» or «In this company as a client — owner rights only», with a «Switch to client» or «Switch to admin» button to change it.
- «Client» means the company owner’s rights only, without Tasaheel screens. It is the default in any company you haven’t chosen for yet, except the first company after an intentional admin sign-in, which opens «as admin».
- After this update the program asks developers to sign in once, because the old sessions were ended on purpose. Any old tab open in the same browser also leaves developer mode.
Writing from several devices, sign-out and permissions on a new device
In an online company every device saves the company's data straight to the server. Here is what happens on edit and sign-out, and when a restricted user signs in on a new device.
Who writes the company data
- Every device linked to the company saves to it: the save goes to the server first, then is written on the device. There is no main device and no view-only devices.
- If two devices edit the same record, the first save wins, and the second is told the record was just changed and the latest version has been loaded, to review before redoing the change.
- Preferences that belong to the device itself, such as the menu's look and position and the save folder, are saved on the device as usual.
Signing out and switching company
- No changes are left waiting to upload when you sign out or switch company, because every save reaches the server at once.
- The exception: cashier sales recorded offline upload when the connection returns, so don't clear the browser's data on a cashier device before they finish uploading.
A restricted user on a new device
- Permission groups are stored with the company's data on the server and reach every device through sync.
- If a restricted user signs in on a device the permissions have not reached yet, the screens stay locked for a moment until sync completes, then their screens open.
- The owner still sees every screen, and a company that never used permissions sees no change.
Signing in with company number and user name
- If the user and the company are on the device, the user signs in on the device at once without waiting for the website, even if the list of company numbers saved on the device was cleared.
- The website is asked only for a user who is not on the device or for another company number, and the program waits at most 8 seconds. If the website does not reply, a message says so instead of the screen staying stuck.
Signing in on the device
A user registered on this device signs in directly, and a Tasaheel team account is checked on the website.
How sign-in works
- A user or email registered on this device is checked on the device itself, so sign-in happens without waiting and without any request to the website. Repeated attempts do not lock the account.
- If the password is wrong, the same message appears as before: «The username or password is incorrect».
- An email not registered on the device (a Tasaheel team account) is checked on the website. If the website does not respond within a few seconds, «Couldn't reach the server — try again shortly» appears.
- There is no new password rule and no new step.
The company number and signing in from another device
Every company linked to the server has a number you use to sign in from any other device, together with your username or email and password.
Where to find the company number
- Open «Company settings»: the number appears under «The company number for signing in from another device» with a «Copy» button.
- The number also appears in «My companies» next to the company.
- Press «Copy» to copy the number, then keep it somewhere safe or send it to the person who should sign in to the company.
When no number appears
- «The company number appears when you are online»: the number is read from the server, so connect to the internet and open the screen again.
- «This company is on this device only — no sign-in number»: the company is stored on this device alone, so there is no number for signing in from another device.
- «The company is not linked to the server — link it from the sync screen»: link the company to the server first, then the number appears.
Signing in from another device
- On the other device, open the program and choose to sign in; the «Sign in» window opens.
- Enter the «Company number» if this is the first time the company is opened on this device, then «Username or email», then «Password», and press «Sign in».
- You can type the number in Arabic or Western digits, or paste it as you received it in a message.
- You can type the registered email instead of the username. If «No account with this email on this device — try the username instead» appears, try the username.
- Tick «Keep me signed in on this device» on your personal device only, never on a shared one.
Entities and groups of companies
An entity is an umbrella over your companies: create it, put the parent and subsidiaries under it, and take the consolidated statements from one place.
Before you start: companies first
- Create each company from the «My companies» button at the top → «+ New company»: the parent and each subsidiary, each with its own name and fiscal year.
- Then open the parent company and, from «Data & settings» in the side menu, choose «Entities».
- The screen lists the entities: name and type, the parent company, the included companies with each subsidiary's ownership, and the «Edit», «Reports» and «Delete» buttons.
Creating a new entity
- Press «+ New entity» and choose the «Entity type» first: «Group — several companies», or «Single — one company» for a company on its own.
- Then type the «Entity name» (for example: Al Noor Holding Group) — changing the type after typing the name clears the name.
- Enter the «Entity currency», and a note if you want one.
- In the table, tick «Included» for each company you want under the entity, and choose the «Parent».
- For each subsidiary enter the «Ownership %» and choose the «Consolidation method»: «Full consolidation — subsidiary», «Proportionate — joint operation» or «Equity method — associate», and check the «Activity» (the «Change» button).
- Press «Save entity».
Day-to-day work and consolidated statements
- Each company works on its own as usual: its entries, invoices and users stay inside it.
- For consolidated statements: on the «Entities» screen press «Reports» next to the entity, then «📊 Consolidated statements for the entity».
- From the same screen: «⚙️ Eliminations and intercompany transactions», or pick a single company to open its own statements.
Adding a new company to an existing entity
- Create the company from «My companies» → «+ New company».
- Go back to «Entities», press «Edit» next to the entity, tick «Included» for the new company, and enter its ownership and method.
- Press «Save entity».
Learn accounting
A path inside the program, always free — from «what is accounting» to closing the year.
Learning path
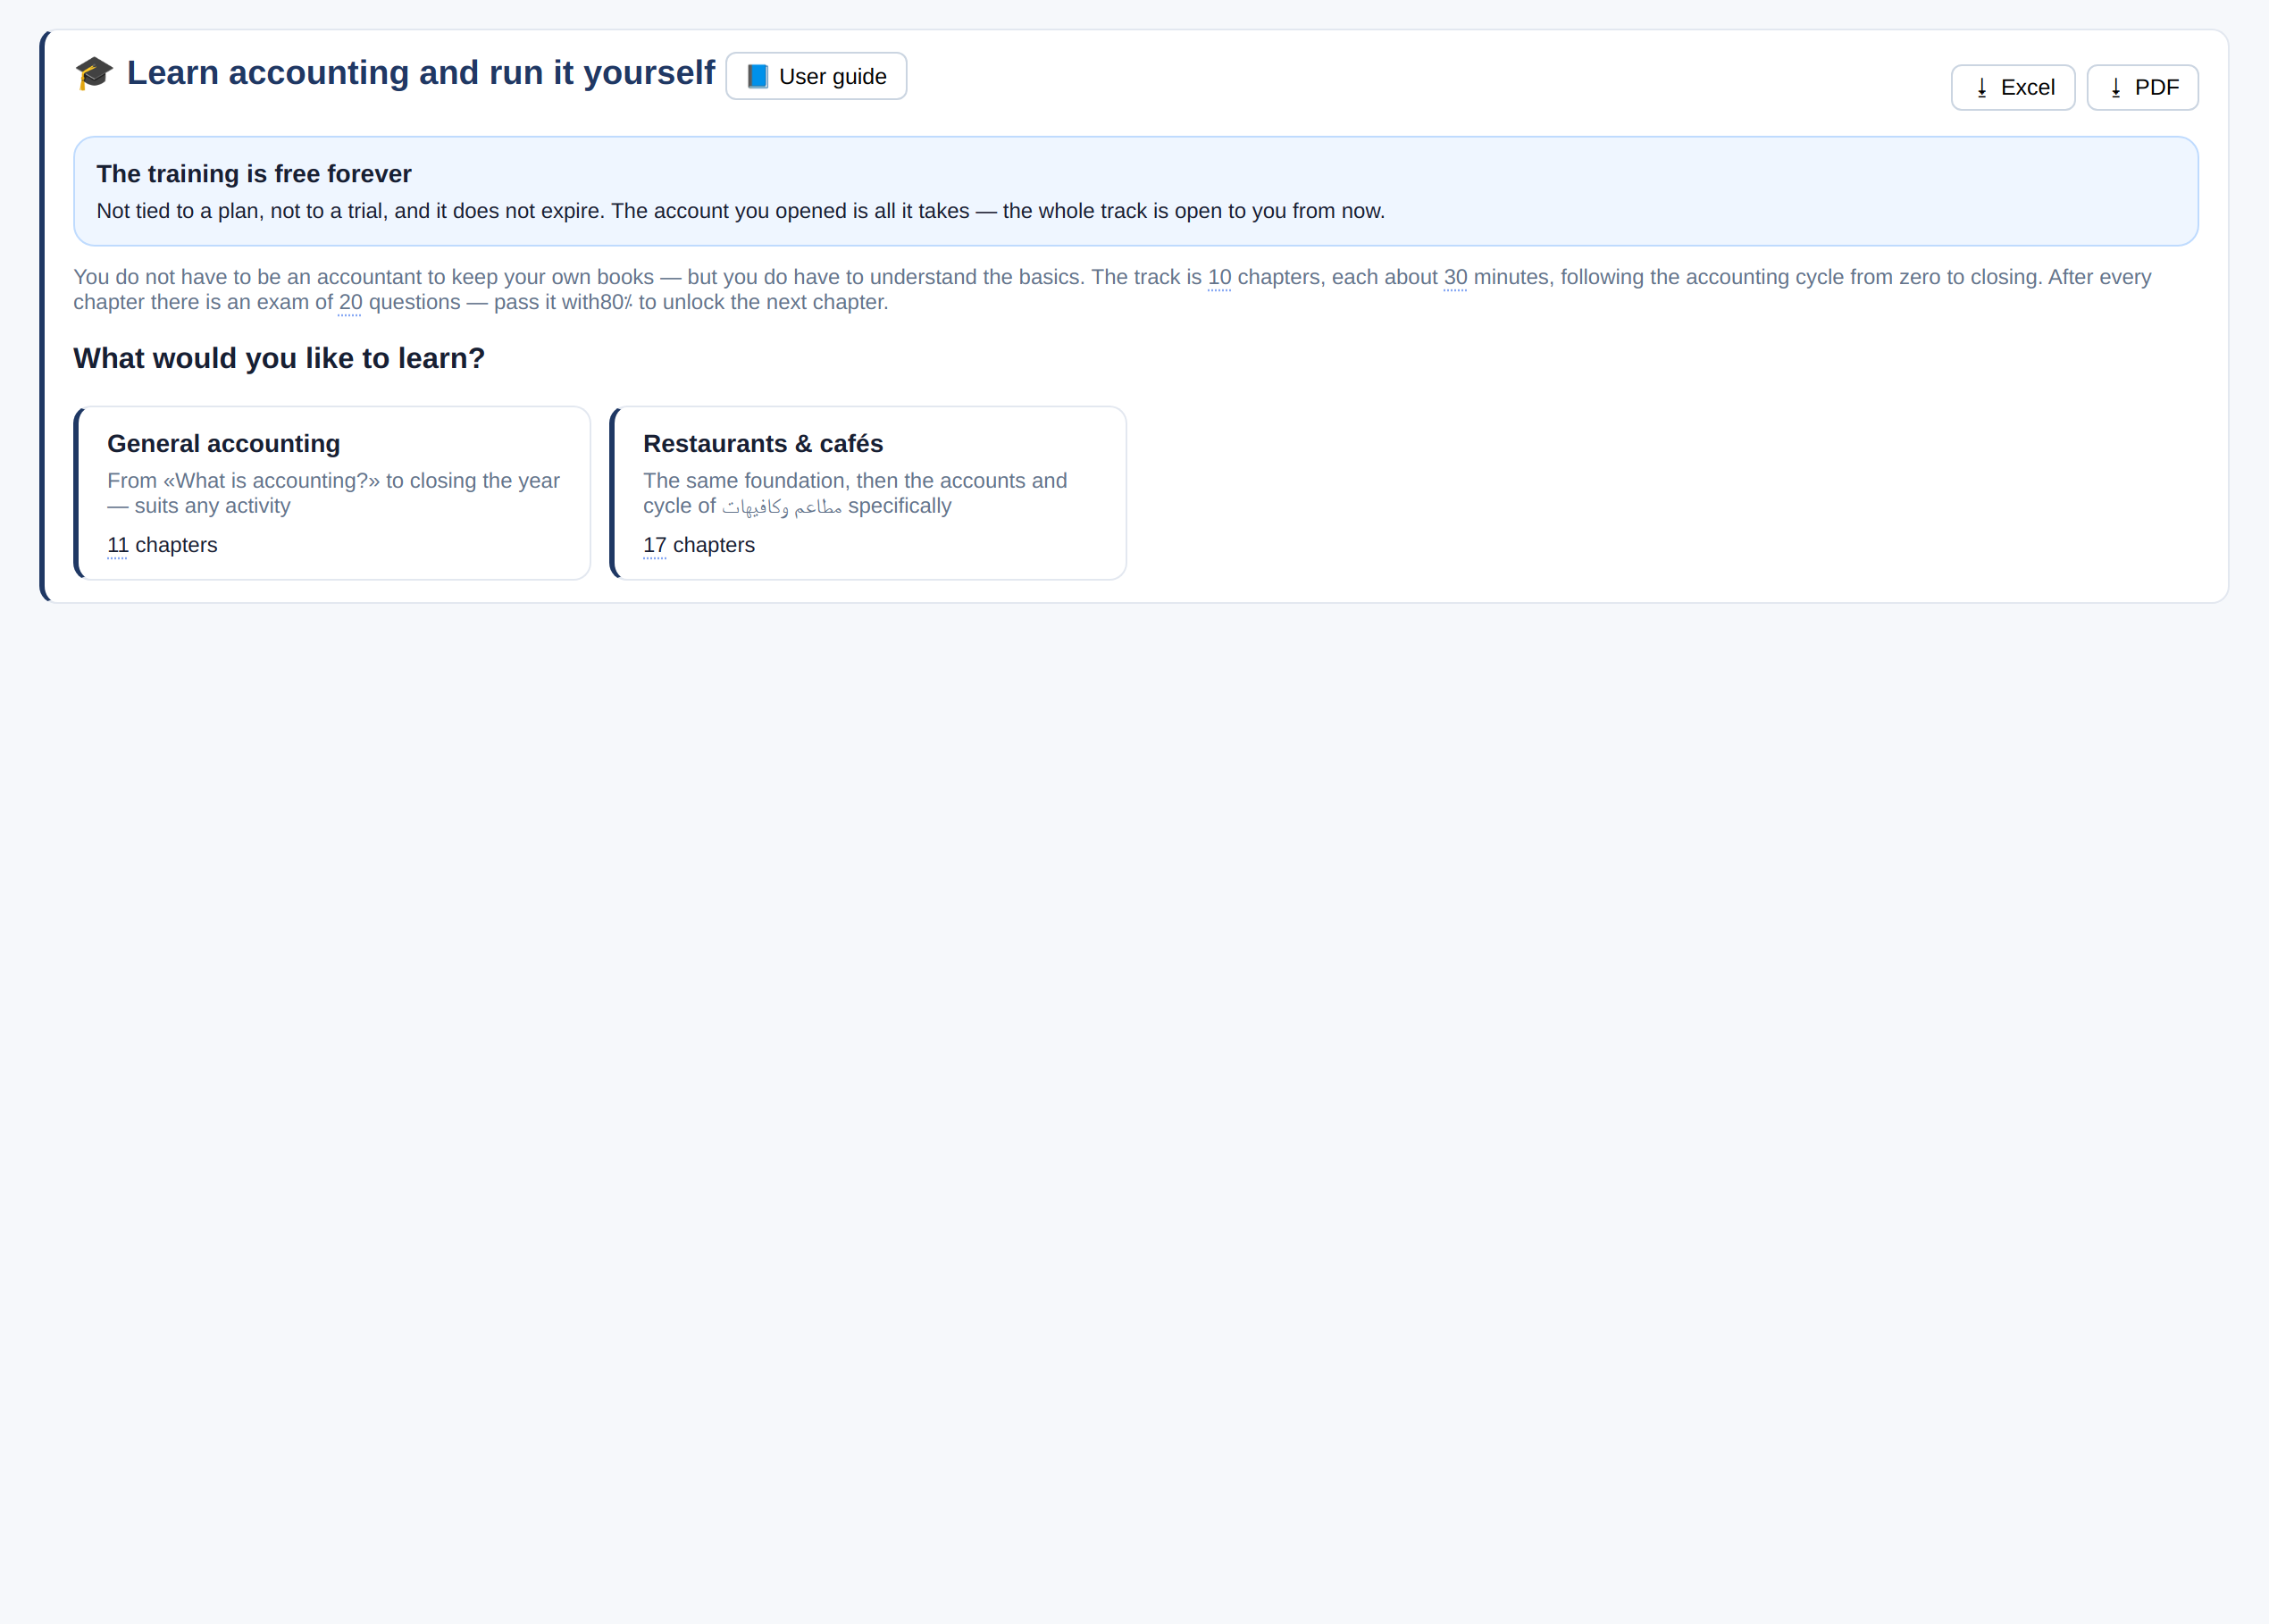
- 10 chapters of about 30 minutes each, in the order of the accounting cycle.
- After each chapter a 20-question exam — pass with 80% to unlock the next chapter.
- There is a general path, and a path for your sector with its accounts and cycle.
The learning path: five stages
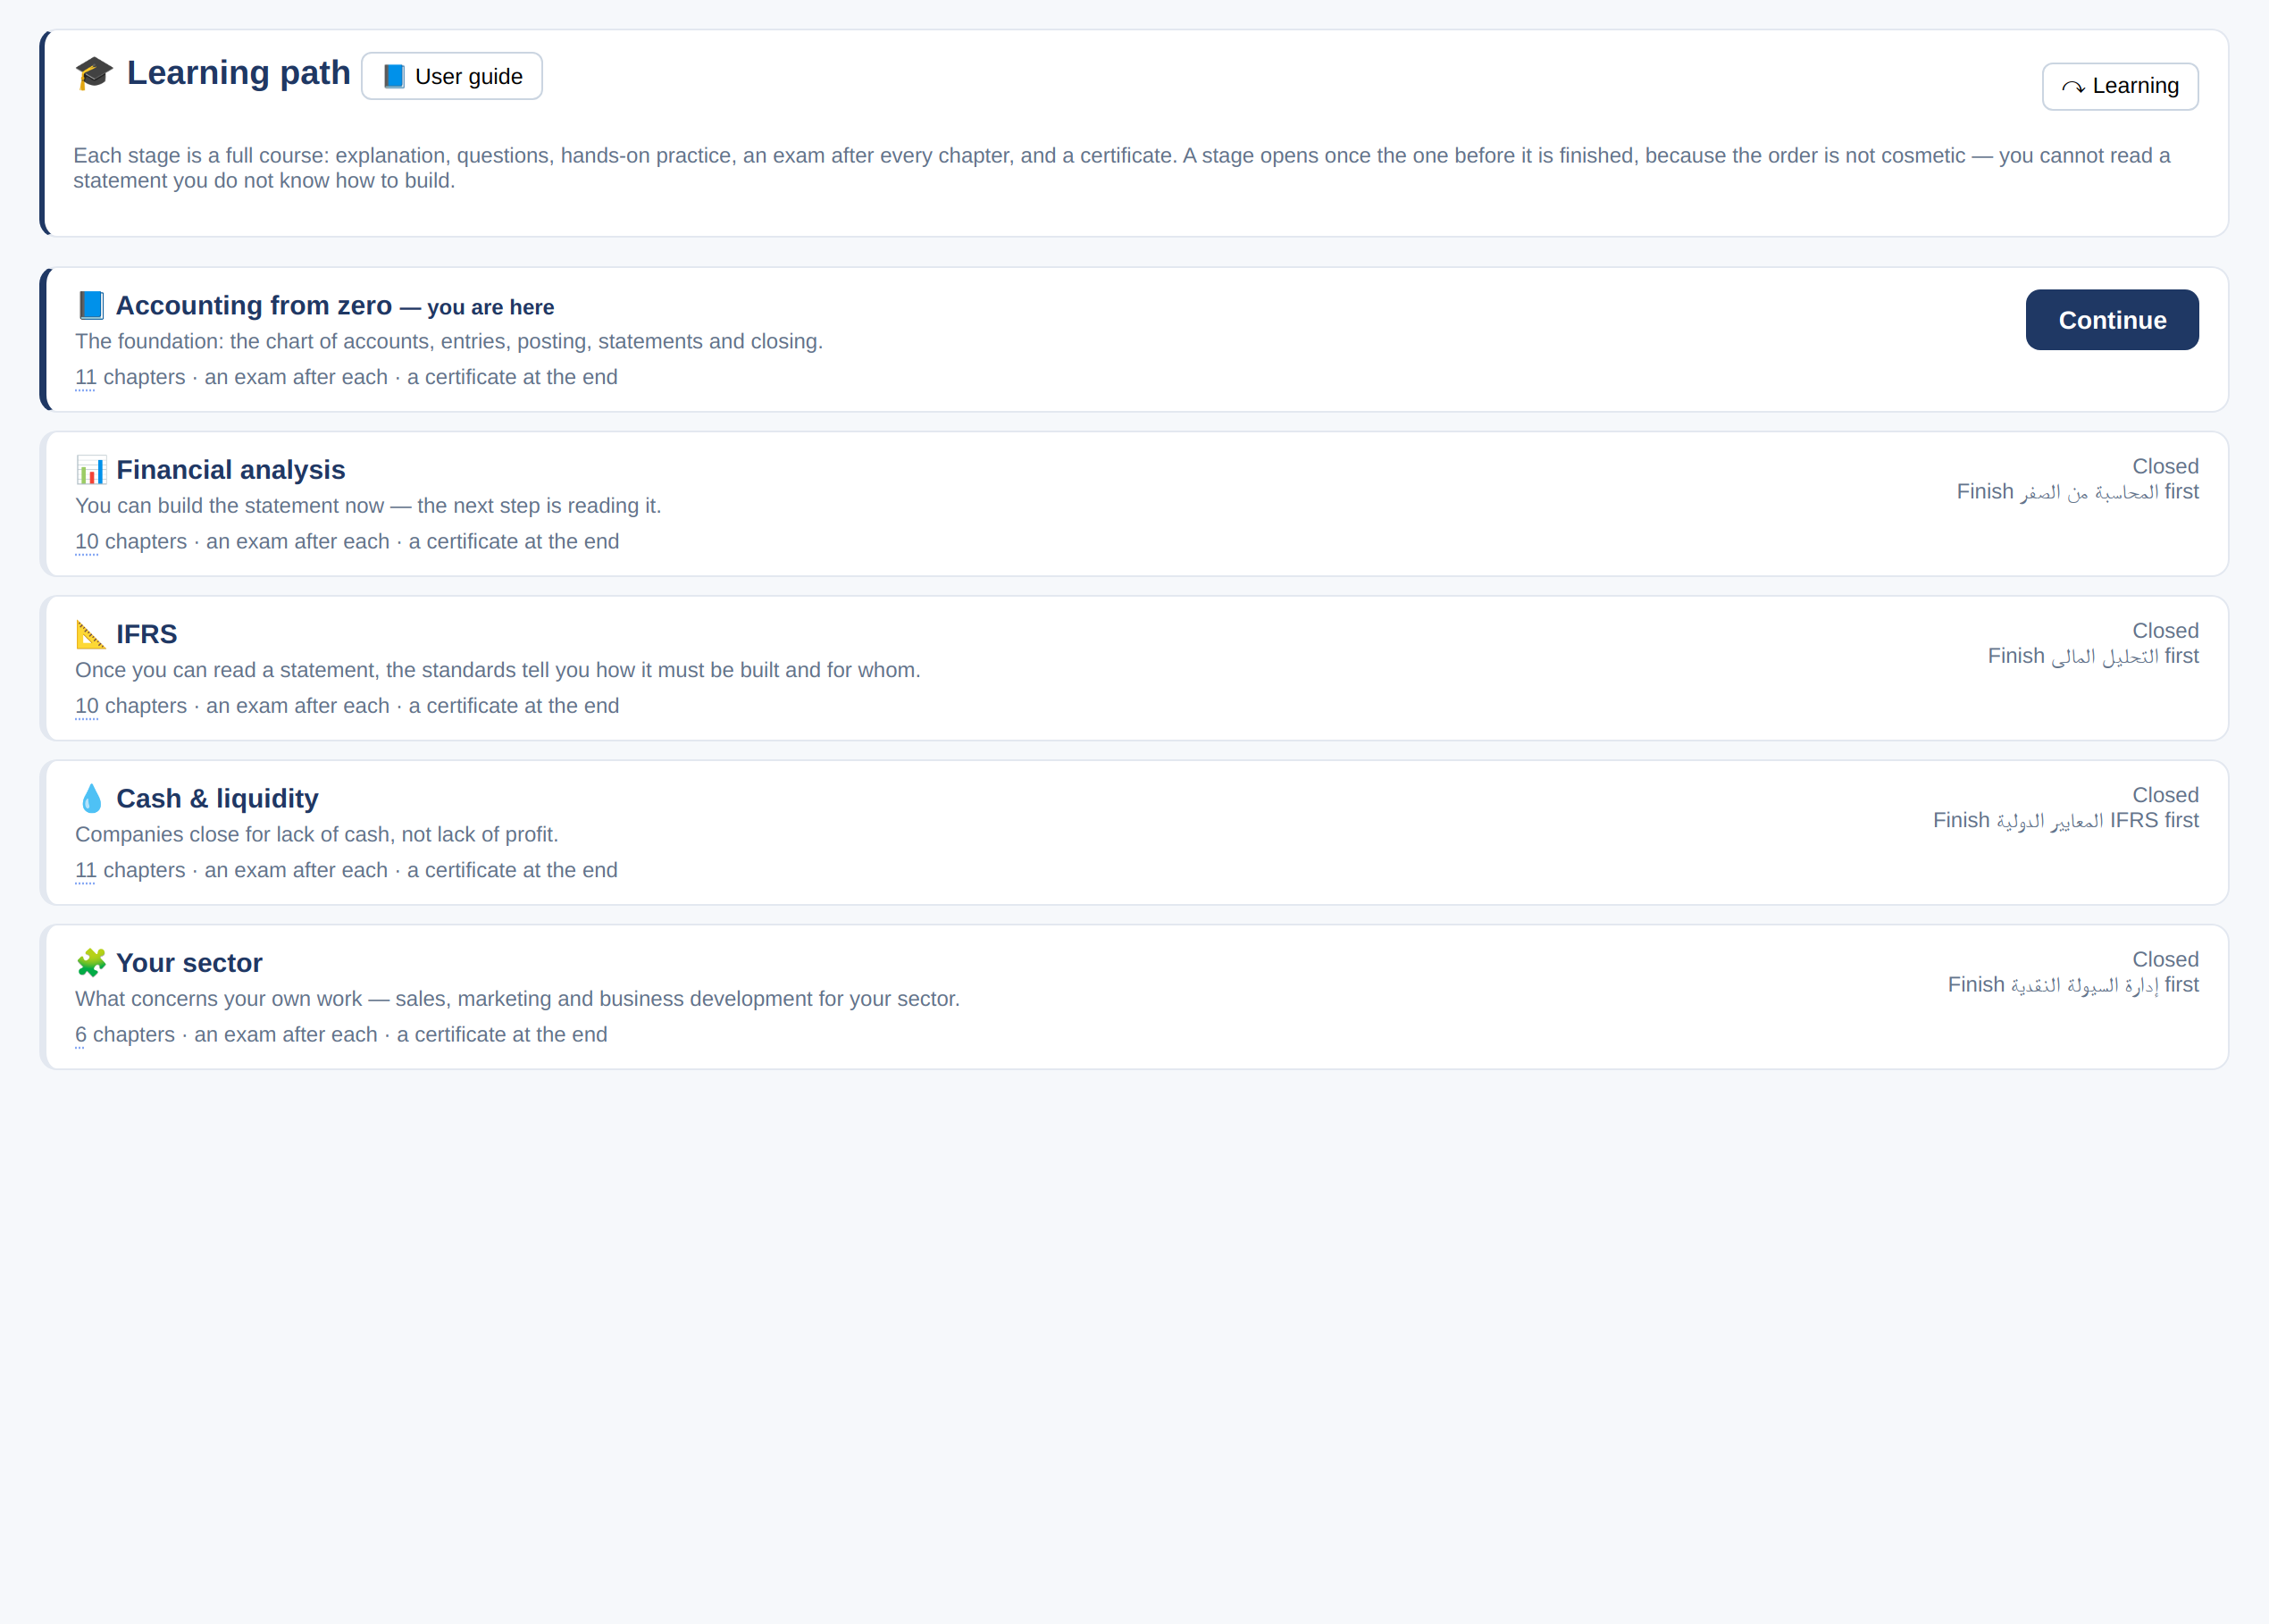
- Each stage is a full course: explanation · questions · practice in the program · a quiz after every chapter · and a stage final exam with a certificate.
- The stages: Accounting from zero → Financial analysis → IFRS → Cash management → Your sector’s path.
- A stage is complete when you pass its final exam, and the next stage then opens automatically — a locked stage shows why.
- Your progress is saved under your user: log out and back in and your passed chapters and stage are still there; «Continue» takes you back where you stopped.
Certificates
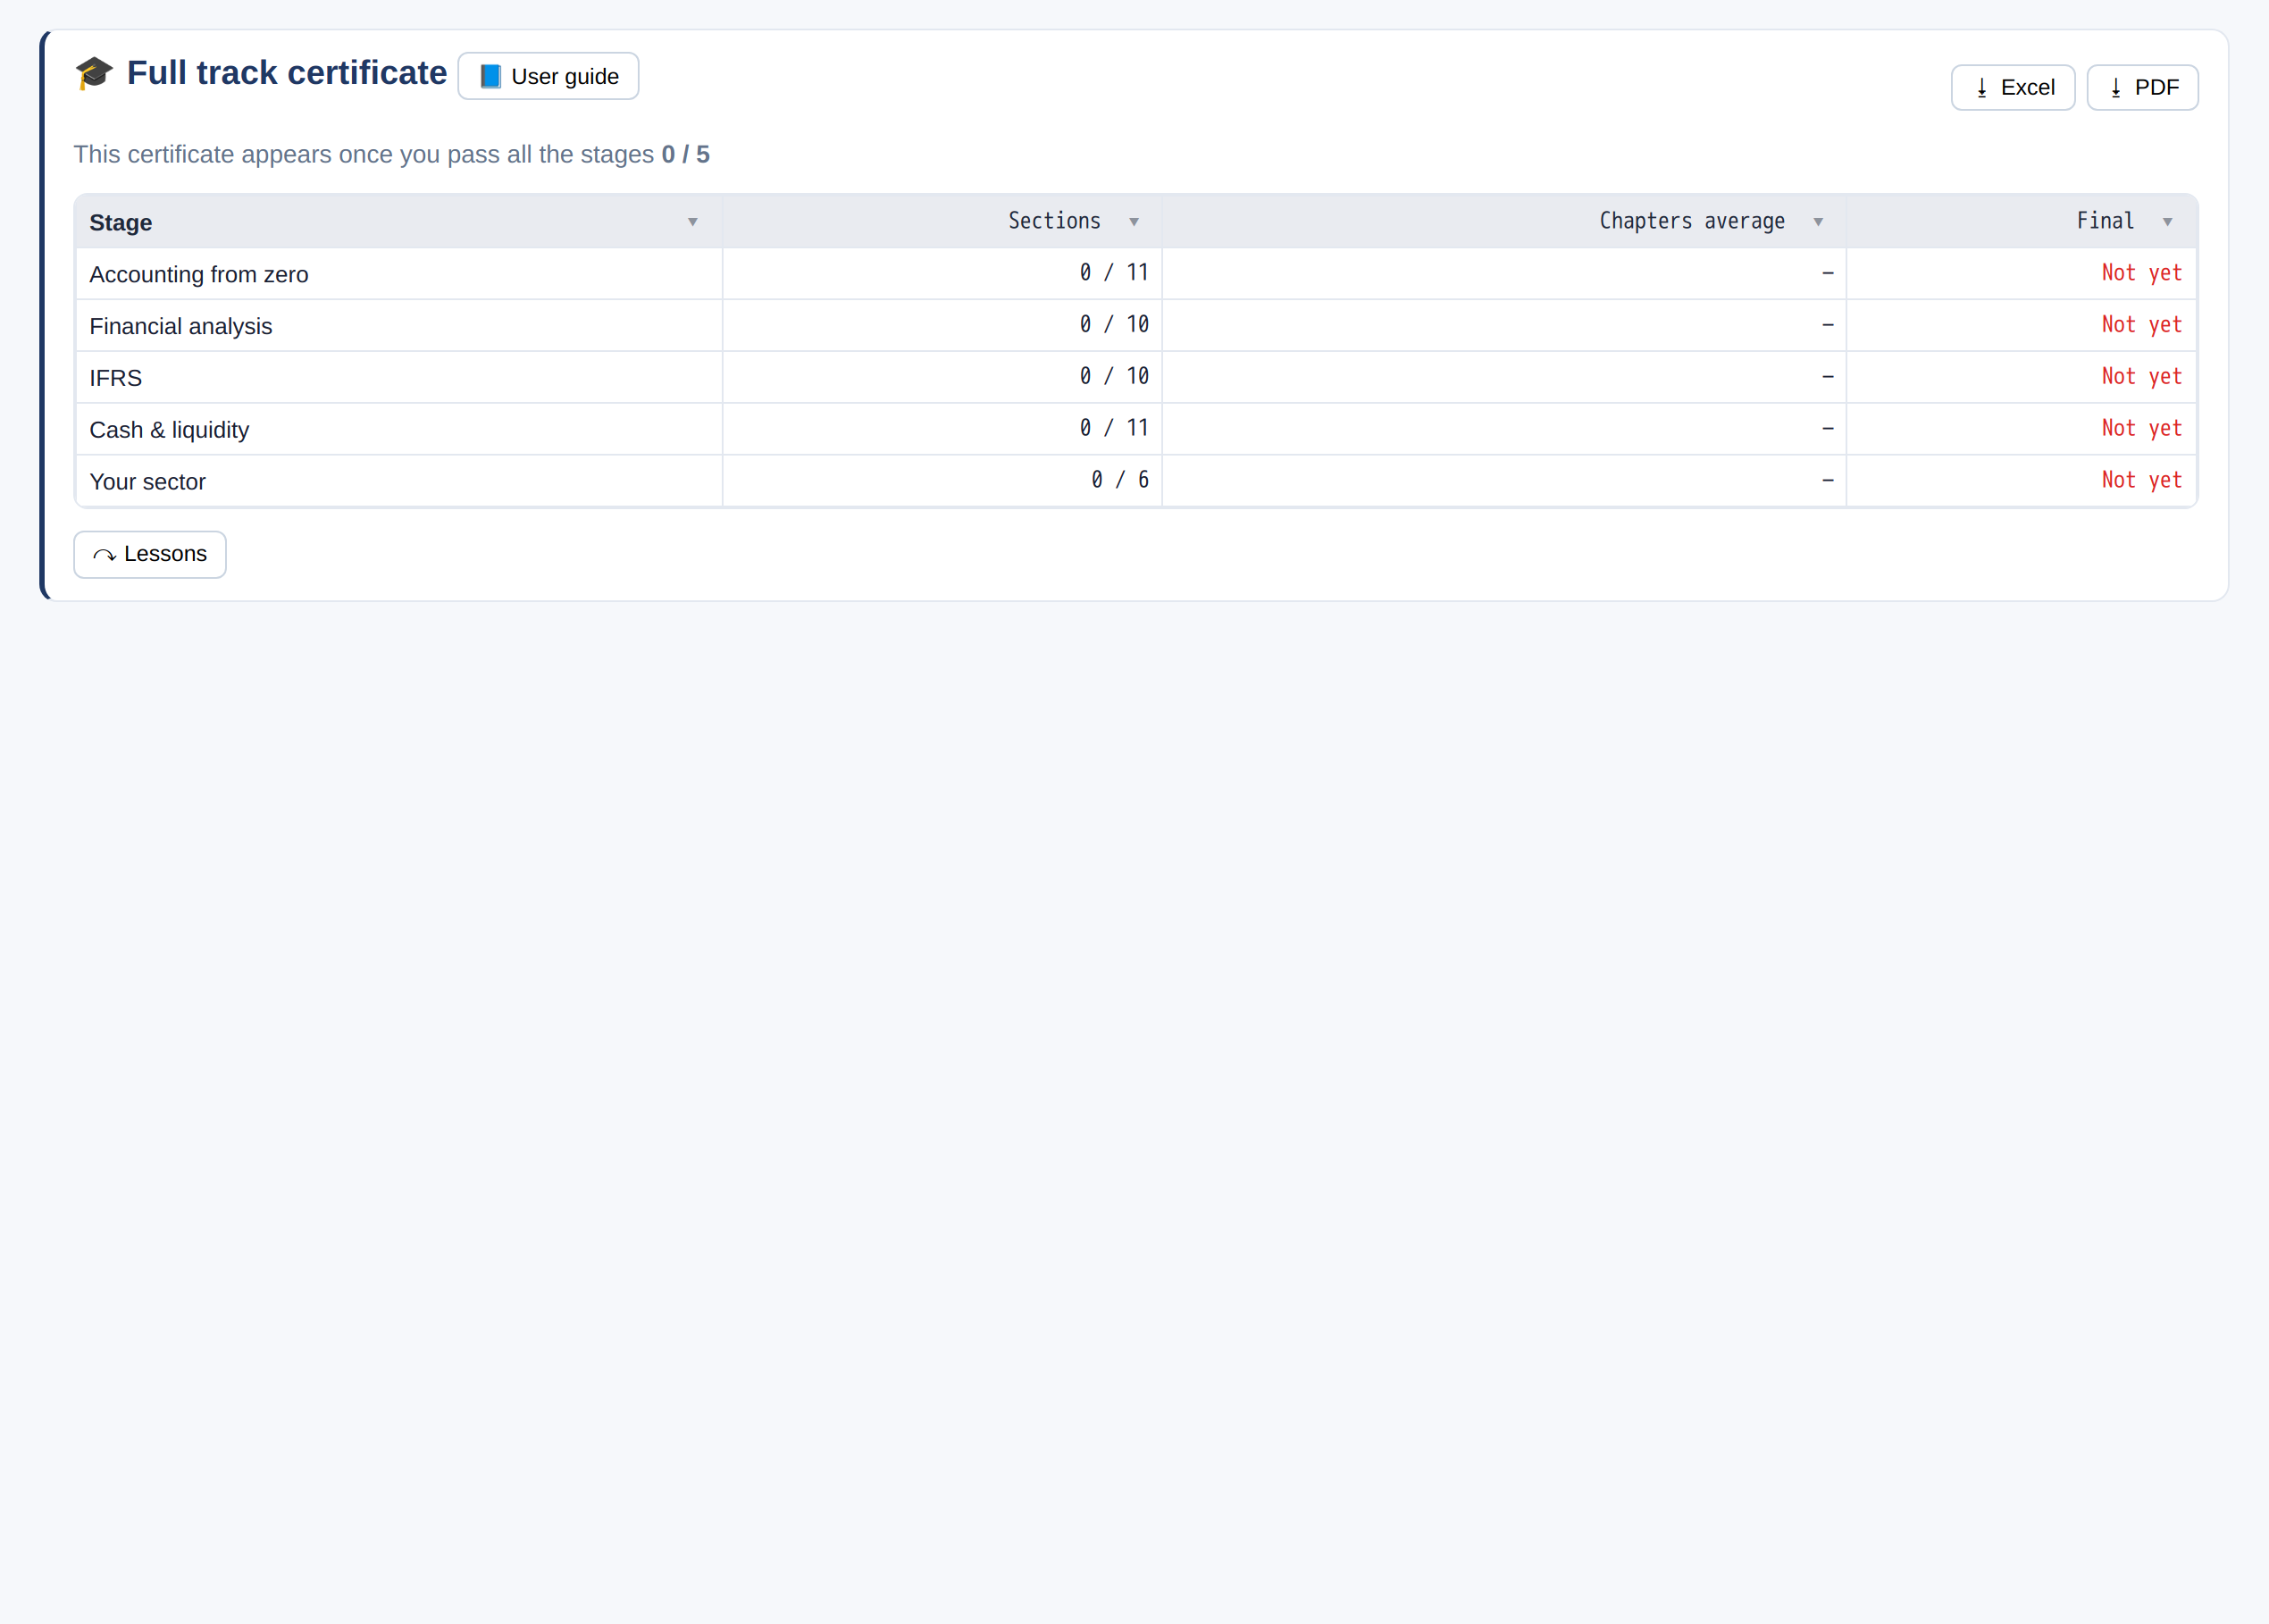
- Passing a stage’s final exam issues the stage certificate, showing the final score, the chapters passed and your average in them.
- «🎓 Full track certificate» is issued once all five stages are passed: a table of every stage with its chapter average and final score, plus the total chapters and the average of the finals.
- Before the path is complete the screen shows your progress: how many of the five stages you have finished, and where each one stands.
No match